You built enemy AI with a Behavior Tree and got it to chase the player. But that enemy just charges straight at the player . It can't hide behind cover, flank, or keep its distance, the movements that look smart. What creates that difference is the ability to choose "where to move".
What handles that "choosing a good position" is EQS (Environment Query System) . Scatter many candidate points around, score them with tests, and select the best. With this, the enemy can choose smart destinations based on the situation. This article covers, from EQS's three-stage mechanism to building an enemy that hides behind cover when shot.
To use EQS, you need to enable the Environment Query Editor plugin.

What You'll Learn
- What EQS is: generate candidate points → score with tests → select the best
- Scattering candidate points with a Generator (Grid / Circle)
- Scoring with a Test (Distance / Trace / Dot)
- Viewing scores as colored spheres with the EQS Testing Pawn
- Using the result with a Behavior Tree's Run EQS Query
- Hands-on: an enemy that hides behind cover when shot
What EQS Is
EQS (Environment Query System) is a mechanism that queries "where's the best place in the current environment". What it does is three stages .
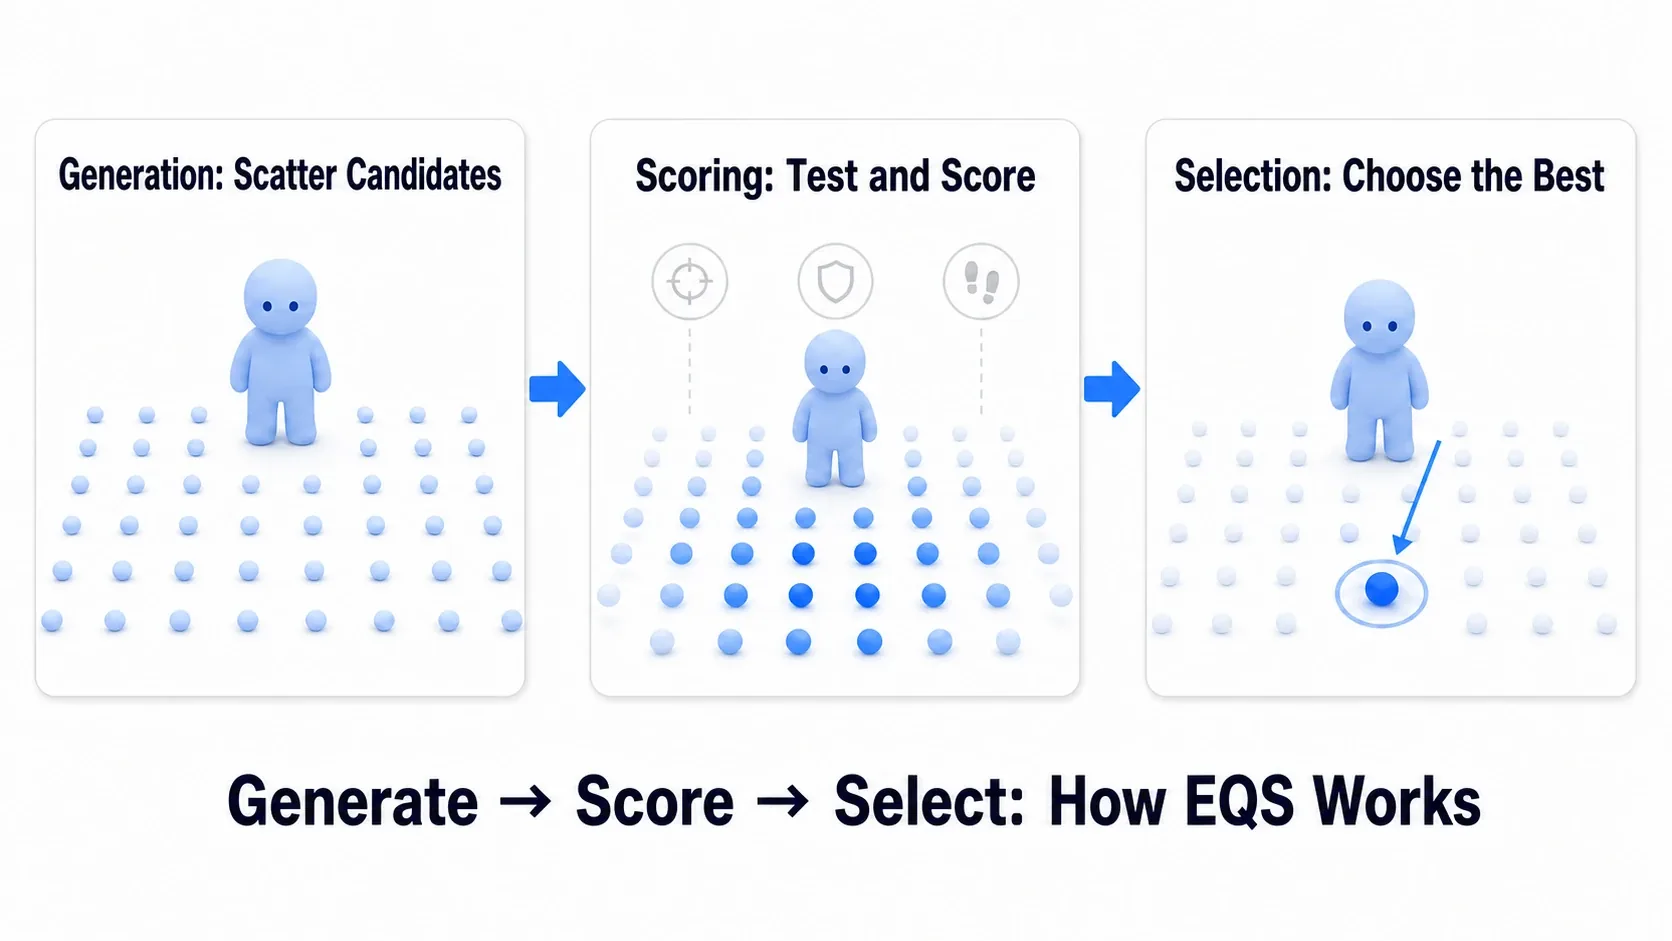
- Generate: scatter many candidate points for destinations around the enemy
- Score: score each candidate point by conditions (near, unseen, in front, etc.)
- Select: choose the highest-scoring point and make it the destination
For "hiding", for example, scatter candidate points around, score "points unseen by the player" high, and select "the nearest point" among them. Then the enemy chooses the nearest cover and runs behind it. Deciding "where to move" by score , that's what EQS is. If the Behavior Tree is "what to do (judgment)" and AI Perception is "what to perceive", EQS handles "where to move (position choice)".
Scattering Candidate Points with a Generator
EQS's first step is scattering candidate points . What handles this is the Generator .
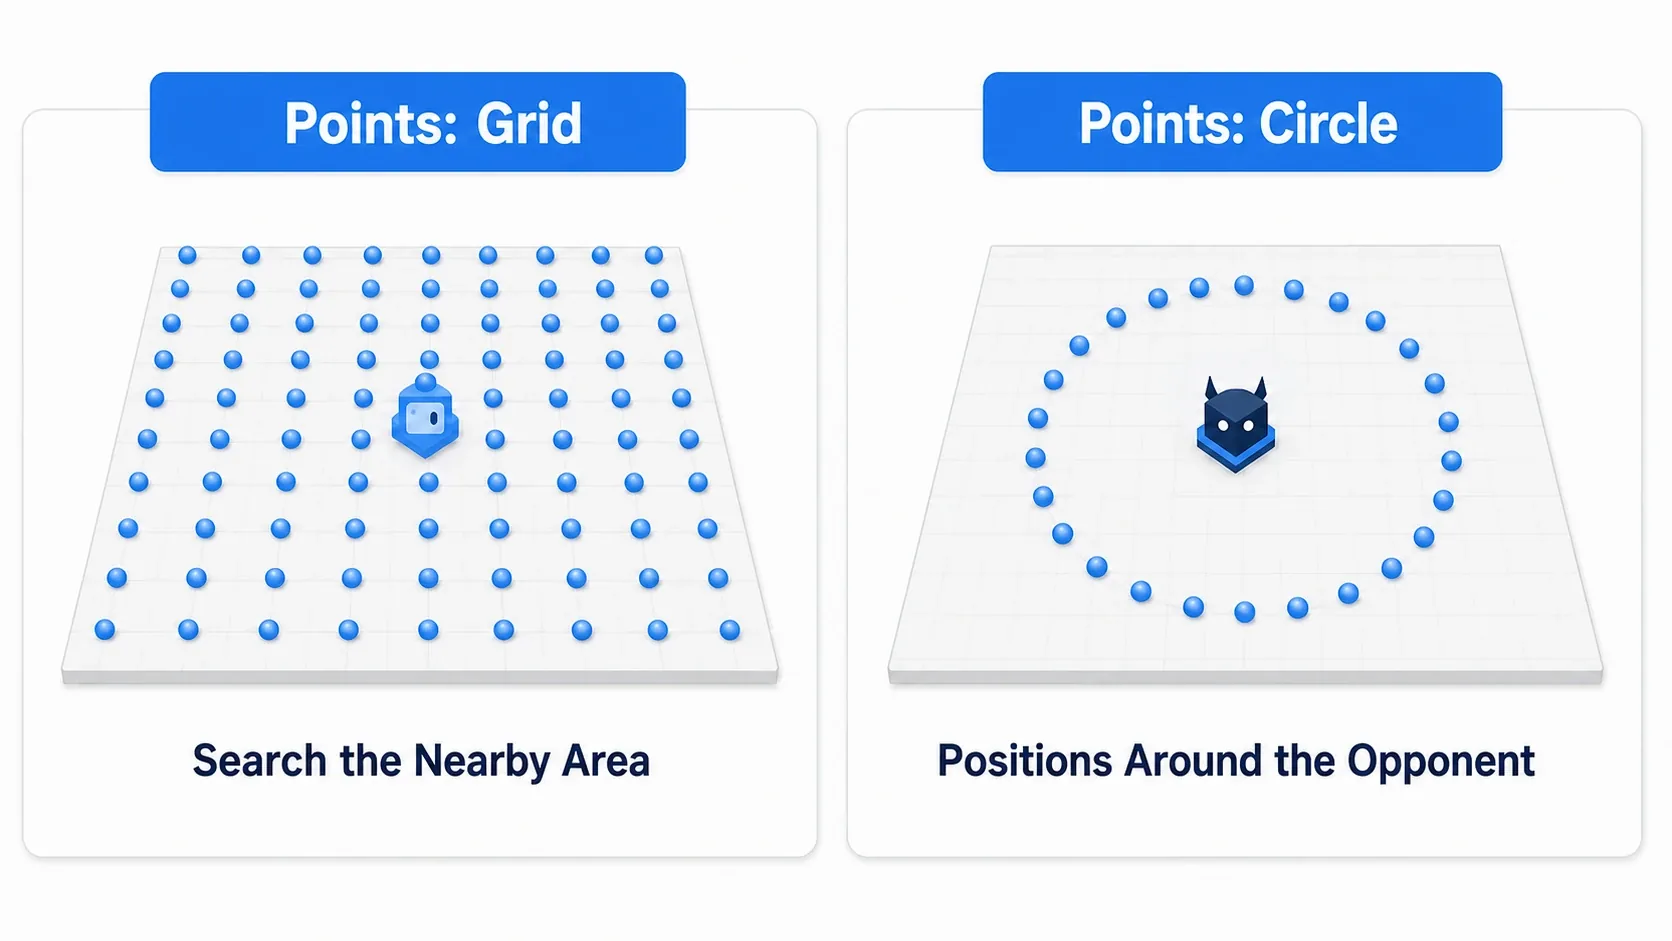
The two commonly-used Generators are:
- Points: Grid: scatter candidate points densely in a grid over a range. Suits "search the whole area around me"
- Points: Circle: scatter candidate points in a circle centered on a reference point. Suits "find a position circling around the opponent"
Scattered candidate points land on the NavMesh. That is, only places you can actually walk to become candidates (nothing scatters inside walls or in midair). Scattering candidates around yourself with Points: Grid first is the clearest starting point.
Scoring with a Test
Once you've scattered candidate points, next is scoring . What scores each point by condition is the Test .
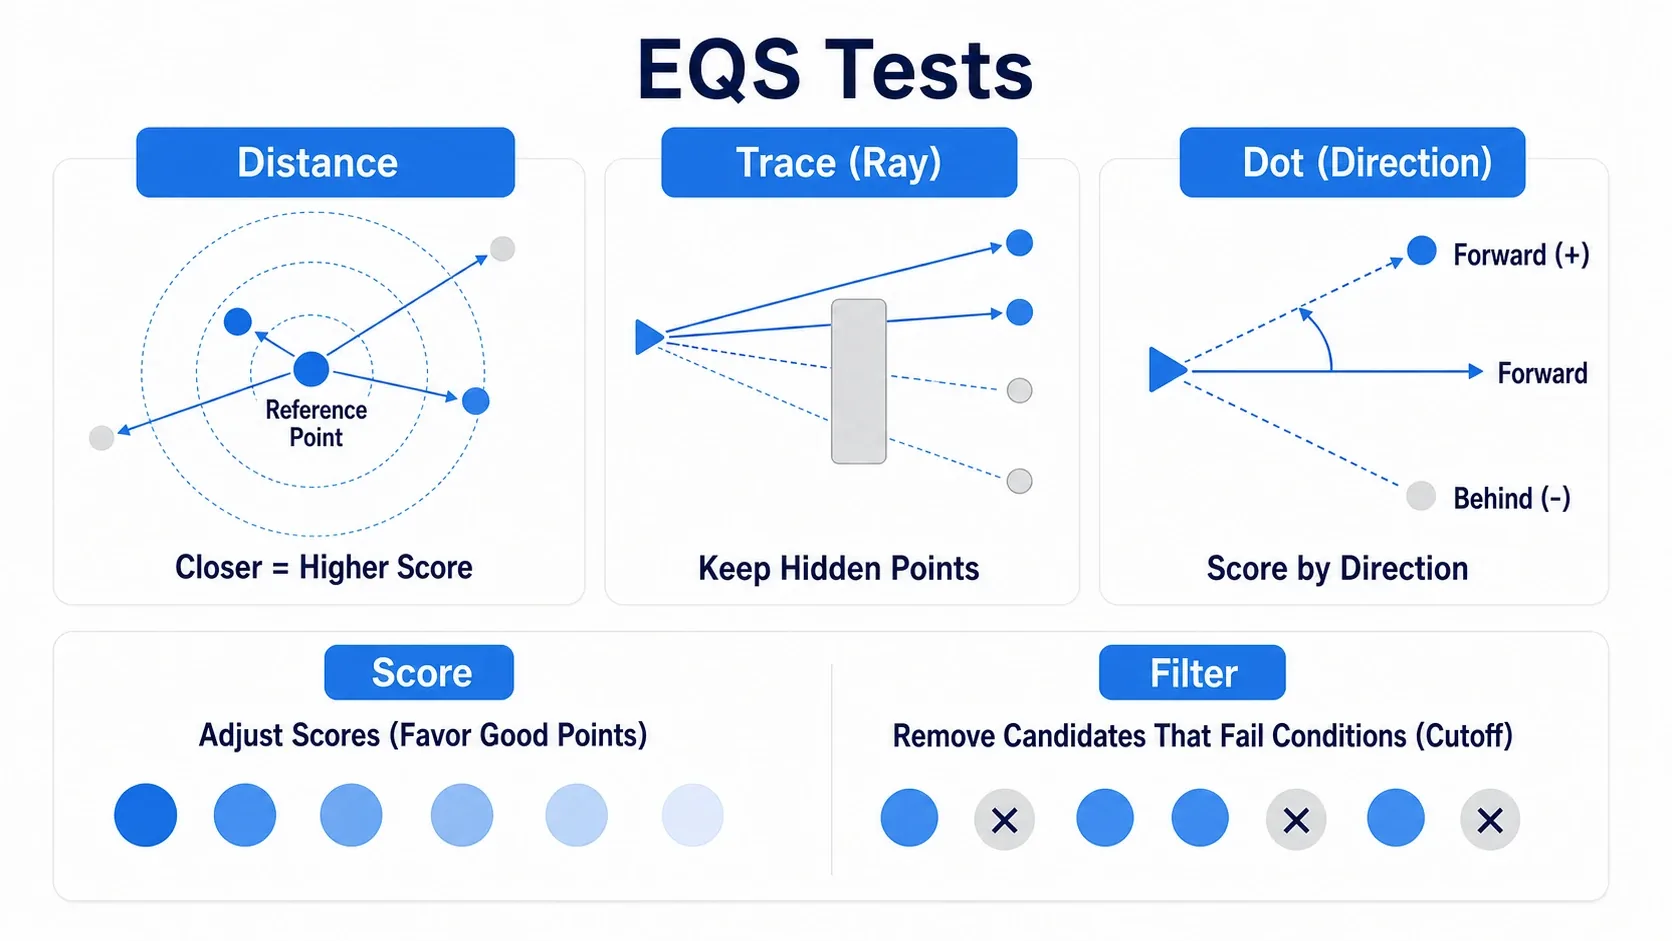
The three representative tests are:
- Distance: score by the distance from a reference point. You can choose "closer scores higher" or "farther scores higher"
- Trace: whether a line of sight passes to a point (same idea as Line Trace). Used to keep "points unseen by the player"
- Dot: the dot product of direction. Score by direction , like "in front of / behind the player"
And a test has two ways of working.
- Score: adjust a point's score up or down. Make good points "better"
- Filter: exclude points that don't meet a condition from the candidates. "Keep only unseen points" is this
By combining Filter and Score, like "keep only unseen points (Filter), and prioritize near points among them (Score)", you get the aimed position chosen.
Visualizing with the EQS Testing Pawn
Build EQS in your head alone and you'll always get stuck on "why is this point chosen?". So, growing it while seeing the scoring results is EQS's basic approach. What you use is the EQS Testing Pawn .
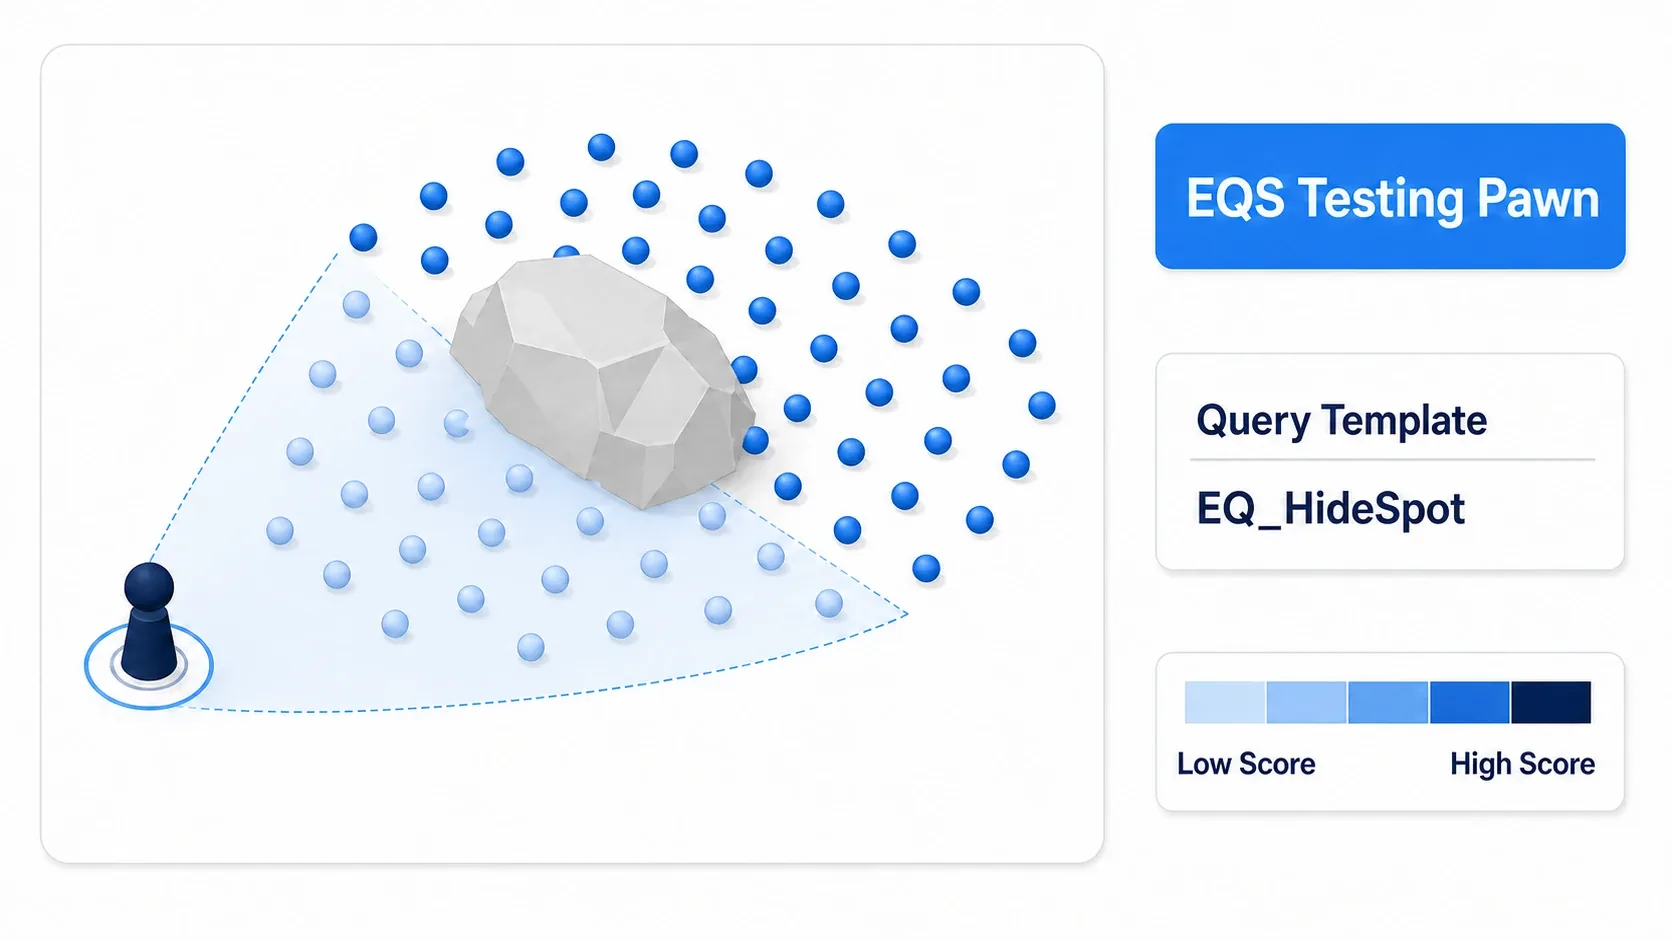
Here's how.
- Make a Blueprint with EQSTestingPawn as its parent class
- Place it in the level
- Specify your Environment Query in the Details panel's Query Template
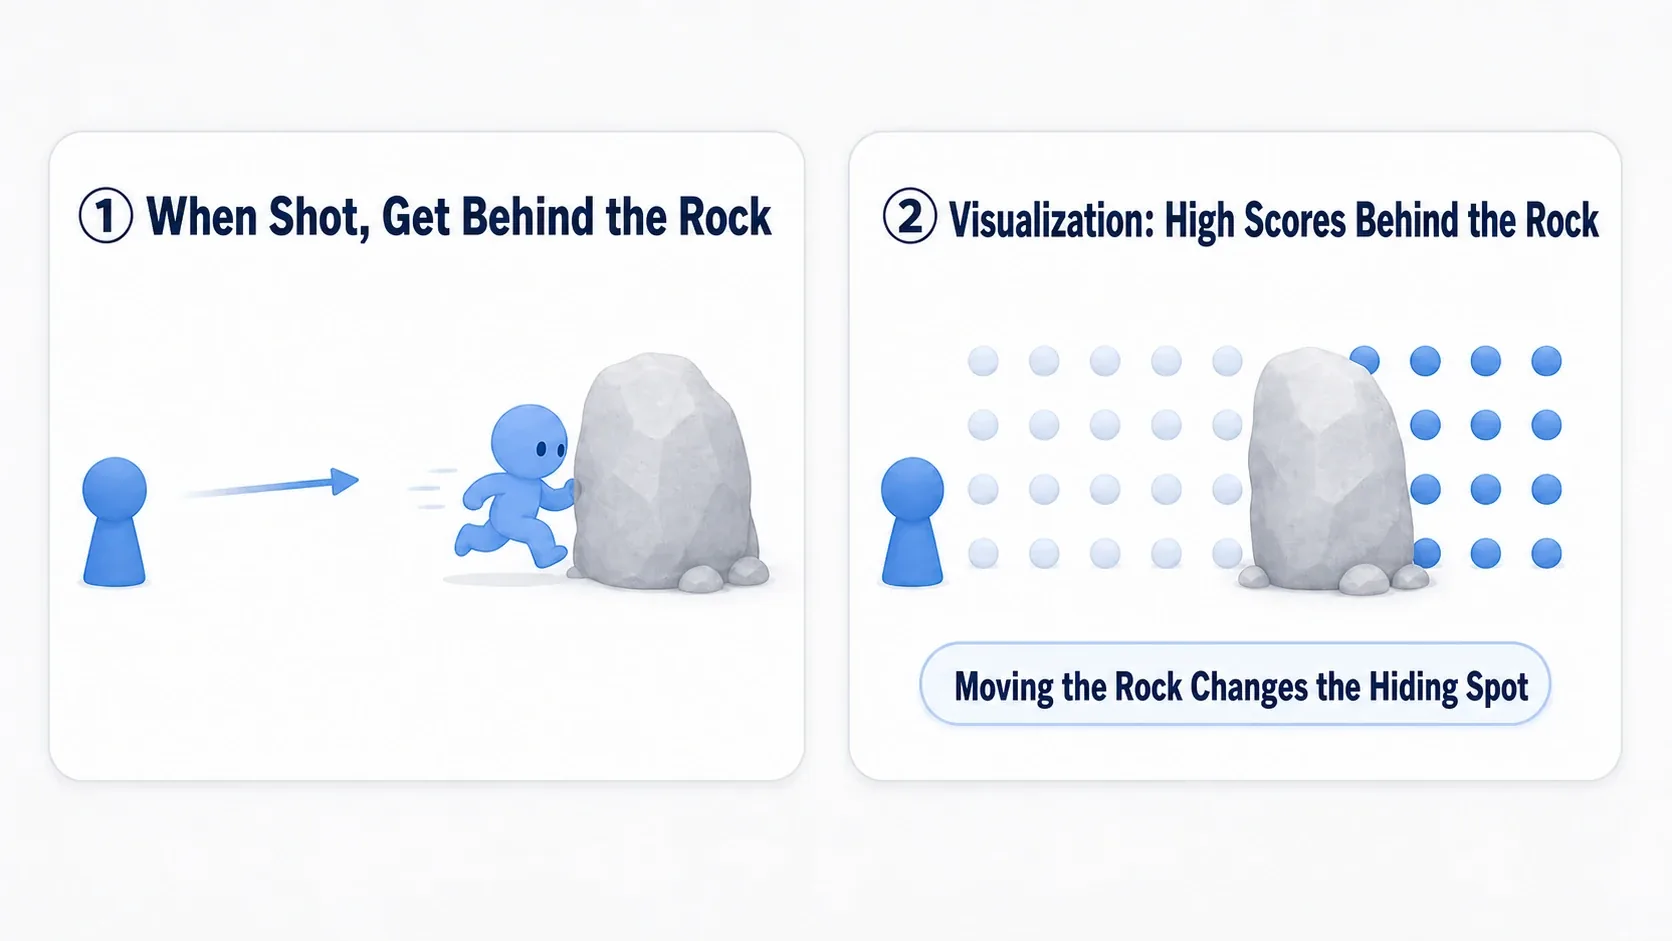
Then candidate points show as spheres around that Pawn, colored by their score . High-scoring points look darker and low-scoring lighter, so you can check visually whether "the aimed place is scoring high". If the high-scoring points line up behind cover, the hiding query is built correctly . You grow EQS by watching this visualization, adding tests, and adjusting thresholds.
Using It from a Behavior Tree
Once the query is built, run it from a Behavior Tree and use the result. What you use is the Run EQS Query task.
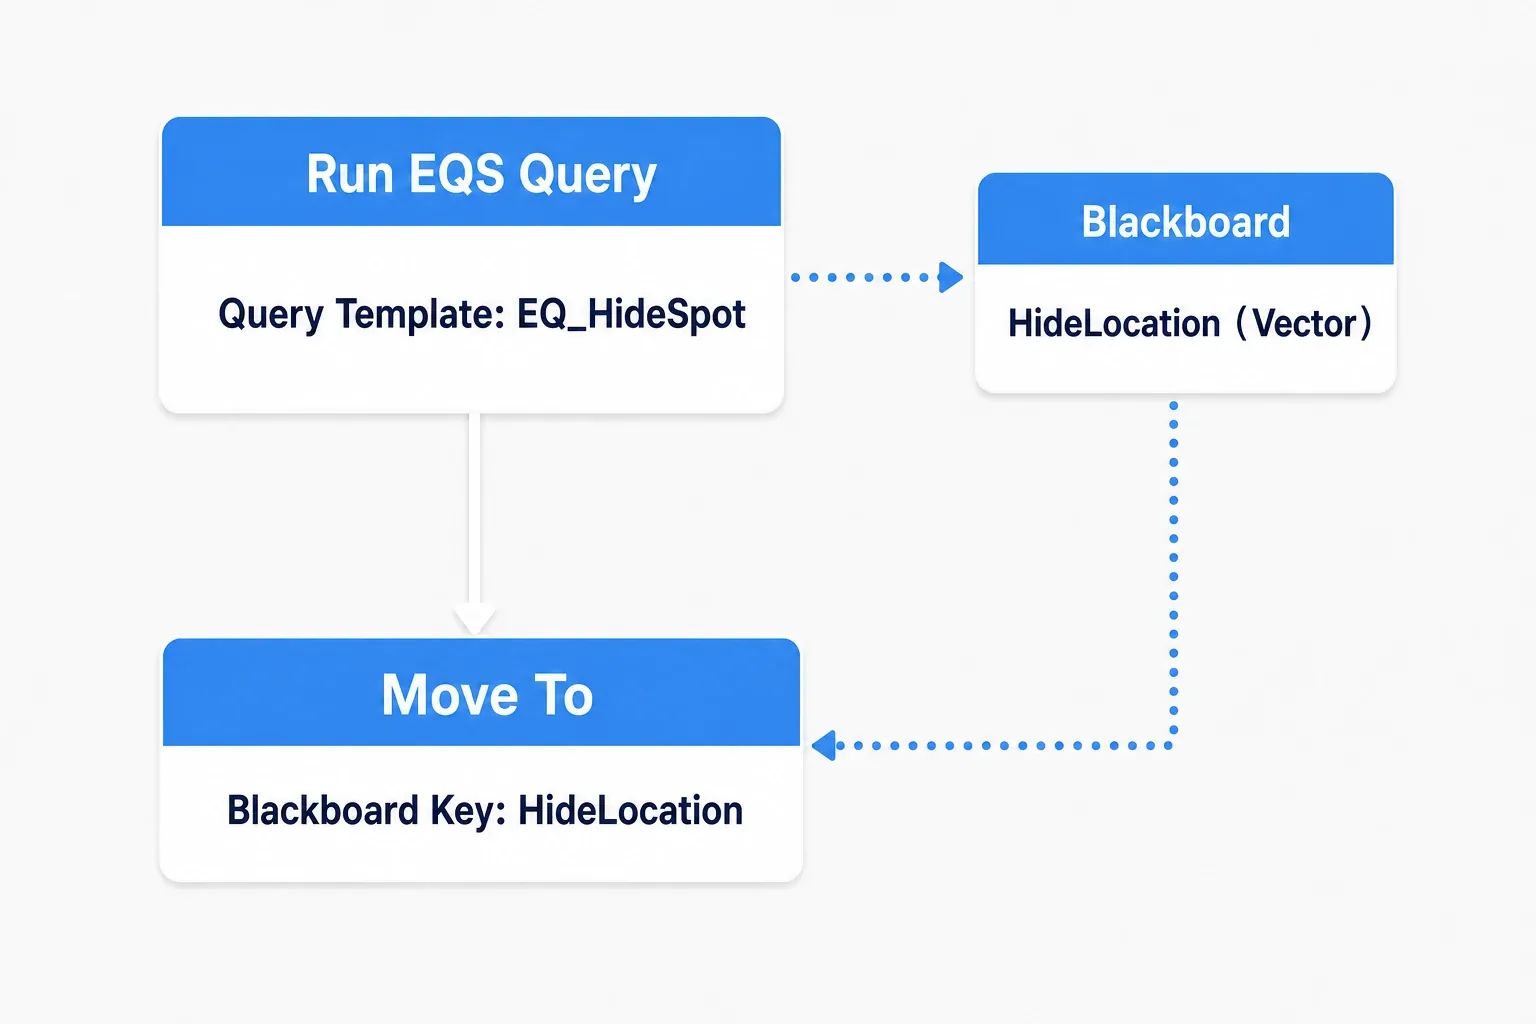
Here's the flow.
Behavior Tree
Run EQS Query (Query Template: EQ_HideSpot)
  → write the chosen point to a Blackboard Vector key
Move To (Blackboard Key: that Vector)
  → move to the written position
The Run EQS Query task runs EQS and writes the best point to the Blackboard (a Vector key for a position, an Object key when the target is an Actor). Then just Move To that key as usual, and the enemy moves to the "good position" EQS chose. The division is: the Behavior Tree is the skeleton of judgment, and EQS handles the "position choice" within it.
Hands-On: Building an Enemy That Hides Behind Cover
A cover shooter's enemy soldier, a stealth game's guard, a survival game's timid animal. "Hide behind cover when shot" is a staple movement that makes enemies look smart. Here we build one lap of it, reusing the guard from the Behavior Tree article, with EQS.
We're building an enemy that, when hit, chooses a "point unseen by the player" from candidate points around itself and runs behind the nearest cover .
Here's what it looks like running. The instant you shoot the enemy, it runs behind the nearest rock. Change the rock placement and the hiding spot changes automatically. And visualizing the same query with the EQS Testing Pawn, you can see the high-scoring points line up behind the rock .
The Query's Structure
Build an Environment Query called EQ_HideSpot like this.
| Stage | Node | Role |
|---|---|---|
| Generate | Points: Grid | Scatter candidate points around the self (Querier) |
| Filter | Trace (Filter, Context: Player) | Exclude points visible from the player |
| Score | Distance (Score, closer scores higher) | Prioritize near points among the remaining |
Adding to the Behavior Tree
Trigger on a hit and add a hiding branch.
(when hit) Run EQS Query (EQ_HideSpot)
  → write to HideLocation (Vector)
  → Move To (HideLocation)
Verifying It
Play and shoot the enemy. If it worked, the enemy runs behind the nearest rock and hides . Move the rock and the hiding spot changes too. Place an EQS Testing Pawn to visualize, and if the high-scoring points line up behind the rock, the query is built correctly.
Here's how to narrow it down when it doesn't work.
- The enemy won't hide / runs to a weird spot → check the Trace test's Context setting . To keep "points unseen by the player", the Context is Player . Leave it as the Querier (self) and the reference is off
- No candidate points appear → the Points: Grid range, or whether NavMesh is laid down. Candidate points only land on the NavMesh
- You can't tell which point is chosen → visualize with the EQS Testing Pawn. The colors reveal the scoring intent
Two things to take away.
- Grow it by visualizing: the iron rule for EQS is to build it while watching the scores with the EQS Testing Pawn. Checking visually whether the high scores line up at the aimed place immediately shows what tests are missing or excessive
- BT judges, EQS positions: the Behavior Tree handles the "decide to hide" judgment, and EQS handles the "where to hide" position choice. With this division, you can add "movement that looks smart" to the Behavior Tree enemy
Bonus: Good to Know for Later
Don't run it every frame. EQS scatters candidate points and scores all of them, so it's a fairly heavy process. Running it every frame gets costly. Running it only when needed , like "when hit" or "at intervals", is the basic approach. Call it with a gap via a Behavior Tree task or Service.
Simple chasing doesn't need EQS. For just "charge straight at the player", you don't need EQS, and the Behavior Tree's Move To is enough. Where EQS comes alive is scenes of "smartly choosing from multiple candidates" (hiding, flanking, keeping distance). Using EQS even for simple movements just makes them needlessly heavy.
Context is the crux of position choice. What trips people up most in EQS is Context (the reference point). When you can correctly specify the reference of "who it's hidden from" and "who it's near" between the Querier (self) and Player (opponent), you can build the aimed position choice. Check the Context one at a time while visualizing.
Summary
EQS, letting enemies choose a good position, is built with this flow.
| Stage | What to do | Node |
|---|---|---|
| Generate | Scatter candidate points | Points: Grid / Circle |
| Score | Score by condition | Distance / Trace / Dot |
| Visualize | See the scores | EQS Testing Pawn |
| Run | Use the result for movement | Run EQS Query (BT) |
And the principle running through it is to grow it by visualizing . Build while checking visually whether the high scores line up at the aimed place, and EQS isn't scary.
With this, the AI trilogy (judgment = BT, perception = Perception, position choice = EQS) is complete. What smart movement, beyond "charging straight in", do you want your game's enemies to make? First, scatter candidate points around and look at their colors.
Further Learning
- Building Enemy AI with Behavior Tree — the foundation of the hands-on, the judgment side that uses EQS's result
- Making Enemies Spot You with AI Perception — combining with perception
- Raycasting with Line Trace — the foundation for understanding the Trace test
- NavMesh Setup and Optimization — candidate points land on the NavMesh