You want to change an enemy's attack power from 10 to 12. Just for that, you open the Blueprint, hunt down the variable, compile, and hit Play . Once is fine, but balancing means doing it dozens of times.
A Data Table moves those numbers out into a table . Open it in Excel, tune everything at once, and import it back. The Blueprint only says "read this row from the table", and you never touch it again.
This article covers how to create a Data Table, how to import CSVs, and how to manage enemy parameters in a table and load them on spawn .
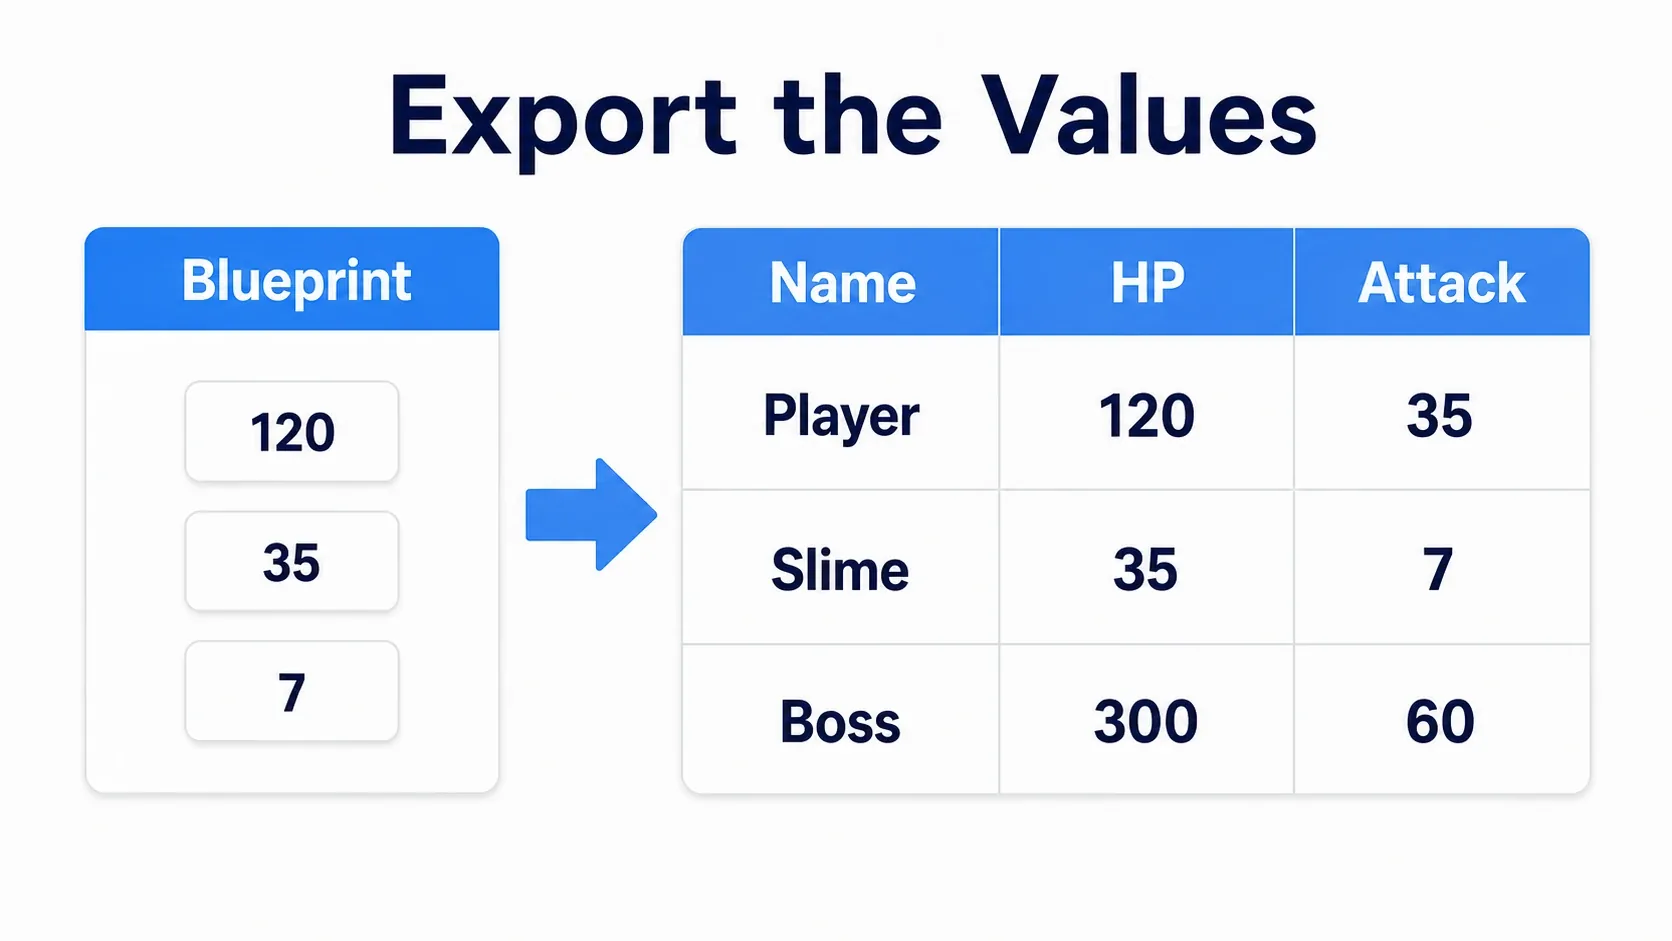
What You'll Learn
- A Data Table is a struct lined up as the shape of each row
- Row Name is the key for each row (this matters most)
- In CSV, column 1 is the row name and row 1 matches your variable names exactly
- Use UTF-8 with BOM for non-ASCII text
- Hands-on: manage enemy parameters in a table and load them on spawn
A Data Table Is "a Table of Structs"
In one sentence, a Data Table is a struct turned into the shape of one row, repeated across many rows .
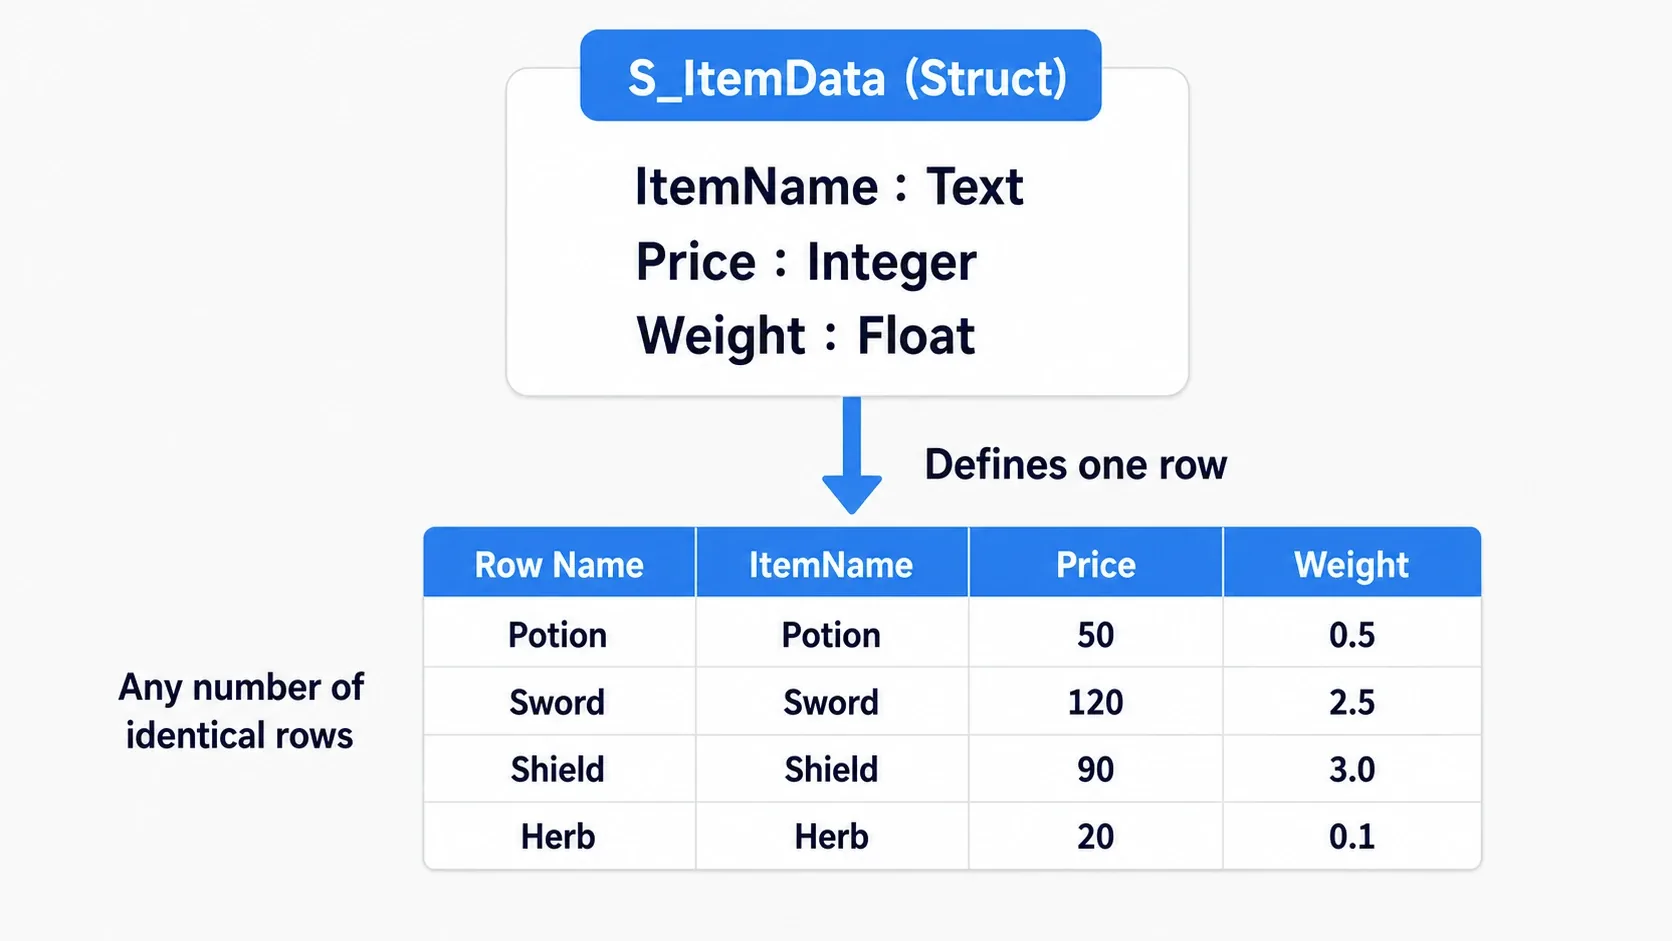
That means you need the struct first . Build a struct with attack, health, and movement speed, and those become the table's columns . After that you just keep adding rows.
| Row Name | Attack | Health | Speed |
|---|---|---|---|
Slime | 5 | 30 | 200 |
Goblin | 12 | 60 | 350 |
Ogre | 30 | 200 | 150 |
Once your data is in this shape, you get the following.
- Tuning happens outside of Blueprint: no compiling required
- You can see everything at once: compare the balance across enemies side by side
- You can edit it in Excel: export and import via CSV
And the Blueprint side only says "read the Goblin row" . It has no idea what the numbers are.
Steps to Create One
There are two steps : create the struct, then create the Data Table pointing at it.
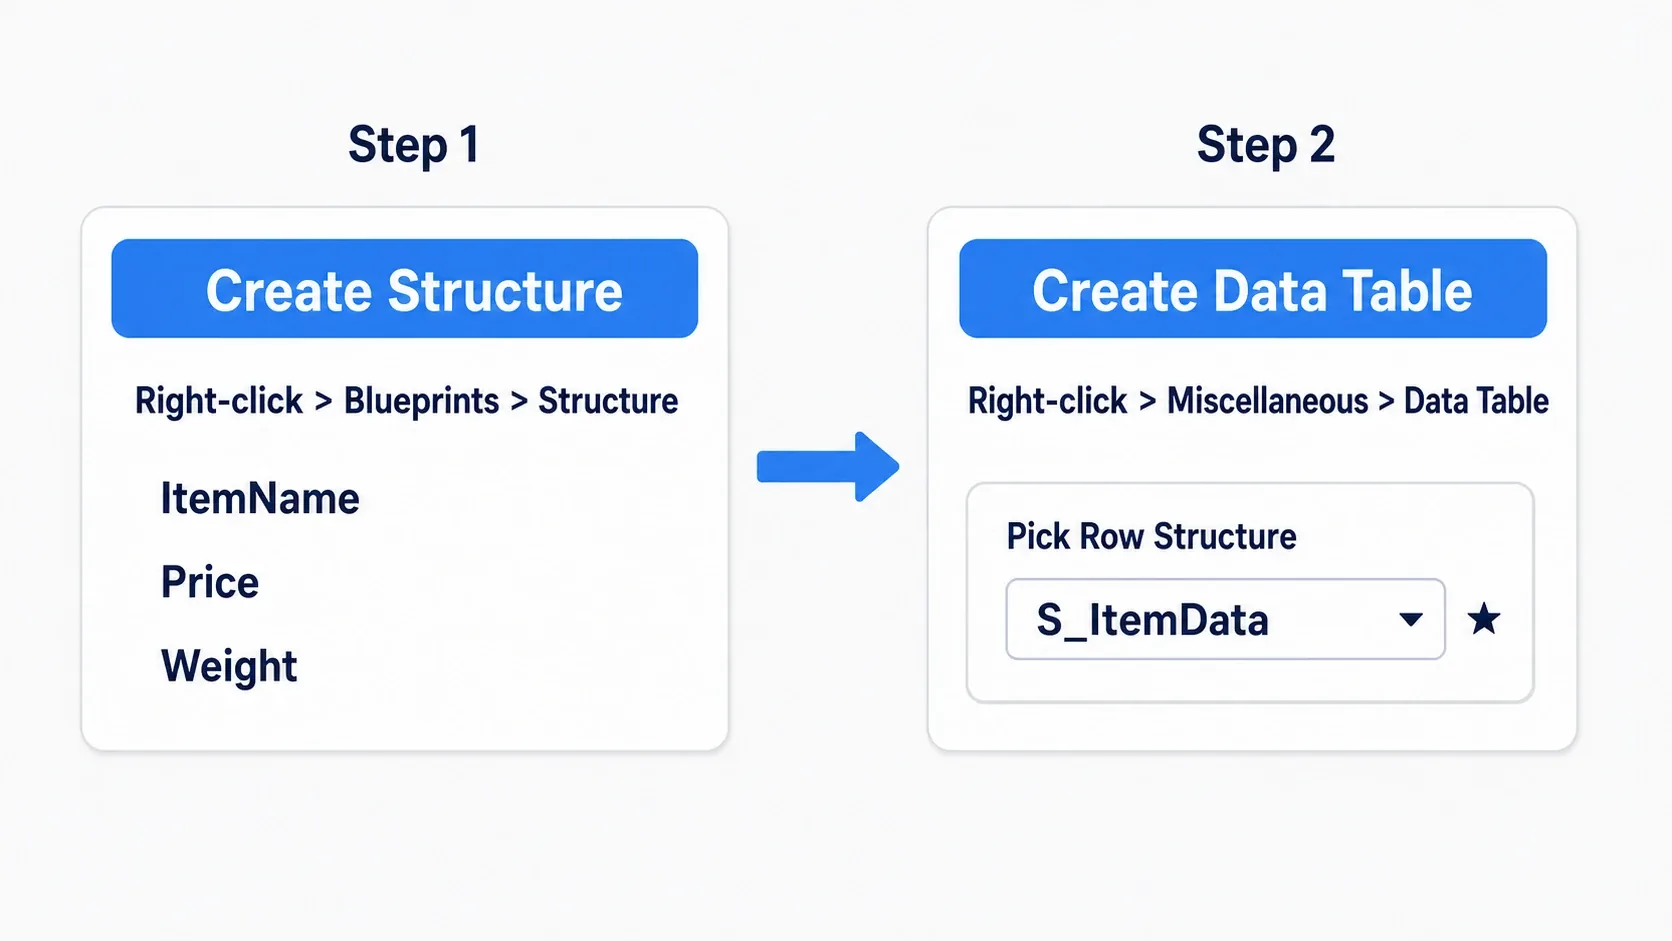
1. Create the struct
Right-click → Blueprints → Structure . Define the fields (→ Creating Structs).
2. Create the Data Table
Right-click → Miscellaneous → Data Table . It asks for the Row Structure , so pick the struct you just made.
The Row Structure can't be changed later. It's locked to whatever struct you chose at creation. If you want a different shape, you'll be rebuilding the Data Table, so it's safest to finalize the struct's fields first .
If you define the struct in C++, it must inherit FTableRowBase . Structs created in Blueprint can be selected as a Row Structure as-is.
USTRUCT(BlueprintType)
struct FEnemyData : public FTableRowBase   // <- this is required
{
    GENERATED_BODY()

    UPROPERTY(EditAnywhere, BlueprintReadWrite)
    int32 Attack = 0;

    UPROPERTY(EditAnywhere, BlueprintReadWrite)
    float Health = 100.0f;
};
Bulk-Editing in CSV
You can edit a Data Table in the editor, but once the row count grows, CSV is dramatically faster .
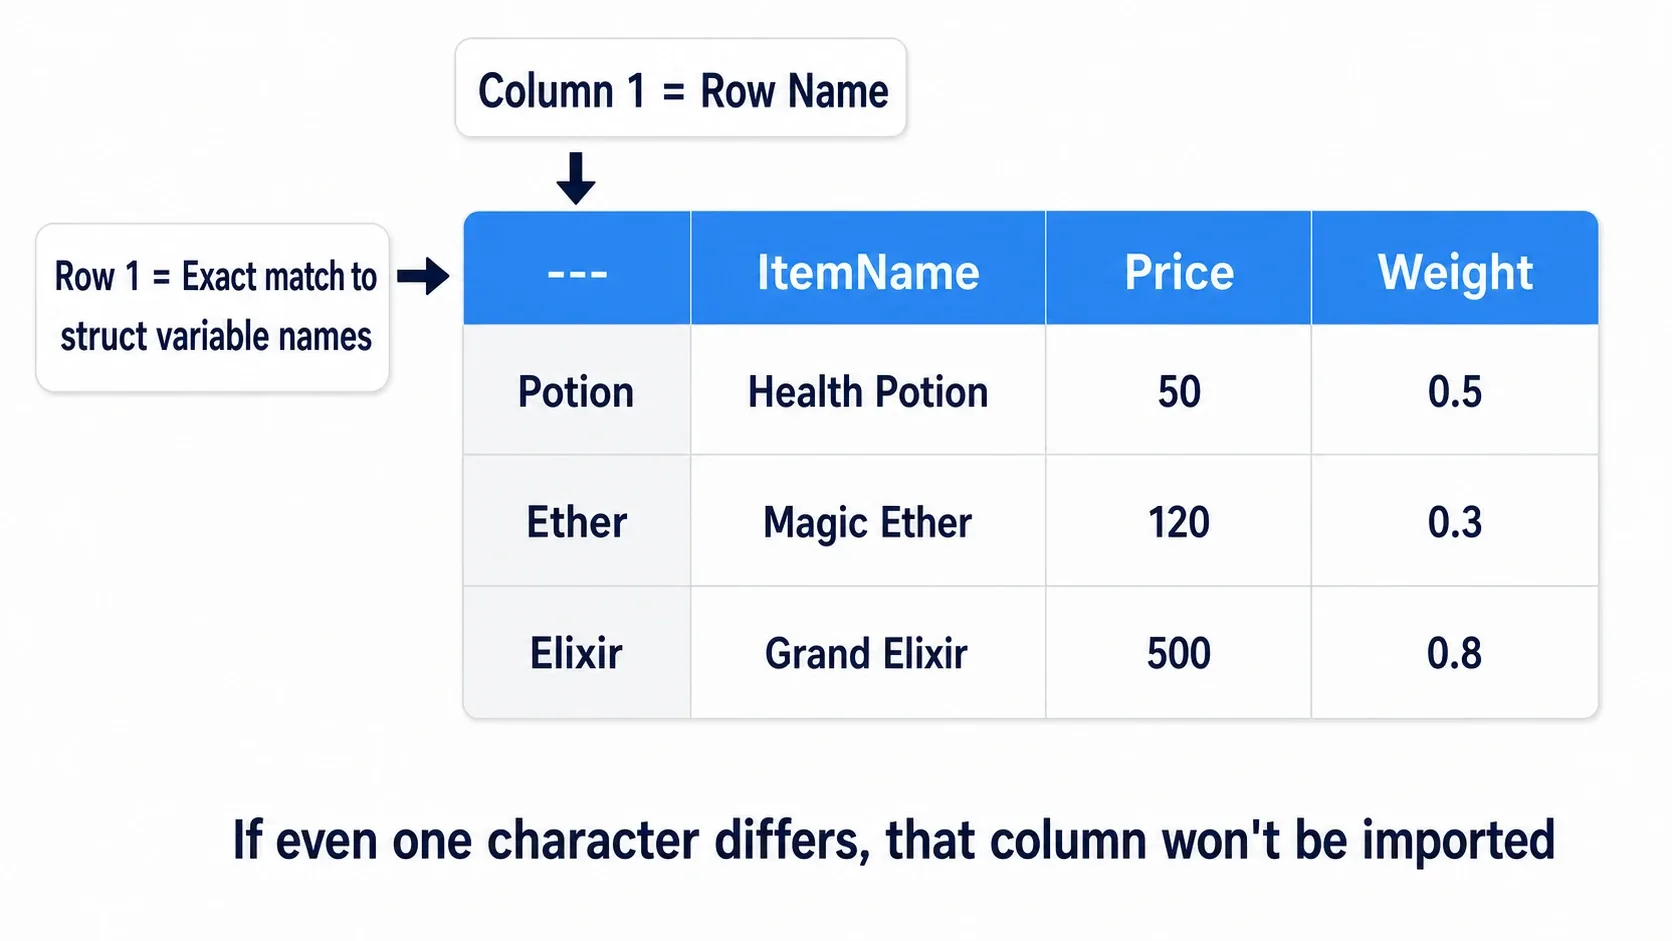
CSVs follow a fixed format . Deviate from it and the import fails.
Name,Attack,Health,Speed
Slime,5,30,200
Goblin,12,60,350
Ogre,30,200,150
| Rule | Details |
|---|---|
| Column 1 | The key for each row (Row Name). Must be unique |
| Row 1 | Exact match with the struct's variable names. Case-sensitive |
| Separator | Comma |
| Encoding | UTF-8 with BOM if it contains non-ASCII text |
There are two ways to import.
- Overwrite an existing Data Table: right-click the asset →
Reimport(orImport) - Create a new one from CSV: drag and drop the CSV into the Content Browser and pick a Row Structure
For day-to-day tuning you use the former. Edit the CSV, right-click, import. Done.
If text is garbled, suspect the save format. Picking plain "CSV" in Excel can produce a legacy regional encoding depending on your system. Choose "CSV UTF-8 (Comma delimited)" , or re-save it as UTF-8 with BOM in a text editor.
Reading It from Blueprint
Reading takes a single node: Get Data Table Row .
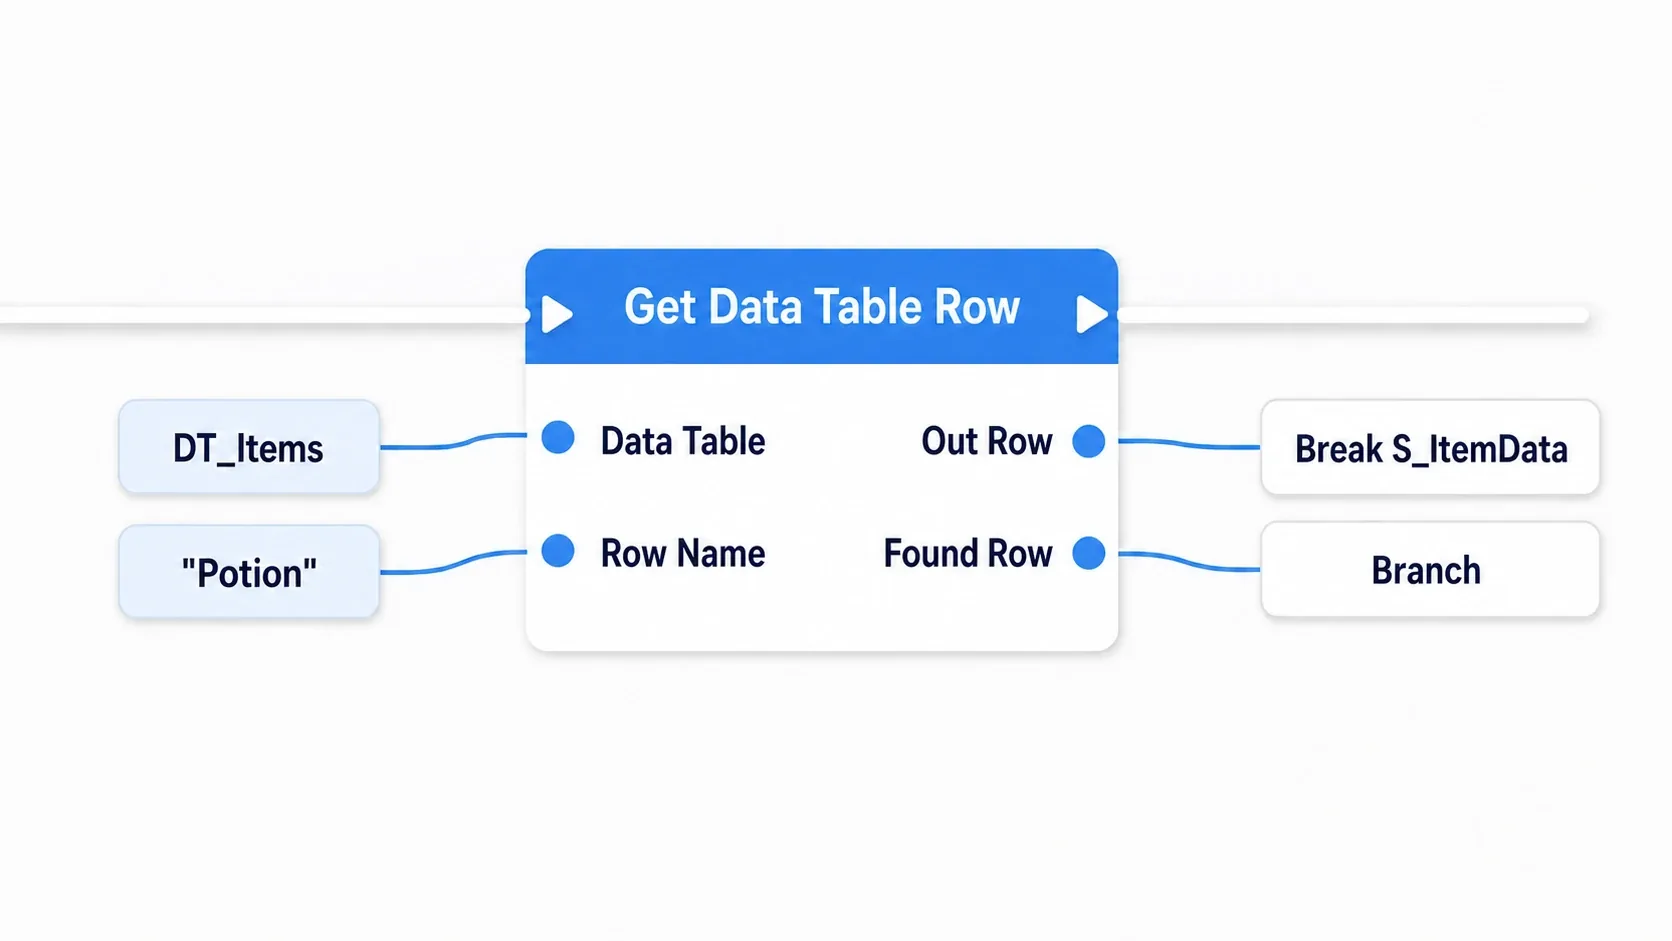
| Pin | Details |
|---|---|
| Data Table | Which table to read |
| Row Name | Which row to read (the key) |
| Out Row | The struct for the row that was found |
| Found Row | Whether it was found (Boolean) |
And here's the biggest thing to watch for .
A miss is not an error.
Out Rowcomes back as an empty struct (all zeros and empty strings) . So the symptom shows up as "for some reason the attack power is 0", and the cause is hard to spot. Always branch onFound Row.
Typos in Row Names happen constantly. Goblin and goblin are treated as different keys.
Hands-On: Managing Enemy Parameters in a Table
RPG monsters, tower defense waves, shoot-'em-up enemy ships. "Same mechanics, different numbers" shows up in every genre. Here we'll stop making one Blueprint per enemy and manage them in a table instead.
Setup to follow along: prepare the following.
| Kind | Name | Contents |
|---|---|---|
| Structure | S_EnemyData | Parameters for one enemy type |
| Data Table | DT_Enemy | Row Structure set to S_EnemyData |
| Character | BP_Enemy | Just one . Numbers come from the table |
Step 1: create the struct. Add these fields to S_EnemyData .
| Variable name | Type | Default value |
|---|---|---|
Attack | Integer | 0 |
Health | Float | 100.0 |
MoveSpeed | Float | 300.0 |
Step 2: create the Data Table. Right-click → Miscellaneous → Data Table → select S_EnemyData as the Row Structure. Name it DT_Enemy .
Step 3: prepare a CSV and import it. In a text editor, write the following and save it as Enemy.csv in UTF-8 with BOM .
Name,Attack,Health,MoveSpeed
Slime,5,30,200
Goblin,12,60,350
Ogre,30,200,150
Right-click DT_Enemy → Reimport (or Import) and select this CSV. Open it and you should see three rows .
Step 4: have the enemy read it. Create two variables on BP_Enemy .
| Variable name | Type | Setting |
|---|---|---|
EnemyRowName | Name | Check Instance Editable (so you can set it per level instance) |
CurrentHealth | Float | Default 0.0 |
Then read from the table on BeginPlay .
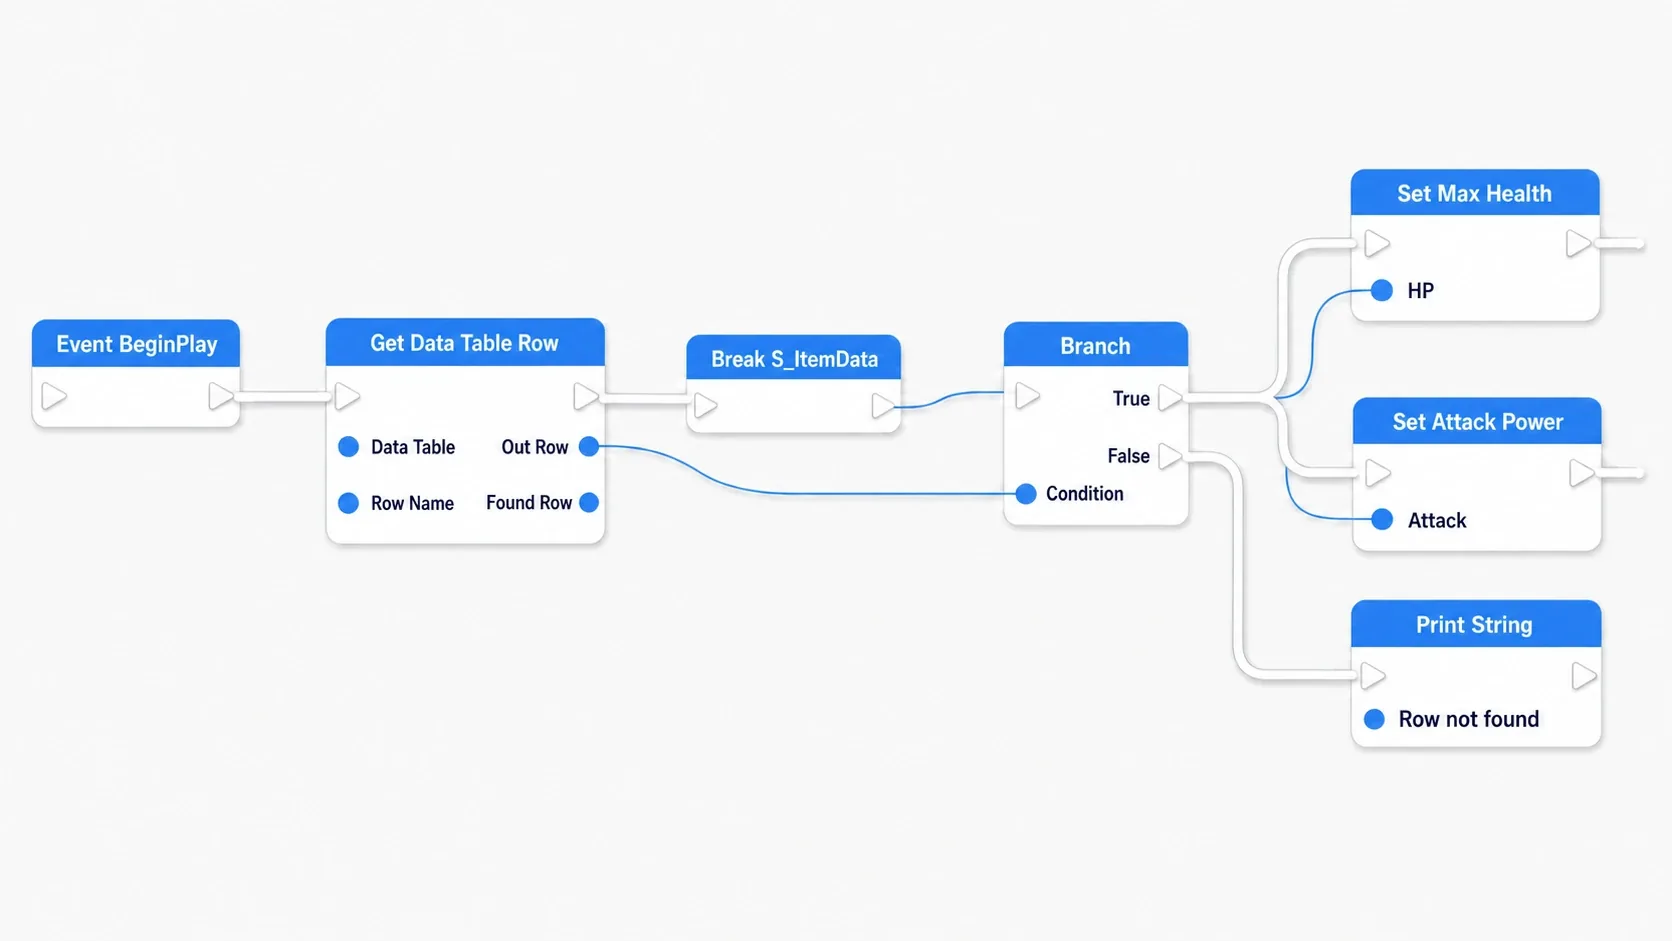
Event BeginPlay (BP_Enemy)
  → Get Data Table Row (Data Table: DT_Enemy, Row Name: EnemyRowName)
  → Branch (Condition: Found Row)
      True  → Break S_EnemyData (Out Row)
            → Set CurrentHealth (= Health)
            → Set Max Walk Speed (Target: Character Movement, = MoveSpeed)
            → Print String (Append("Load succeeded: ", EnemyRowName))
      False → Print String (Append("Row not found: ", EnemyRowName))  <- always include this
The key point is to always write the Found Row branch . Without it, a missing row quietly runs the enemy with zeros.
Step 5: place them in the level and check. Drop three BP_Enemy actors into the level and set each one's Enemy Row Name in the details panel to Slime / Goblin / Ogre .
Hit Play and check. All three use the same Blueprint, yet their movement speeds are visibly different. Slime is slow, Goblin is fast, Ogre is slower still. The log also shows three "Load succeeded" lines.
The real payoff starts here. Open Enemy.csv , change Goblin 's MoveSpeed to 600 , Reimport , and hit Play. Without ever opening the Blueprint, only the Goblin got faster.
Troubleshooting if it doesn't work.
- You get "Row not found" → the spelling or capitalization of the Row Name. Copying the name shown in the table is the reliable fix
- Garbled text on import → re-save as UTF-8 with BOM
- Importing doesn't add rows → row 1 of your CSV doesn't match the struct's variable names
- Speed doesn't change → did you wire Character Movement into the
TargetofSet Max Walk Speed?
Two things to take away.
- Don't ignore
Found Row: a miss returns an empty struct, so the game quietly runs with zeros. Just logging the failure dramatically shortens the time it takes to find the cause - Keep it to one Blueprint: making a Blueprint per enemy type means touching all of them every time you fix shared logic. One system, numbers in a table is the maintainable shape
When you want the same data held per asset rather than as a table, Data Asset is the next option. If you need to rethink the row shape itself, head back to Structs.
Bonus: Good to Know for Later
Keeping CSVs inside the project makes them easier to manage. Create a folder like Content/Data/CSV for the source files and Git can track the diffs. Note that files placed directly under Content will be treated as assets by UE, so deciding on a location up front avoids accidents.
You can get the list of rows. Get Data Table Row Names returns every Row Name in the table as an array. Features like "spawn a random enemy" or "list every entry in a bestiary" start from this.
Data Tables aren't meant to be rewritten at runtime. They're strictly a place to store configuration values . Values that change, like current HP, live in Blueprint variables after loading. That's exactly why the hands-on copies Health into CurrentHealth .
Changing the struct can wipe the table's contents. Adding or removing fields may reset the data you entered. Export to CSV before making changes and you can restore if things break. Right-click → Export to write it out.
Summary
Four things to keep in mind when using Data Tables.
| Aspect | Takeaway |
|---|---|
| Prerequisite | Struct first . The Row Structure can't be changed later |
| Key | Look rows up by Row Name . Case-sensitive |
| CSV | Column 1 is the key, row 1 matches variable names exactly, UTF-8 with BOM |
| Biggest gotcha | A miss isn't an error . Branch on Found Row |
And one design rule: one system, numbers in a table . Stop adding a Blueprint per enemy type and both tuning and bug-fixing get far easier.
That Blueprint you keep opening to tweak numbers, could those values live in a table instead?