You've gotten to where you can zero out an enemy's HP and defeat it. But the defeated enemy just vanishes on the spot, standing stiff. Even if you've polished the feel of a hit, when that final "collapse" moment is bland, half the satisfaction of the kill is lost.
Building that "collapse" with physics is the ragdoll . Stop the animation and switch to per-bone physics bodies, and the enemy flies in the direction you shot and collapses naturally along the terrain. This article covers, from reading the underlying Physics Asset to ragdolling and blasting an enemy in Blueprint, while building a death reaction.

What You'll Learn
- What a ragdoll really is: stop animation, switch to per-bone physics
- What a Physics Asset is (a collection of capsules on bones)
- The three-set for ragdolling in Blueprint
- Blasting in the attack direction with Add Impulse
- Partial ragdolls and cleanup cautions
- Hands-on: a death reaction where the enemy collapses in the direction you shot
What a Ragdoll Really Is
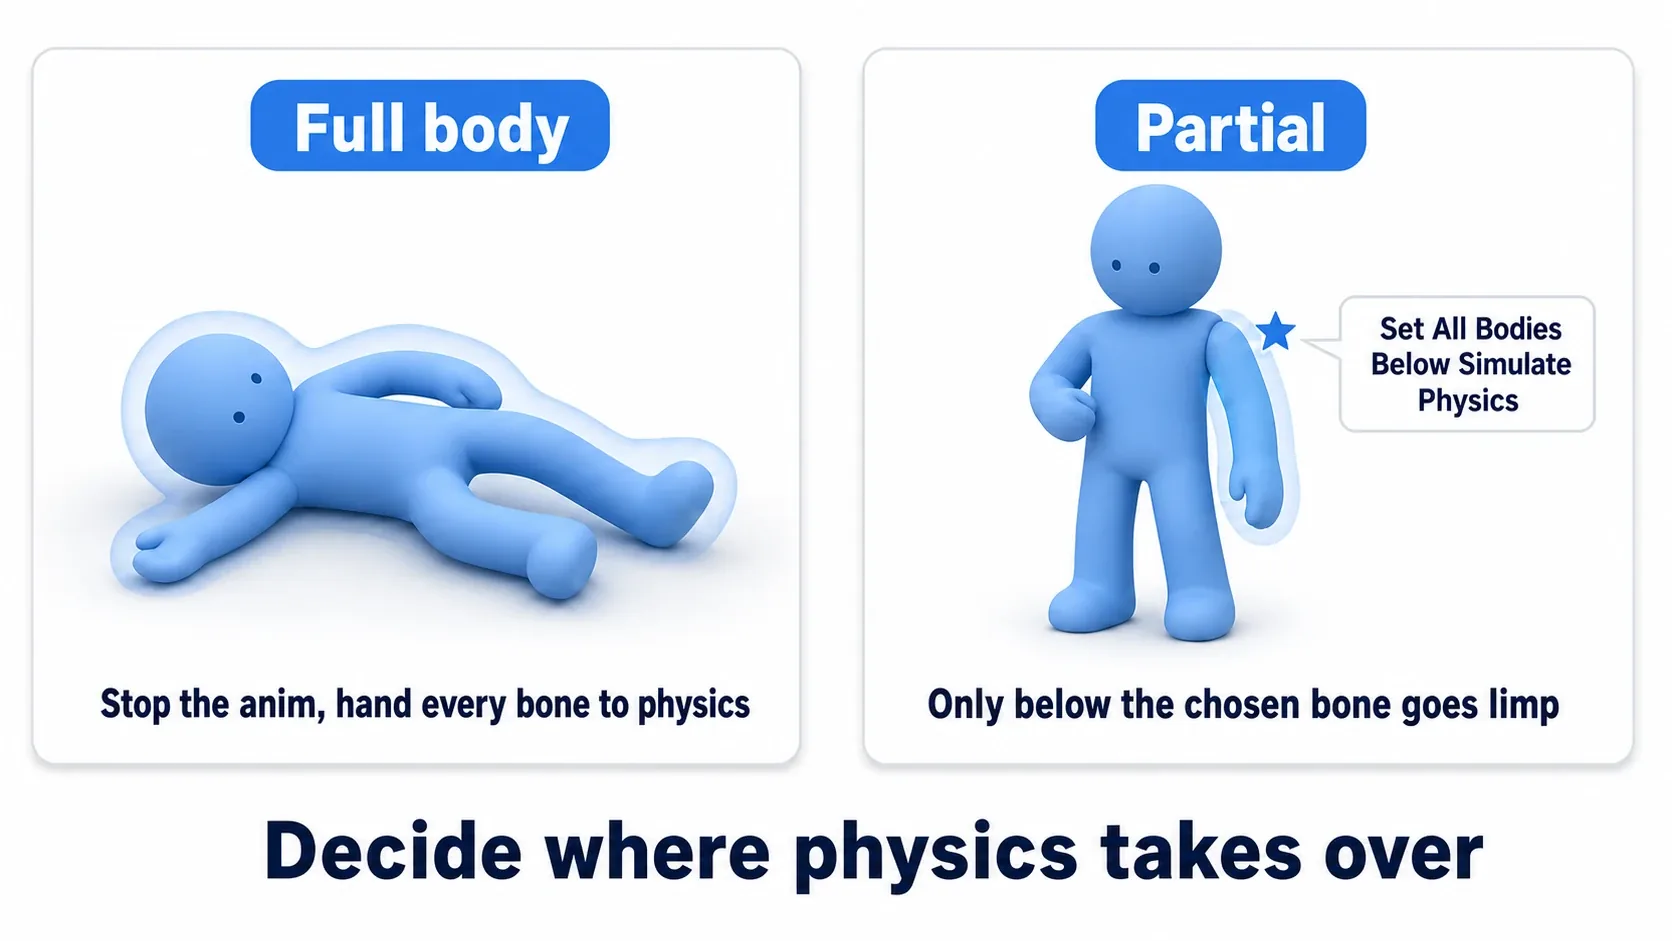
"Ragdoll" sounds complicated, but what it really is, is simple. Stop playing the animation and leave the character to physics simulation as a "collection of per-bone physics bodies" , that's all.
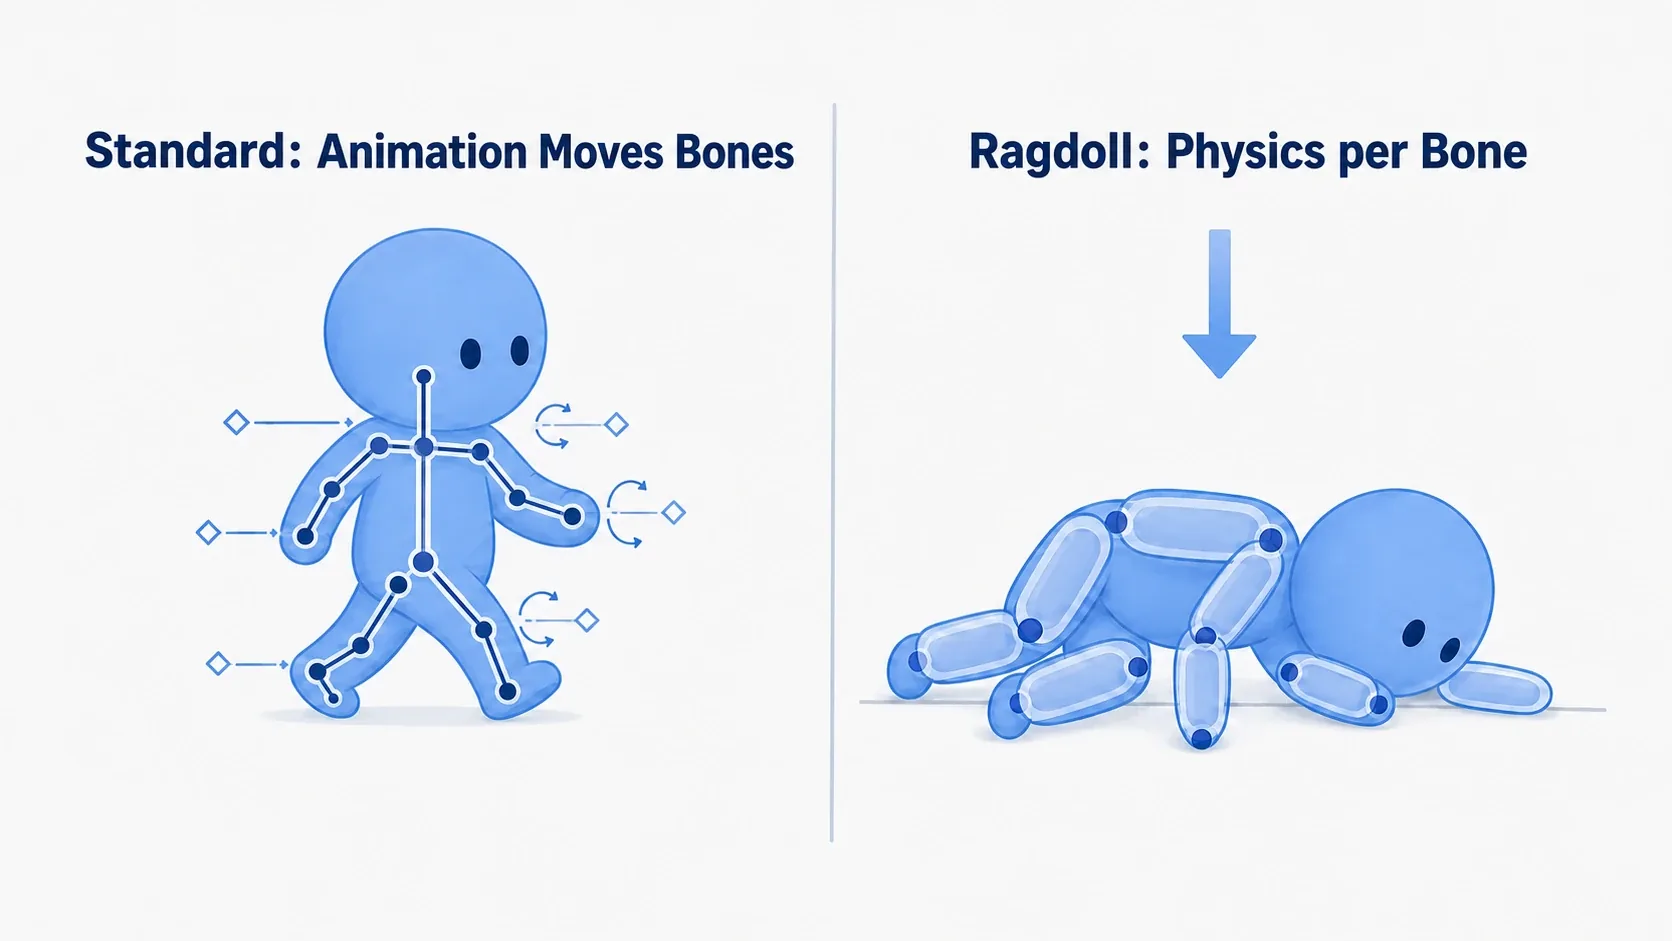
- Normal: animation (walking, attacking) moves the character's bones. The bones take set poses
- Ragdoll: animation stops, and the physics bodies on each bone move freely under gravity, collision, and applied force . The joint-connected figure collapses as if drained of strength
That's why it's called a "rag doll". Controlled by animation while alive, switched to physics the instant it dies. This switch is the heart of the death reaction.
What a Physics Asset Is
What supports the ragdoll is the Physics Asset . It's an asset paired with the Skeletal Mesh, a collection of physics bodies (capsules and boxes) on each bone and the constraints (joints) connecting them .
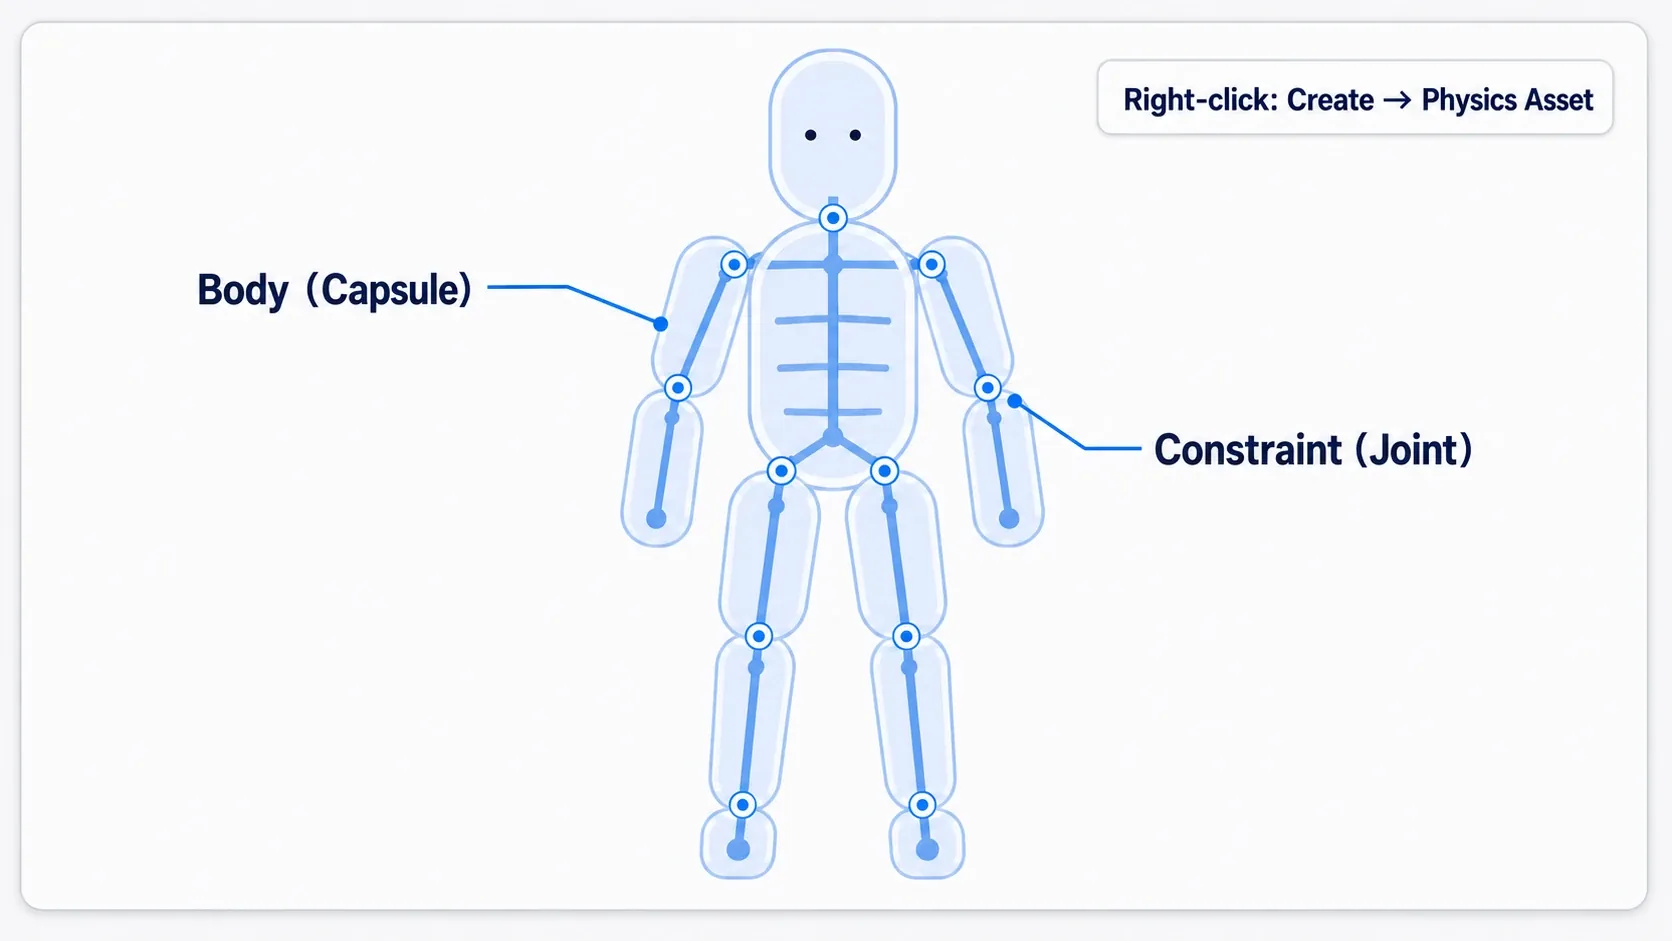
- Body: the capsule or box wrapping each bone. This is the substance of collision and physics
- Constraint: the joint connecting bodies. Holds things like the limits on bending angle
You can auto-generate a Physics Asset by right-clicking a Skeletal Mesh in the Content Browser and choosing Create → Physics Asset → Create . Once made, open the Physics Asset Editor and check the actual collapse with the Simulate button. If anything clips or thrashes here, adjust the size or collision of that body's capsule. Trying the auto-generated one as-is first and fixing only the odd spots is the fast route.
The Three-Set for Ragdolling in Blueprint
Now, in Blueprint, we switch a living enemy to a ragdoll the instant it dies. What matters here is gathering the three-set . Miss even one and it won't collapse right.
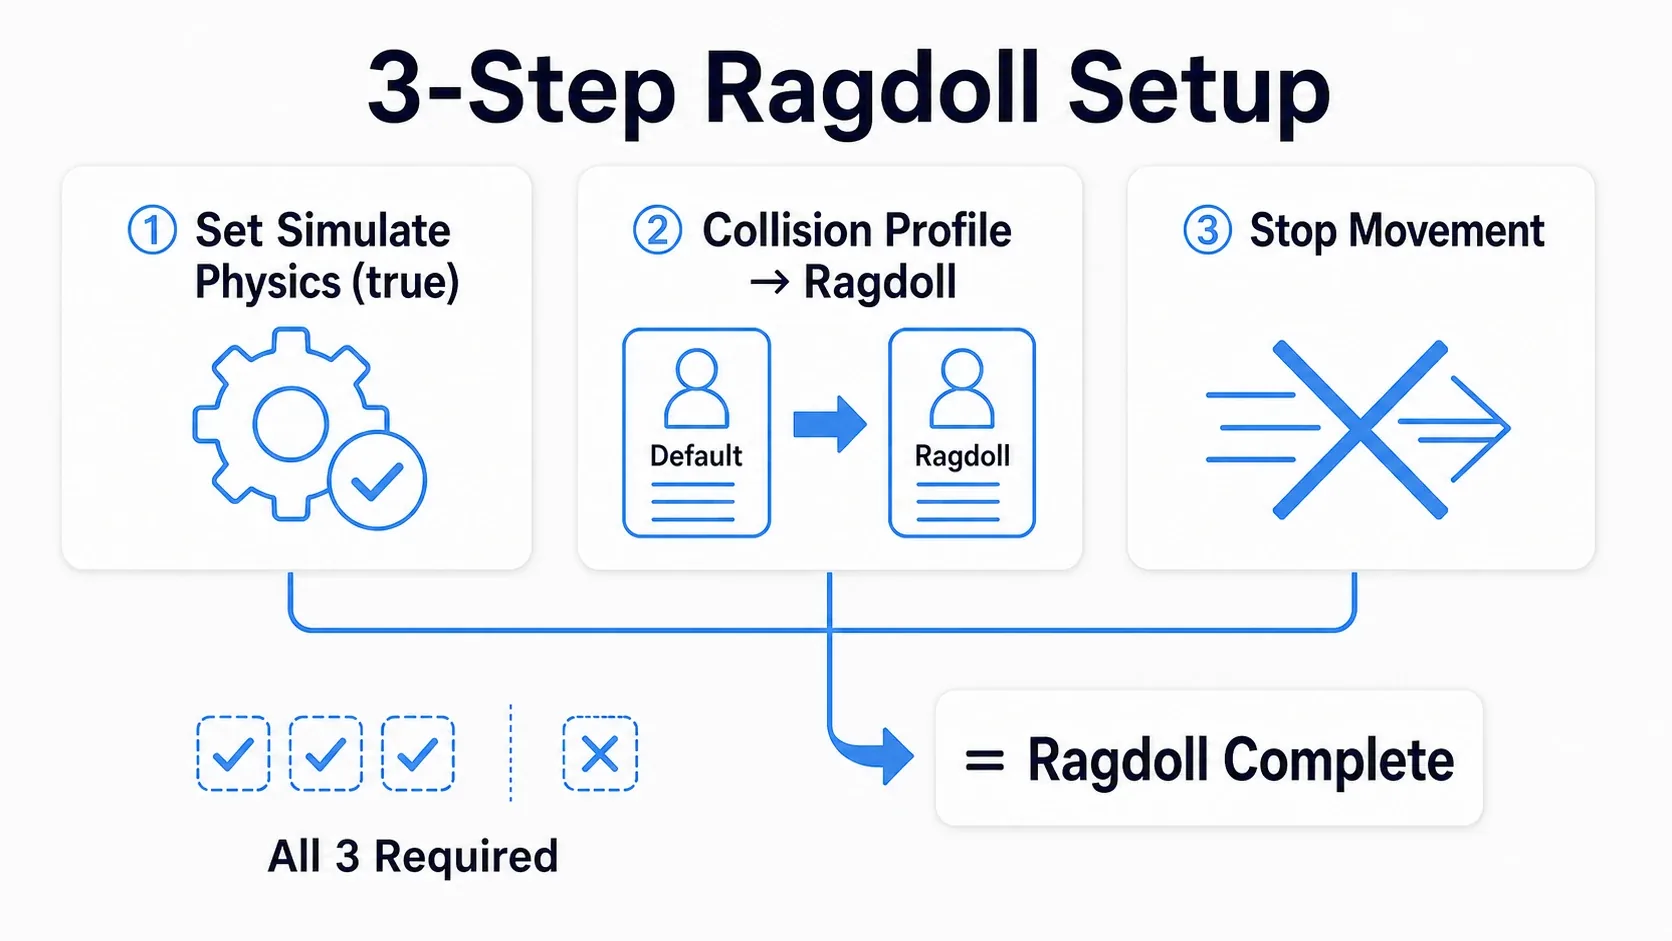
- Set Simulate Physics(true): turn on physics simulation on the Mesh. Now the bones start moving with physics
- Collision Profile to
Ragdoll: switch the Mesh's collision profile toRagdoll. Now the physics bodies collide correctly with the ground and walls - Stop Movement: stop Character Movement (like setting
Set Movement ModetoNone). Keeps animation-controlled movement from fighting physics
Also, the Character's Capsule Component and the physics bodies can collide with each other and thrash, so turning the Capsule's collision OFF at the moment of ragdolling stabilizes it. This three-set plus Capsule OFF is the standard form of a Blueprint ragdoll.
Blasting in the Attack Direction
Beyond just collapsing, blasting in the direction you shot makes the death reaction feel much better at once. This uses Add Impulse .
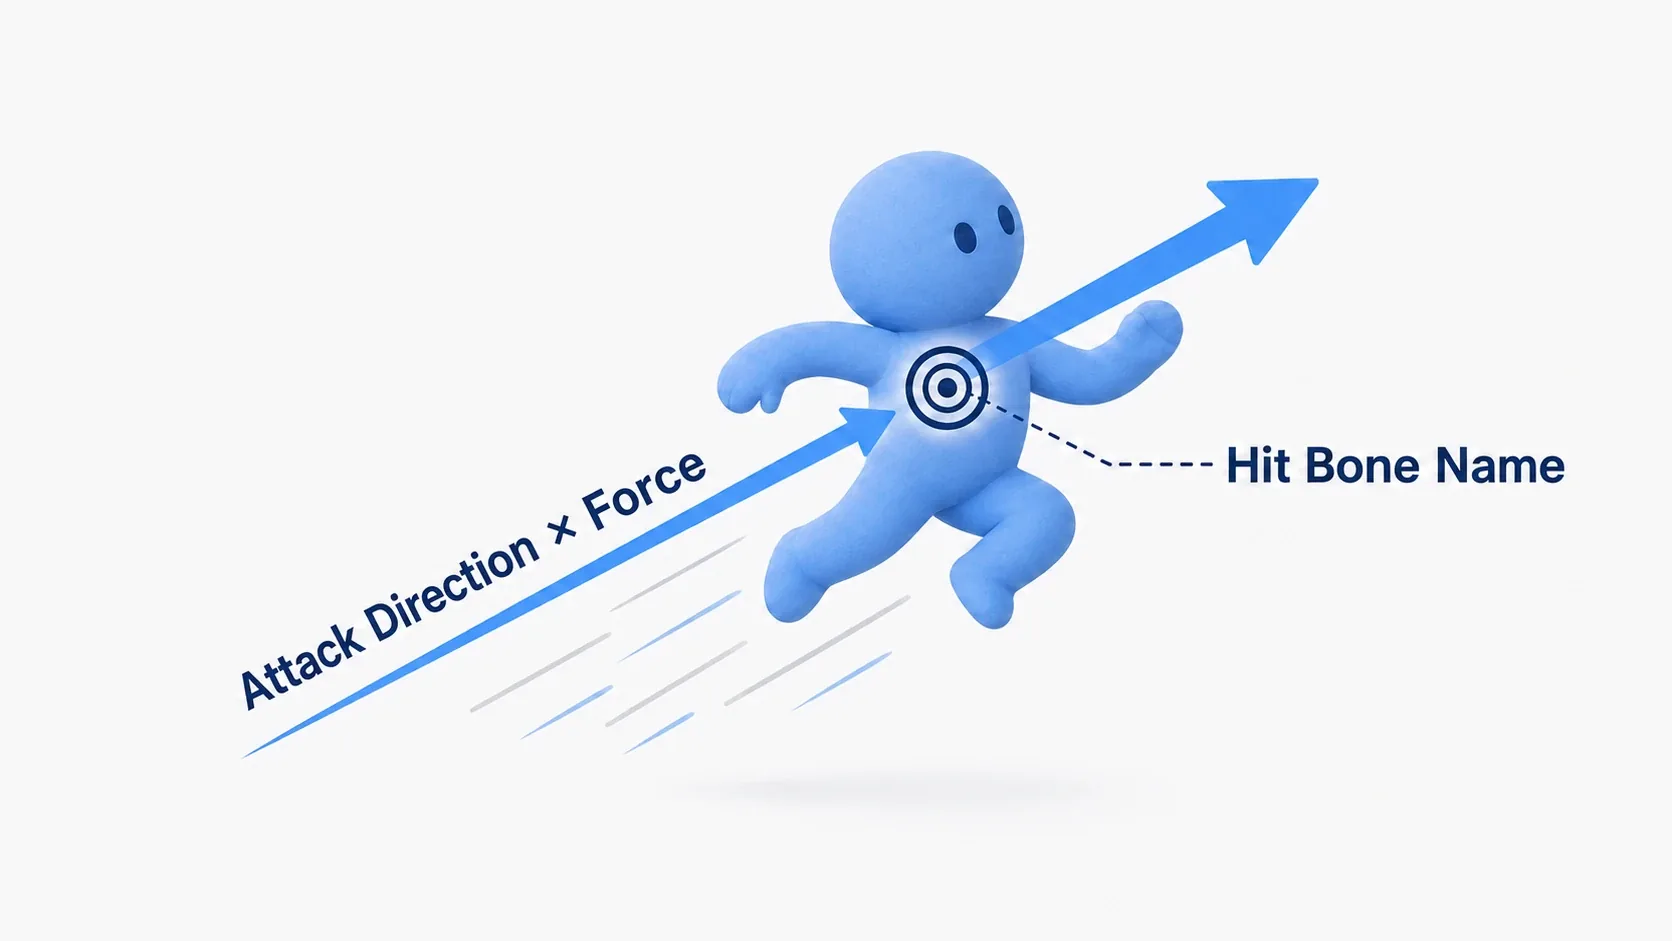
Add Impulse is a node that applies an instantaneous force to a physics body. Call it right after ragdolling.
- Where: specify the
Hit Bone Name(the bone hit) from the Line Trace Hit Result, and force is applied to the hit part - In which direction: pass the attack direction (like the direction the bullet flew) × a factor (magnitude) as the force vector
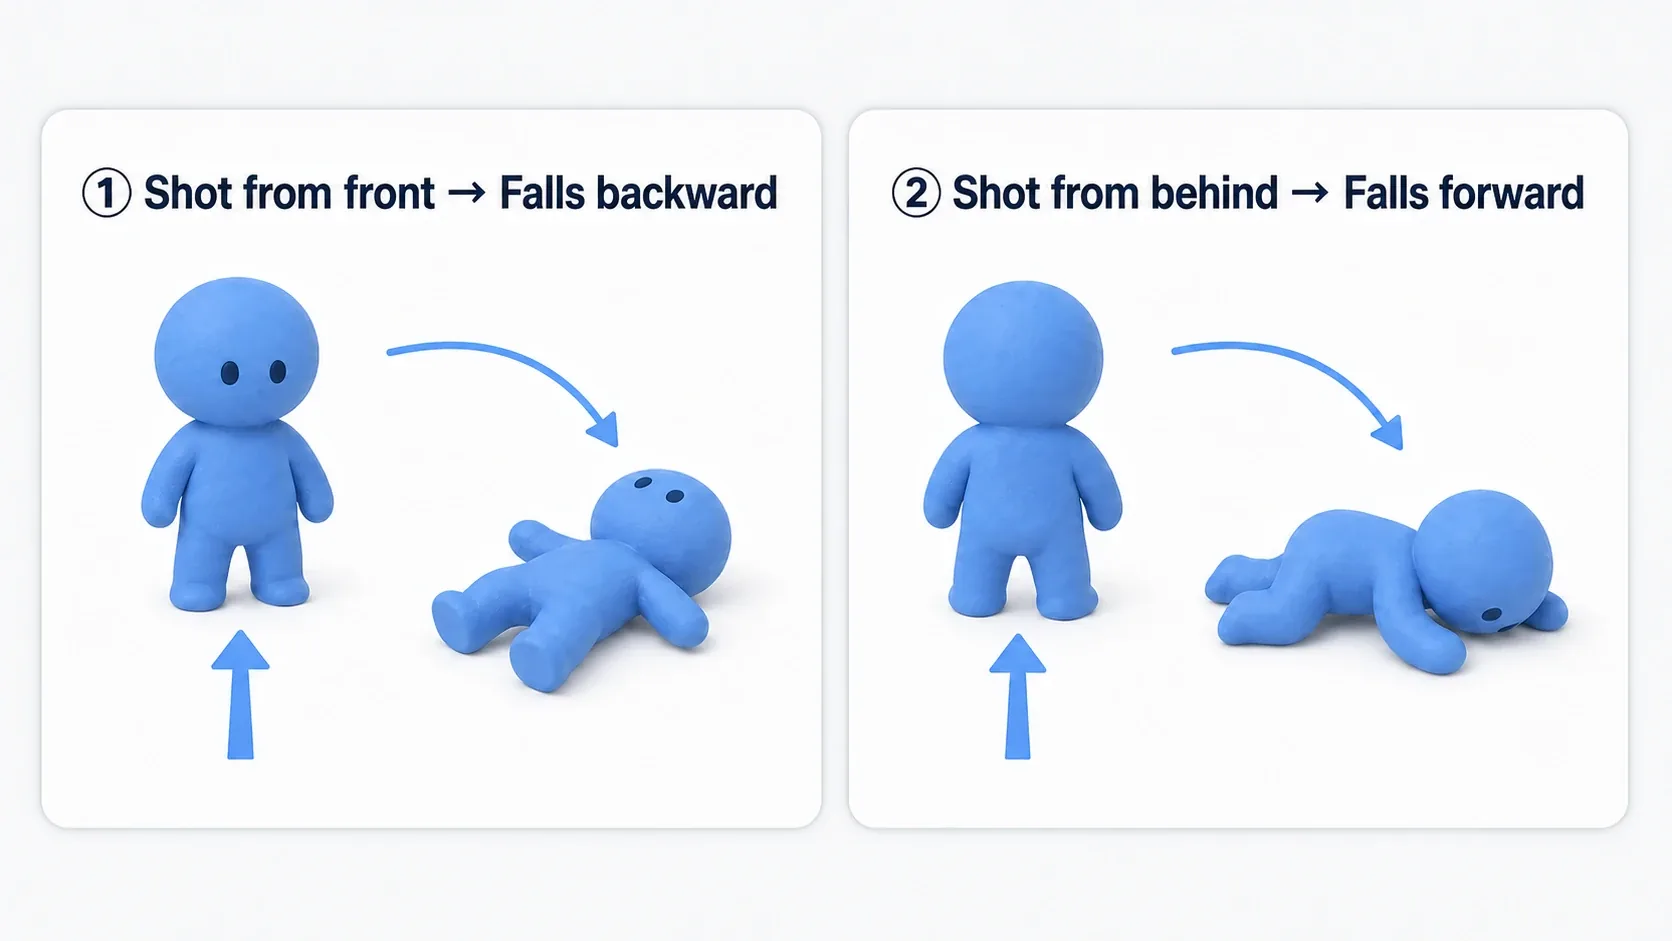
Now shooting from the front sends it supine, from behind sends it prone, hitting the head sends it head-first, the collapse changes with the part and direction hit . The Hit Result's Bone and direction you got in the Line Trace article come alive right here.
Partial Ragdolls and Cleanup
You can also limp only some of the bones rather than the whole body. This is a partial ragdoll .
Using Set All Bodies Below Simulate Physics to make only below a bone (say the shoulder) physics lets you do things like only an arm dangling limply . It suits reactions where the upper body is alive but the arm goes limp (challenging it once you're used to full-body ragdolls is plenty).
And the thing you must not forget is cleanup . Ragdolls run physics per bone, so leaving many bodies around gets heavy.
- Basic:
Destroy Actorwith a timer a few seconds (e.g. 8) after they fall - If you want to leave them: keep the load down by putting the physics to sleep after a set time, or capping the number of bodies kept
"Leaving defeated enemies around forever" is fun visually, but it trades off with performance. Think of the basic as clearing them with a timer.
Hands-On: Blasting and Collapsing an Enemy
An ARPG's mob kill, a shooter's headshot, a brawler's knockback. "A defeated enemy flies in the direction you shot and collapses" is a staple reaction that decides the satisfaction of the kill. Here we build one lap of it, reusing the enemy from Health and Damage.
We're building a death reaction where when HP hits zero, the enemy switches from animation to physics, flies in the direction it was hit and collapses, and vanishes after 8 seconds .
Here's what it looks like running. Shoot the enemy from the front and it collapses supine. Shoot from behind and it falls prone, face-forward. Hit the head and it crumples head-first, and the collapse changes each time with the part and direction hit. And after 8 seconds, the body quietly disappears.
Setup Conditions
| Item | Setting |
|---|---|
Enemy BP_Enemy (Character) | Skeletal Mesh with a Physics Asset assigned. Has the death event from Health and Damage |
| Death event | Call HandleDeath when HP hits zero |
| Attacker | Hit detection via Line Trace. Pass the Hit Result's Hit Bone Name and direction to the enemy |
| Collision Profile | A Ragdoll profile usable for the Mesh (the foundation of collision profiles) |
The Ragdoll Process
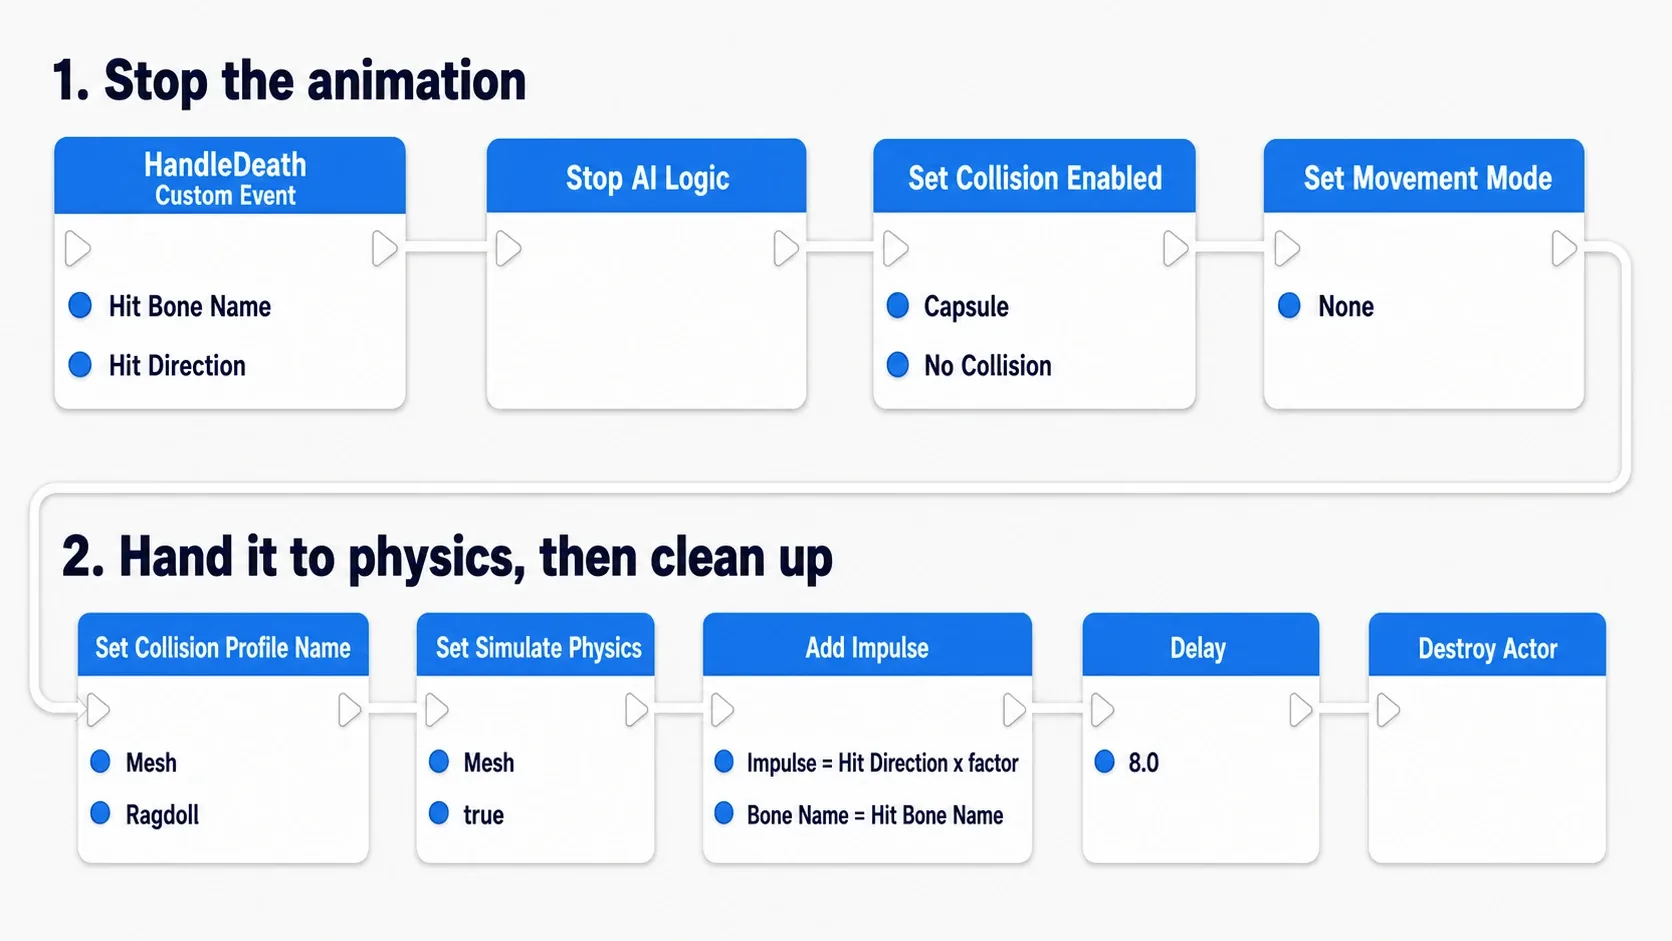
Inside HandleDeath , stop the AI and input, ragdoll with the three-set, blast with Impulse, and clear with a timer.
BP_Enemy (Event Graph)
HandleDeath (receives Hit Bone Name, HitDirection)
  → Stop AI (Stop Logic / Unpossess, etc.)
  → Capsule Component → Set Collision Enabled (No Collision)
  → Character Movement → Set Movement Mode (None)
  // 1. ragdoll three-set
  → Mesh → Set Collision Profile Name ("Ragdoll")
  → Mesh → Set Simulate Physics (true)
  // 2. blast
  → Mesh → Add Impulse (Impulse = HitDirection × force factor, Bone Name = Hit Bone Name)
  // 3. cleanup
  → Delay (8.0) → Destroy Actor
Verifying It
Play and shoot the enemy. If it worked, shooting from the front makes it supine, from behind makes it prone , and the collapse changes with the part hit. After 8 seconds, the body disappears.
Here's how to narrow it down when it doesn't work.
- Freezes standing stiff in place → forgetting to switch the Collision Profile is the top suspect. Check that you're switching to
Ragdolland callingSet Simulate Physics(true) - Collapses but doesn't fly → the
Add Impulseforce factor is too small, or the Bone Name is empty. Check that the Hit Bone Name is being passed - The collapse thrashes or clips → check that you're turning the Capsule's collision OFF, or the Physics Asset body adjustment (above)
Two things to take away.
- The ragdoll completes with the three-set: Simulate Physics, Ragdoll profile, stop Movement. Miss one and it won't collapse. If it stands stiff, suspect the Collision Profile first
- Direction from the Line Trace, cleanup with a timer: the Line Trace Hit Result supplies the fly direction, and a timer clears the body. The satisfaction of the reaction and performance coexist through these two
Bonus: Good to Know for Later
Getting up needs a "restore" process. When you want to recover from a stun and go back from ragdoll to the original animation, just calling Set Simulate Physics(false) makes the character snap to the reference pose in an instant. To get up naturally takes an extra step: record the fallen pose with Pose Snapshot and blend gradually back to animation with Physics Blend Weight. Building just "fall and clear" first and making getting up a later task is realistic.
As an extension of the feel of a hit. The ragdoll is a technique that extends the "feel of a hit" from game feel and hit feedback all the way to the death reaction. Adding the final "collapse" to hit stop, screen shake, and knockback completes the whole sequence of the kill.
Physics Assets are reusable. For characters with the same skeleton, one Physics Asset can be reused across multiple characters. You don't have to remake it per enemy type, and remembering that you can share it when the skeleton is the same makes mass production easier.
Summary
The death-reaction ragdoll is built with this flow.
| Stage | What to do | Tool |
|---|---|---|
| Foundation | Put physics bodies on the bones | Physics Asset (auto-generate → adjust) |
| Switch | Stop animation, go to physics | Simulate Physics + Ragdoll + stop Movement |
| Blast | Apply force in the attack direction | Add Impulse (Hit Bone, direction) |
| Clear | Remove the body | Destroy with a timer |
And the principle running through it is the switch of animation while alive, physics the instant it dies . Across this one line, the character changes from controlled movement to a strength-drained collapse.
With this, you graduate from the blandness of defeated enemies vanishing while standing stiff. From what direction, and how, do you want your game's enemies to collapse? First, shoot one from the front.
Further Learning
- Health and Damage (Apply Damage) — the source of the death event
- Raycasting with Line Trace — the Hit Bone and blast direction
- Collision Profiles and Custom Channels — the foundation of the Ragdoll profile
- Game Feel and Hit Feedback — layering death reactions