You place one light in your level and multiply its intensity by ten. The screen barely changes. Turn it off and it doesn't go pitch black either, just dim.
UE5 lighting is the product of four things working together: the light sources, Mobility, Lumen, and exposure. Touch only one of them and the result won't move, which is why it feels unresponsive at first. This article covers choosing between the four light types, what Mobility actually decides, the Lumen that's already running by default, and how to stop auto exposure, the usual culprit behind "too dark" and "too bright."
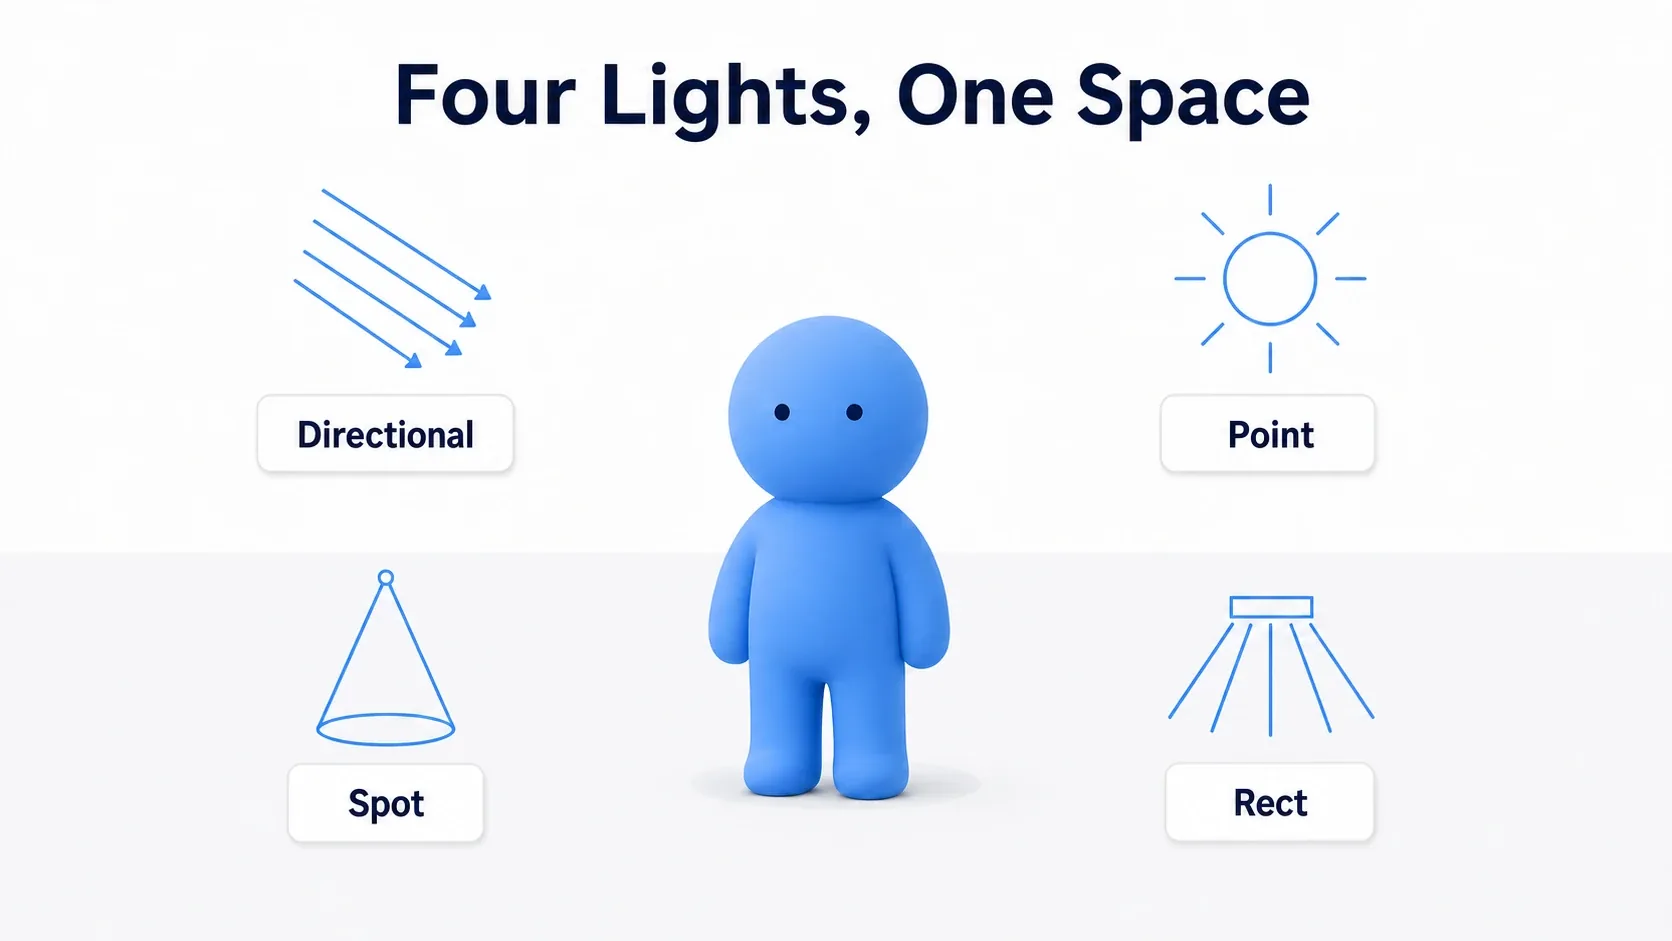
What You'll Learn
- Choosing between the four lights ( Directional / Point / Spot / Rect )
- Mobility decides "bake it, or compute it on the spot"
- What Lumen, running by default in UE5, is doing
- The culprit behind "too dark" is often auto exposure, not the lights
- Hands-on: lighting a pitch-black cave with three lights
Choosing Between the Four Lights
The "Lights" section of the Place Actors panel lists five entries, and we'll start with the four that emit direct light (the remaining Sky Light comes later). They differ in how the light is emitted, so mapping each to a real-world equivalent makes the choice obvious.
| Light | How It Emits | Real-World Equivalent | Main Uses |
|---|---|---|---|
| Directional Light | Parallel rays. Position is irrelevant, only direction matters | The sun | The key light outdoors. Usually one per level |
| Point Light | From one point in all directions | A bare bulb, a campfire | Interior lighting, torches, glowing props |
| Spot Light | A cone in one direction | A flashlight, stage lighting | Guiding the player, drama, car headlights |
| Rect Light | From a rectangular surface | A window, a fluorescent panel, a monitor | Window light, soft interior light |
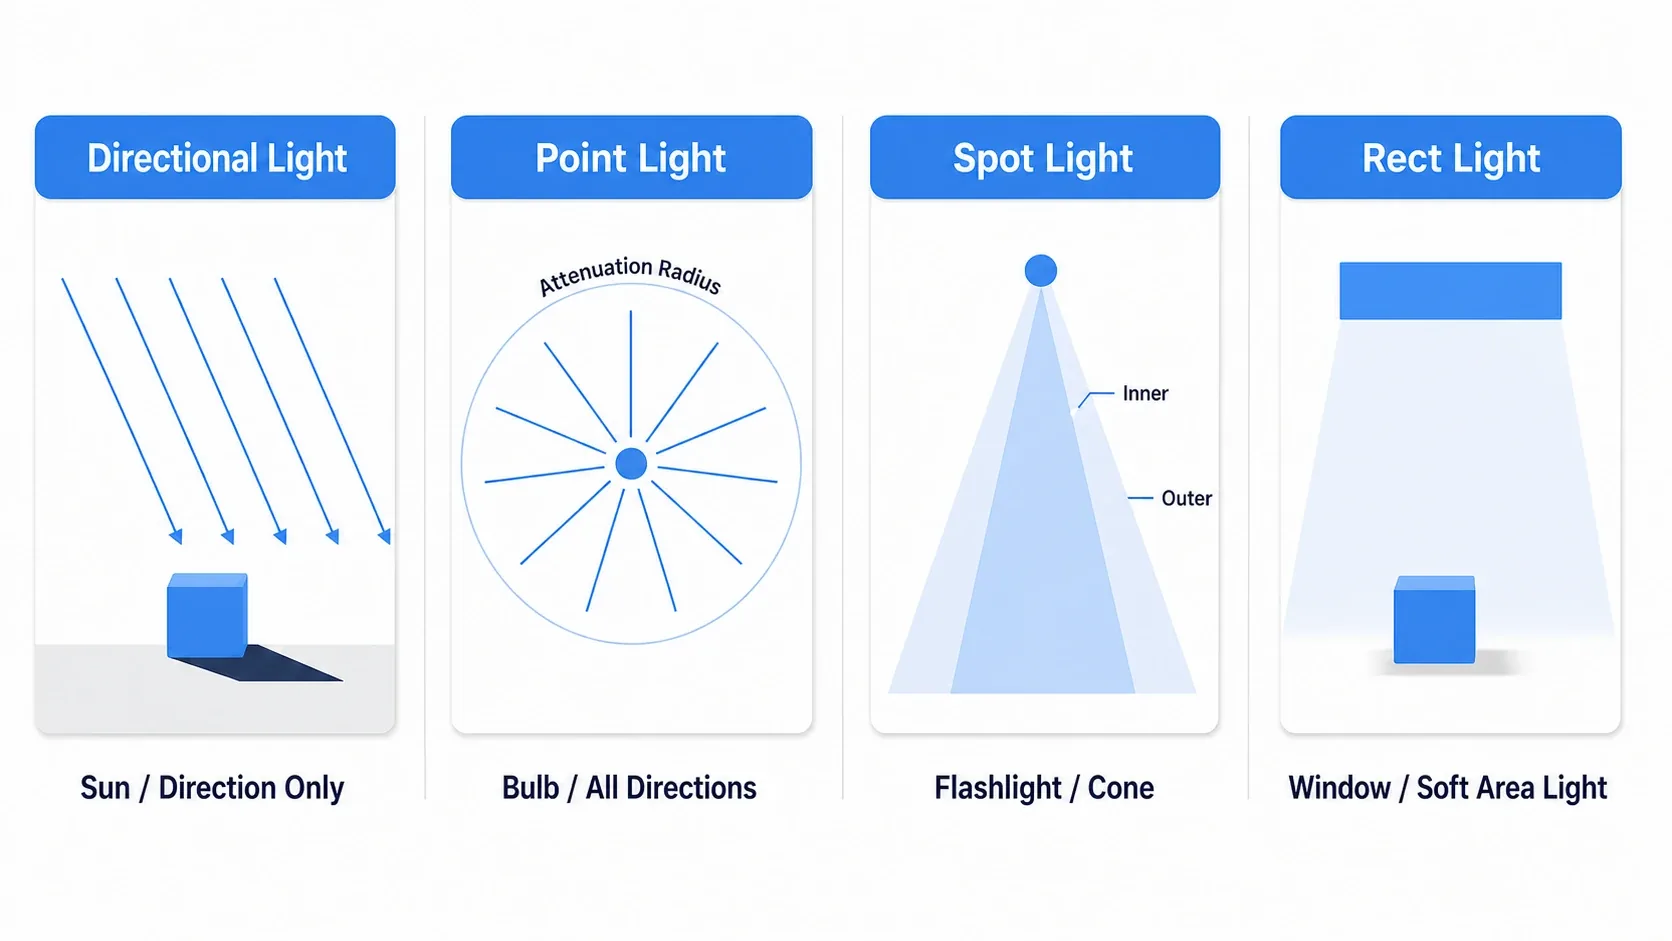
Only Directional Light ignores its position entirely. Like the sun, it's treated as arriving in parallel from infinitely far away. Only intensity, direction, and color matter. Rotating it is literally changing the time of day.
The first property to touch on Point and Spot lights is Attenuation Radius. It isn't brightness, it's the hard cutoff of the light's influence, and nothing outside that sphere receives any light at all. When "I placed a light but the floor isn't lit," this radius is usually too small.
A freshly placed Point Light defaults to Intensity 8.0 cd and Attenuation Radius 1000.
What Mobility Decides
Every light has a three-way Mobility choice at the top of its Details panel. This is confusing for beginners, but what it decides is when the lighting is calculated.
| Mobility | When It's Calculated | What You Can Do | What You Can't |
|---|---|---|---|
| Static | Baked at build time | Cheapest by far | Can't be changed at all at runtime |
| Stationary | Partly baked, partly live | Change color and intensity at runtime | Can't move. Limited overlap count |
| Movable | Computed live every frame | Move, flicker, anything | Most expensive |
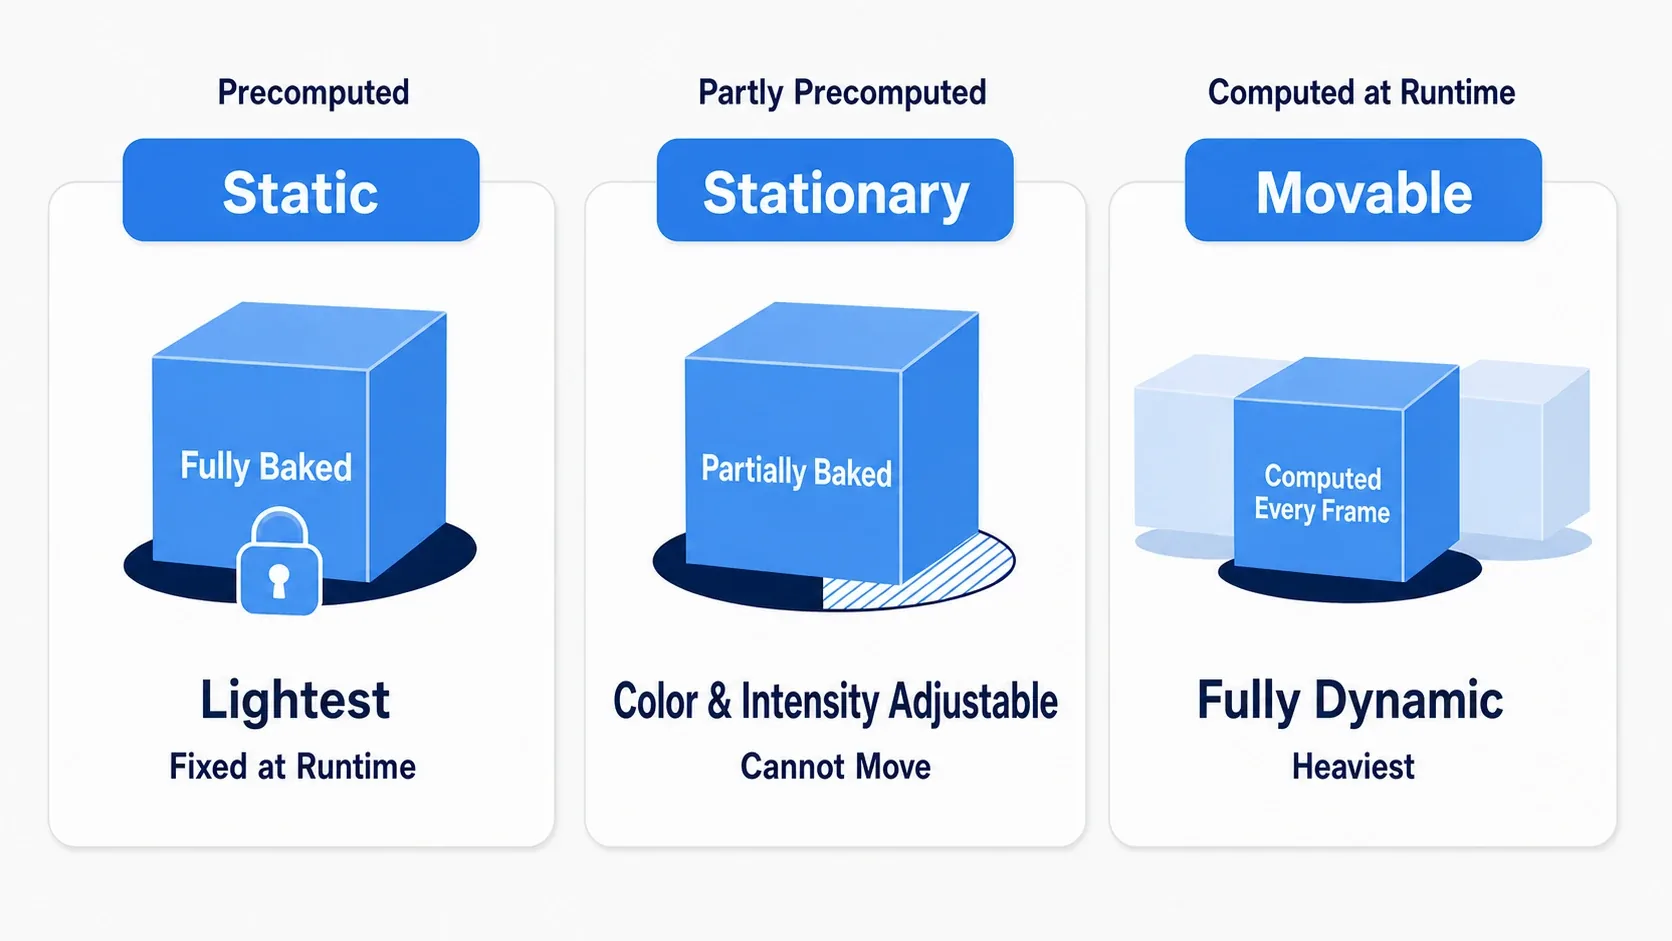
There's an important precondition in UE5. With Lumen enabled, baked results from Static lights aren't used as GI. Lumen and baked lightmap GI can't coexist, and Lumen takes priority.
That leaves you with two options.
| Approach | Light Mobility | Build Lighting |
|---|---|---|
| Use Lumen (UE5 default) | Movable or Stationary | Not needed |
| Go back to baking | Mostly Static | Required (disable Lumen first) |
For solo development, building with Movable is the realistic choice. UE5's Lumen assumes dynamic lighting, so leaving everything Movable still produces good-looking results.
"I set it to Static and everything went black" happens when you've chosen the baking approach but haven't run Build Lighting. If you're still on Lumen, there's no reason to set anything to Static in the first place.
Note: Mobility exists on Static Mesh Actors too, not just lights. Leave a mesh you intend to move set to Static and its shadow freezes in the wrong place. Set moving objects to Movable on the mesh side as well.
Lumen: Light You Didn't Place Bounces In
Lumen is enabled by default in UE5's standard templates. It's a dynamic global illumination (GI) system, and in one sentence, it calculates light bounces automatically.
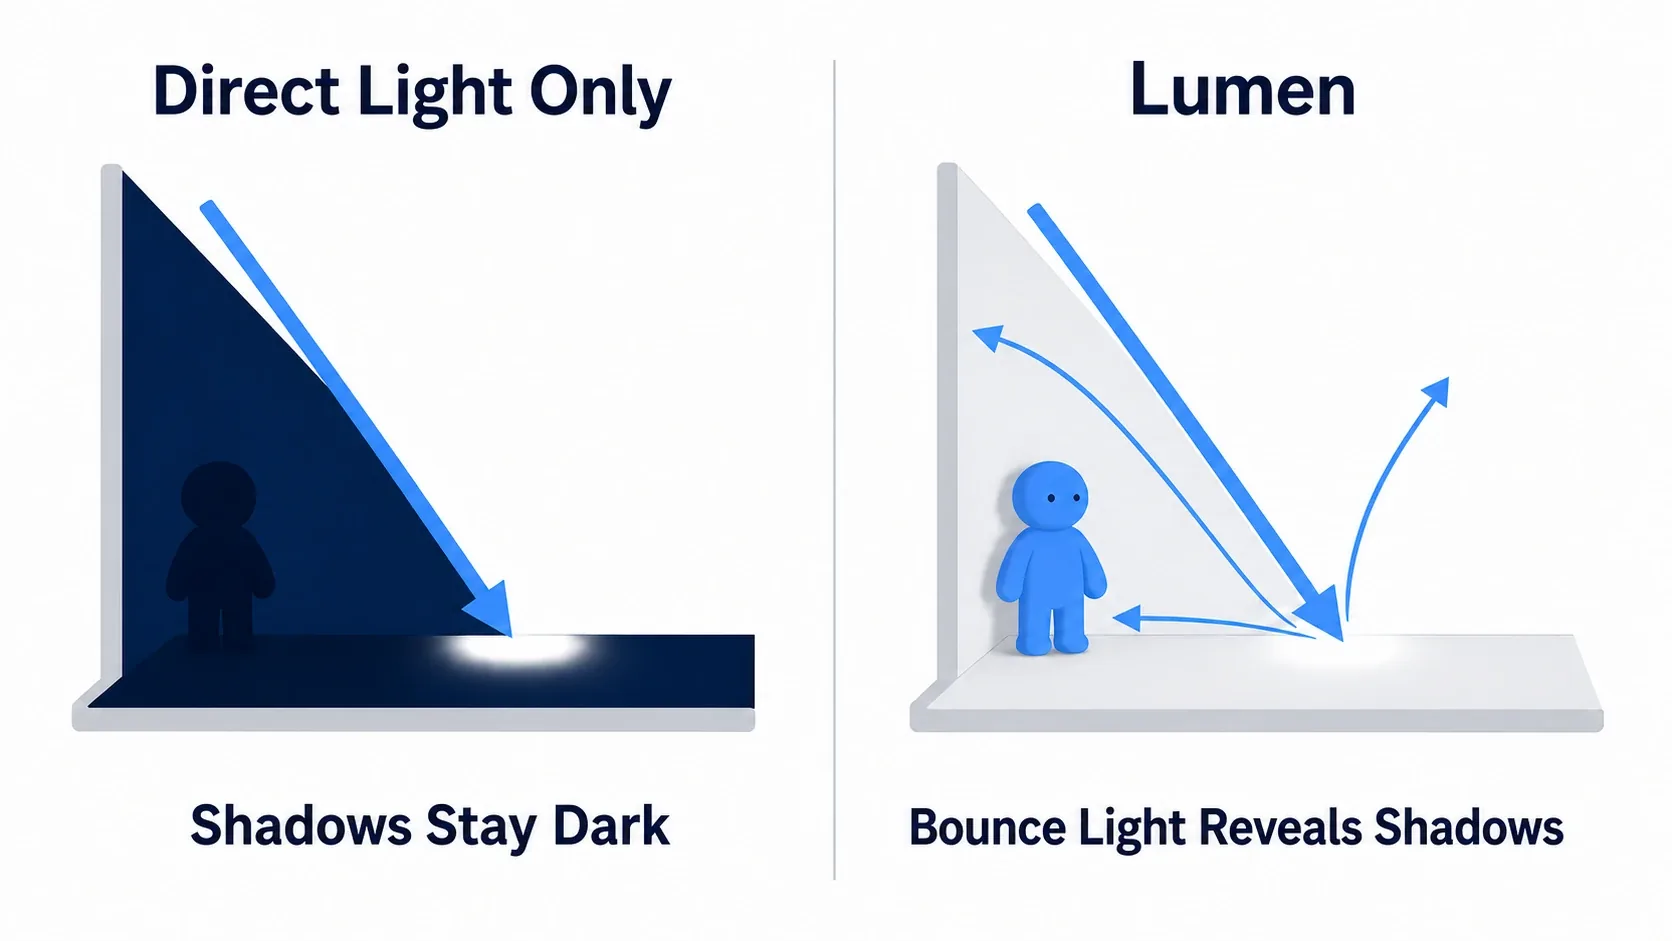
Shine white light on a red wall and the floor in front of it picks up a faint red tint. Light through a window brightens a ceiling it never directly touches. Lumen generates this light you never placed in real time.
Lumen covers two things.
| Feature | Project Settings Entry | Effect |
|---|---|---|
| Dynamic Global Illumination | Dynamic Global Illumination Method | Light bounces. Shadows don't go pure black |
| Reflections | Reflection Method | Reflections. Surroundings appear in floors and water |
Both are active as long as they're set to Lumen. Check under Edit > Project Settings > Engine > Rendering.
Thanks to Lumen, a space reads properly without placing dozens of lights. One light travels along walls and floors to fill the area.
Note that "cranking a light barely changes anything" is usually not Lumen's doing. It's auto exposure, covered next.
The Culprit Behind "Too Dark" Might Be Exposure
The other, more common cause is auto exposure (Eye Adaptation).
By default, UE's camera adapts to brightness like a human eye. Go somewhere dark and things gradually become visible; go somewhere bright and the glare settles down. Because this is running, turning a light up just makes the camera stop down and restore the original brightness.
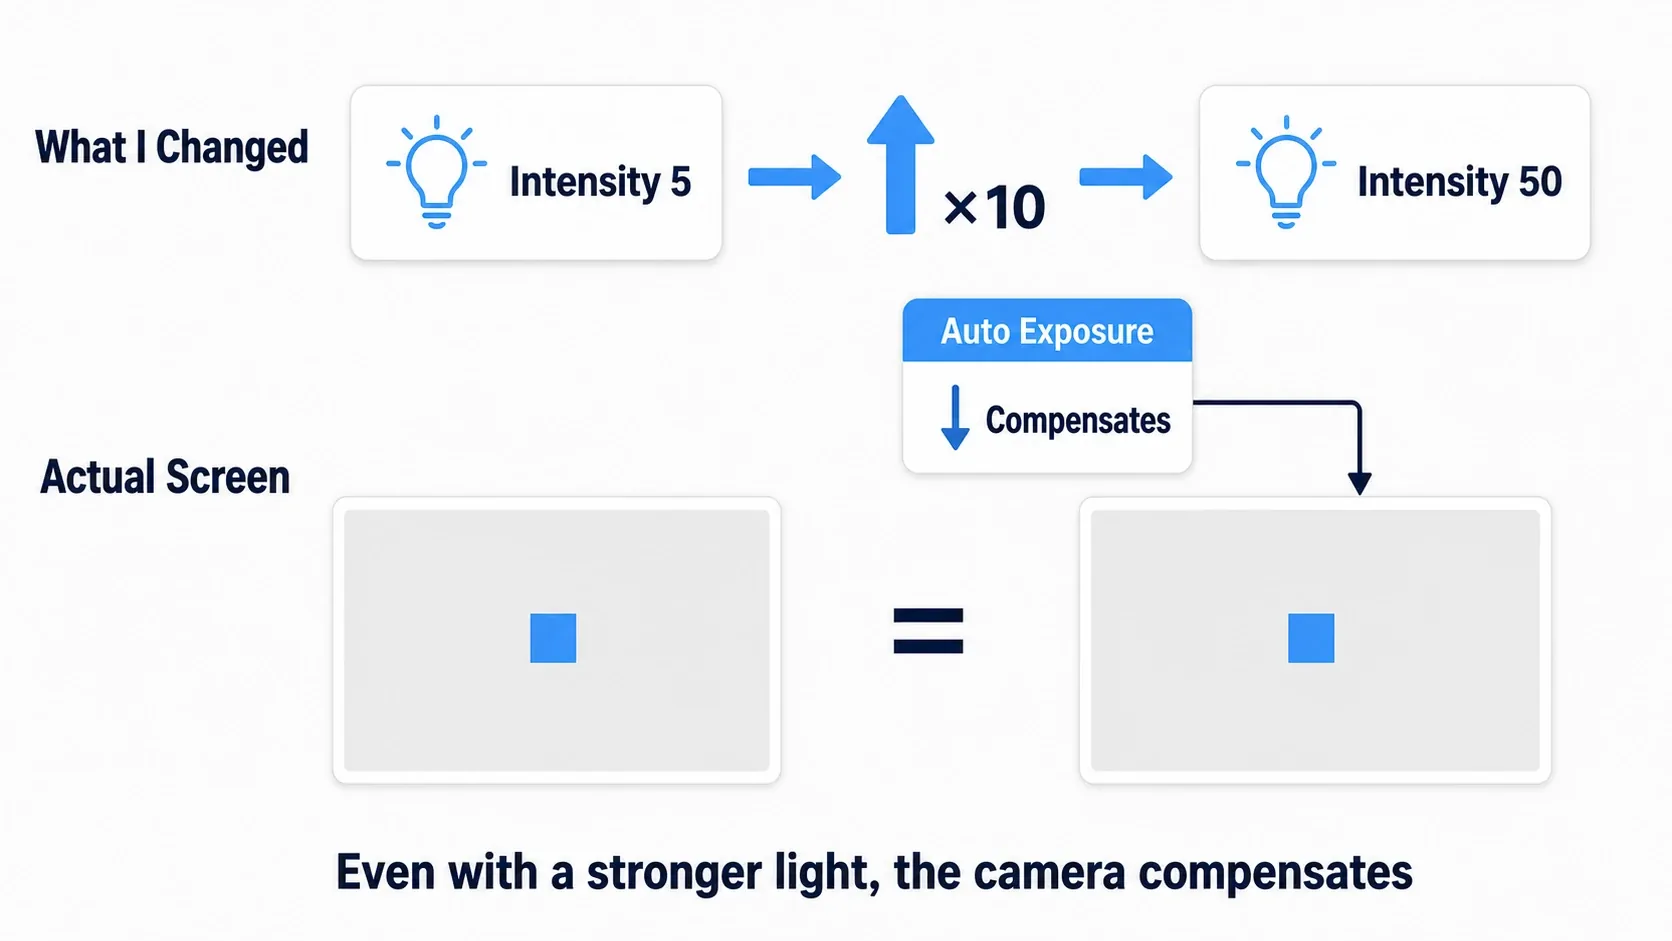
Before tuning lighting, turn this off.
- Place a Post Process Volume in the level from Place Actors
- Check
Infinite Extent (Unbound)in the Details panel (so it applies to the whole level) - Open Lens > Exposure
- Set
Min EV100andMax EV100to the same value (both1.0, for example)
Brightness is now locked, and the screen changes exactly as much as you change the lights. Start every lighting session by disabling exposure. Do it in the other order and every change looks like it's being cancelled out.
Note: Whether you restore auto exposure for the final build is a creative call. The glare of stepping from a cave into daylight is a great effect, but it also changes UI legibility. Finer exposure control is covered in the Post Process Volume article.
Hands-On: Lighting a Pitch-Black Cave with Three Lights
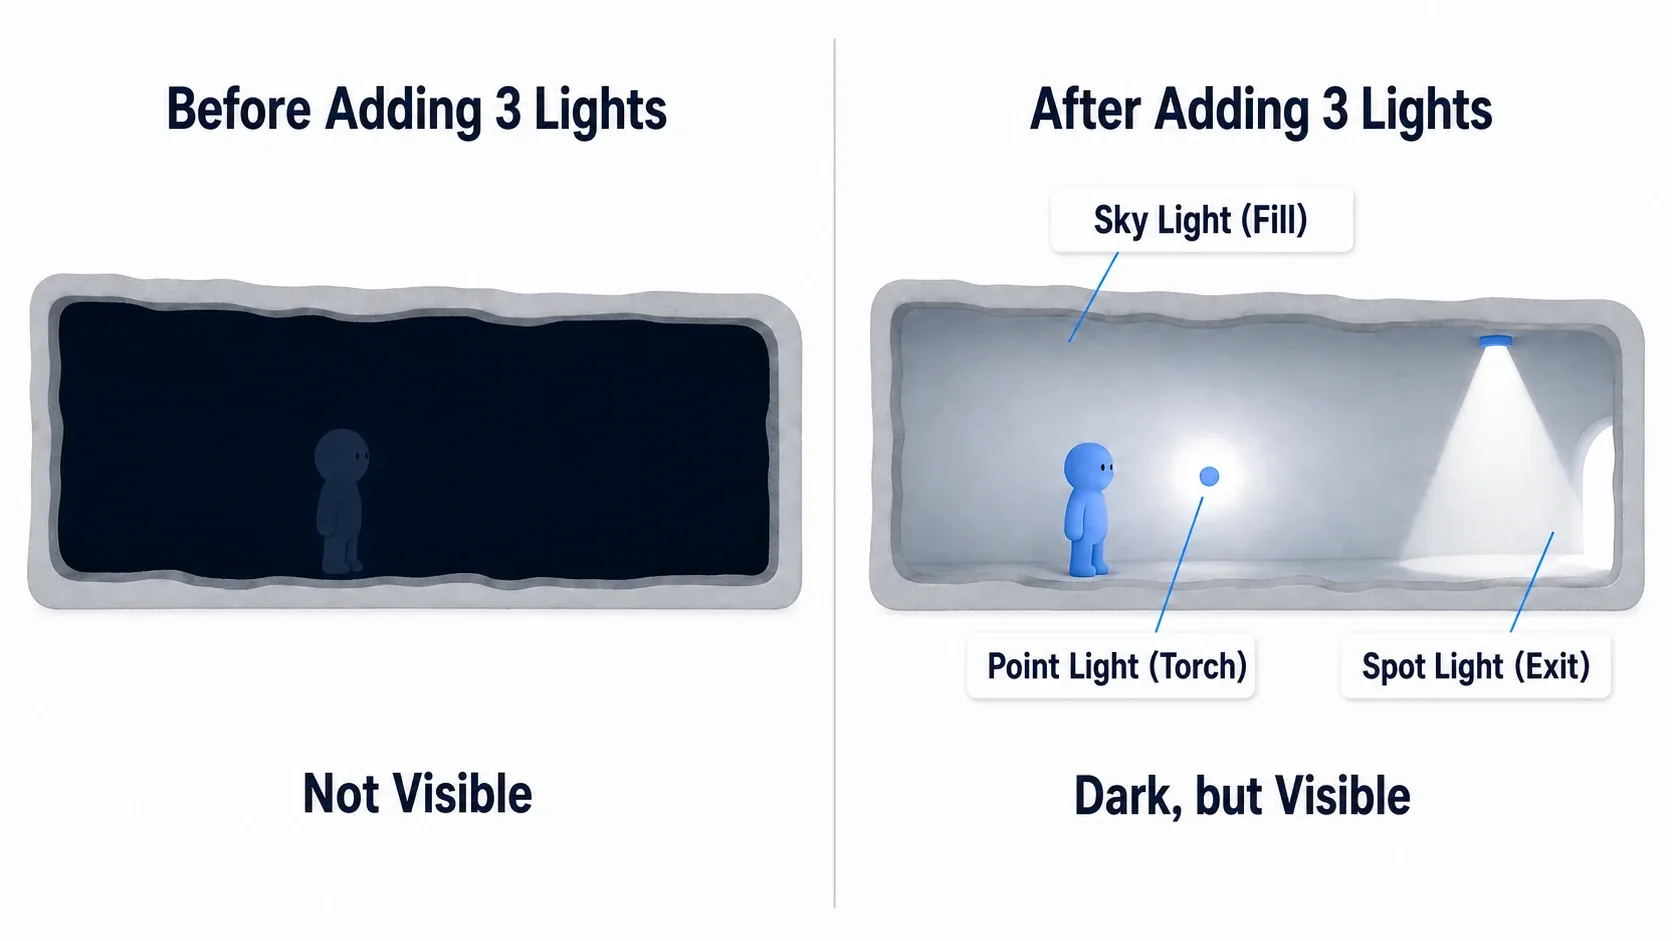
A horror game cave, a dungeon RPG corridor, an escape-room warehouse. How to present a dark interior is something every genre runs into. Let's build "visible darkness" in a space with no sun, using only three lights.
The Finished Result
A pitch-black space becomes one where the area around a torch glows warm and an exit shines in the distance.
Reproduction Setup
Create a new project from the Third Person template, open a new level via File > New Level > Basic, and get it into this state.
| Step | Contents |
|---|---|
| 1 | Place a Player Start and set World Settings' GameMode Override to BP_ThirdPersonGameMode (without this you can't walk) |
| 2 | Delete the default Directional Light (remove the sun) |
| 3 | Delete Sky Atmosphere, Volumetric Cloud, and Exponential Height Fog too (we're indoors) |
| 4 | Keep the Sky Light (it's in the Basic level by default. We'll use it later) |
| 5 | Stretch the default Floor into a corridor and build walls and a ceiling from Cubes |
| 6 | Place a Post Process Volume, enable Infinite Extent (Unbound), and set Min EV100 and Max EV100 both to 1.0 |
Hit Play at this point and the screen is nearly pure black. Now we add three lights.
Light 1: Lift the Floor with Sky Light
Select the Sky Light already in the level rather than adding a new one (adding one gives you two and unexpected brightness) and change its settings.
| Property | Value |
|---|---|
| Mobility | Movable |
| Source Type | SLS Specified Cubemap |
| Cubemap | Any reasonably bright HDRI cubemap (if you have none, turn off Real Time Capture and adjust with Intensity Scale) |
| Intensity Scale | 0.1 |
Warning: After deleting Sky Atmosphere, leaving Source Type on
SLS Captured Scenemeans it captures a now-black sky and emits almost no light. That's the reason behind "I added a Sky Light and nothing changed." Either specify a Cubemap or make sure there's something to capture.
Shadows that were pure black now lift to just barely readable silhouettes. Set this to 0 and unlit areas become total black, leaving the player unable to judge anything. "Dark" and "invisible" are different things, and this one light draws that line.
Light 2: A Torch Point Light
Place a Point Light partway down the corridor.
| Property | Value |
|---|---|
| Mobility | Movable |
| Intensity Units | Candelas (cd) |
| Intensity | 50.0 cd |
| Attenuation Radius | 400.0 |
| Light Color | Toward orange (around R 1.0 / G 0.6 / B 0.3) |
The Attenuation Radius sphere is the hard limit of influence. Drop the radius to 200 and you can see the light reaching only the player's feet. Move it around to get a feel for how far light carries.
Brightness falls off with the square of distance. At 50 cd you get roughly 50 lux at 1 m and about 12 lux at 2 m. When something is "darker than expected," multiply Intensity by 4 rather than 2 to match one step of distance.
Light 3: A Spot Light Guiding to the Exit
Place a Spot Light at the far end of the corridor, aimed from the exit back toward the player.
| Property | Value |
|---|---|
| Mobility | Movable |
| Intensity Units | Candelas (cd) |
| Intensity | 500.0 cd |
| Attenuation Radius | 1500.0 |
| Inner Cone Angle | 20.0 |
| Outer Cone Angle | 40.0 |
The gap between Inner and Outer is how soft the edge is. Set them equal for a hard outline; widen the gap for a softer falloff (defaults are Inner 0 / Outer 44).
Reaching far takes numbers much larger than a Point Light's. To light something 10 m away, start in the hundreds of candelas.
Verify It
Hit Play and walk the corridor. If the walls turn orange as you approach the torch, fall back into bluish gloom as you leave, and a white exit glows in the distance, it worked.
- Nothing changes at all → The Post Process Volume's
Infinite Extent (Unbound)isn't checked - Cranking intensity doesn't brighten anything →
Min EV100andMax EV100are still different values (exposure is still moving) - Only the area right by the light glows and the floor stays dark →
Attenuation Radiusis too small - Shadows are pure black and nothing is readable → The Sky Light's
Source Typeis stillSLS Captured Scene. With the sky deleted, it's capturing pure black - You can't walk at all →
GameMode Overrideisn't set, or there's no Player Start - Everything is oddly bright → You added a second Sky Light (check the World Outliner)
Now try deleting just the torch Point Light. The orange bounce light on the surroundings disappears with it. Making the walls reddish makes the Lumen bounce difference much more obvious.
Two things to take away.
- The darker the space, the more you need a "floor-raising" light: Before your hero light, use a Sky Light to establish a minimum brightness. Without it, unlit areas go pure black and the player can't even tell whether there's a wall there
- Attenuation Radius decides the range: Point and Spot lights never reach outside their radius no matter how high Intensity goes. When "it won't get brighter," suspect the radius before the intensity
Once the lights are placed, the final pass is color and tone. Balancing the overall look continues in the Post Process Volume article.
Checks for When Lumen Isn't Working
When "there's no bounce light" or "reflections are pure black," check these in order.
| Where to Check | What to Look At |
|---|---|
| Project Settings > Rendering | Is Dynamic Global Illumination Method set to Lumen? |
| Same | Is Reflection Method set to Lumen? |
| Same | Is Generate Mesh Distance Fields on? (required to run Lumen with Software Ray Tracing) |
| Mesh size | Extremely small objects and thin planes are hard for Lumen to pick up |
| Project age | Projects migrated from UE4 may not default to Lumen |
| Target platform assumptions | Lumen is on by default only for desktop-targeted projects created at Maximum quality. Mobile / Scalable / VR / Forward Shading don't qualify |
Toggling Generate Mesh Distance Fields requires an editor restart. If a setting doesn't take effect, restart and try again.
Also, if you've enabled Hardware Ray Tracing on a supported GPU, Lumen traces the meshes directly and depends much less on Distance Fields. Still, if you want a fallback for unsupported hardware, leaving it on is the safe choice.
The Lit > Lumen menu at the top left of the viewport offers visualization modes for Lumen's internal representation. That's how you confirm whether it even knows an object is there.
Bonus: Good to Know for Later
- Outdoors means the trio of Directional + Sky Light + Sky Atmosphere: You only get a natural outdoor look with all three. Without a Sky Light, shade goes unnaturally black
- Intensity units differ per light type: Directional Light is fixed to
lux. Point / Spot / Rect let you pickcd(candelas),lm, orUnitlessviaIntensity Units, and the standard default iscd. The same "10" means different things, so don't copy numbers between light types - Stacking lights gets expensive: Movable lights that cast shadows are especially costly. For small decorative lights, just disabling shadow casting (
Cast Shadows) saves a lot (see the profiling article) - Emissive materials emit light too: With Lumen enabled, indirect light from self-illuminating materials spreads to the surroundings. That's how you get the "bleed" of neon and magic circles. But they're no substitute for a key light. You need Emissive values well above 1, small bright surfaces flicker easily, and they can't produce sharp shadows. Pair them with an actual light where you need reliable illumination (see the material article)
- If you want to place a lot of lights, there's a dedicated system: MegaLights changes the very premise that "more movable lights means heavier." It lets a large number of dynamic lights cast shadows without falling apart, making neon streets, dozens of torches, or heavy spell VFX practical. Check
Project Settings → Renderingto see whether it's available in your version (it has hardware requirements) - If it's heavy, move to baking: This can cut runtime cost dramatically. But disable Lumen first (set
Dynamic Global Illumination MethodtoNonein Project Settings and enableAllow Static Lighting). Then set the lights that never move to Static and bake withBuild Lighting Only. Rebaking takes time, so save it for after the level layout is settled
Summary
- There are four main direct lights. Directional cares only about direction; Point/Spot/Rect have Attenuation Radius as their hard limit of influence
- Mobility is "when the lighting is computed." While using Lumen, stay on Movable/Stationary, since Static baking can't coexist with it
- UE5 has Lumen on by default. Bounce light you never placed fills the space automatically
- The culprit behind "too dark" is usually auto exposure. Match
Min EV100andMax EV100to stop it before you tune anything - Dark spaces need a floor-raising Sky Light. "Dark" and "invisible" are different things
In the level you're building, where's the thing you most want the player to notice first? Start by putting one light there.