You've got it working on keyboard and mouse. But plug in a pad and the character doesn't budge. Even on PC games, gamepad support is the first thing reviewers flag at release, and if you're thinking about shipping on Steam it's effectively mandatory.
That said, you don't have to rebuild from scratch. If you built it with Enhanced Input, most of it works by just adding pad keys to the existing setup . This article covers the three pad-specific topics, stick drift, device detection, and navigating UI with a pad, while making a keyboard-only mini-game work on a gamepad too.
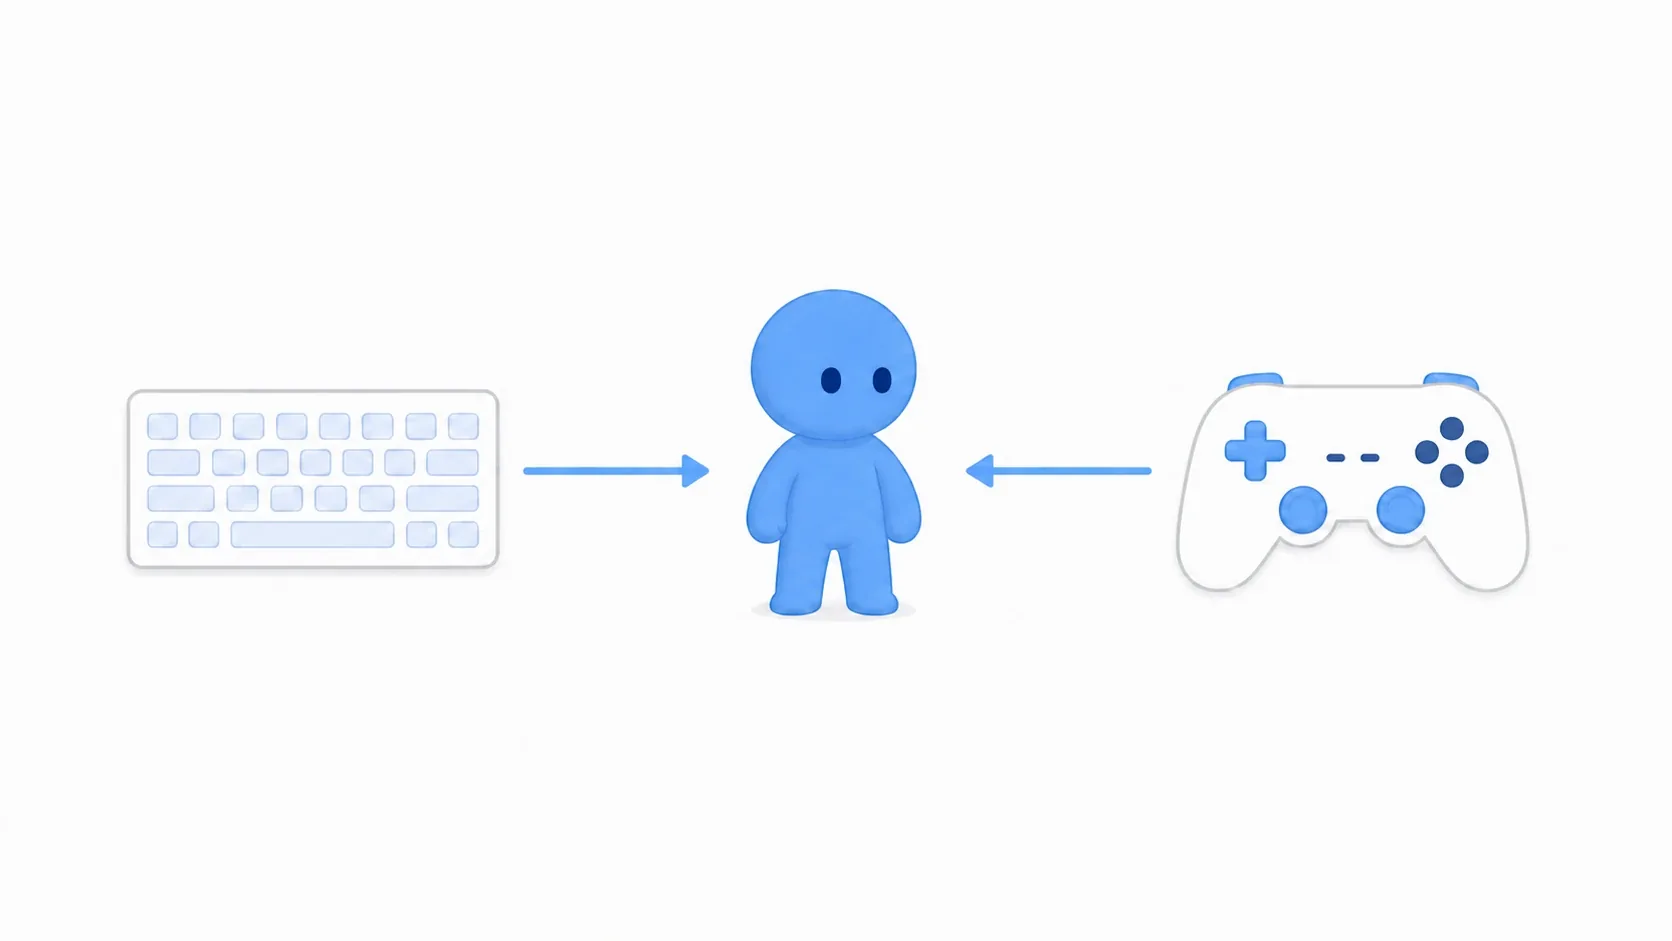
What You'll Learn
- The basic of just adding pad keys to an existing Input Action
- Fixing stick drift that walks on its own with the Dead Zone
- Handling triggers (Axis-style buttons)
- Detecting the current device to swap button prompts
- Handing focus to the pad when a menu opens
- Hands-on: making a keyboard-only mini-game work on a gamepad too
Just Add Pad Keys
If you built it with Enhanced Input, the first step of pad support is very easy. You just assign pad keys to the same Input Action .
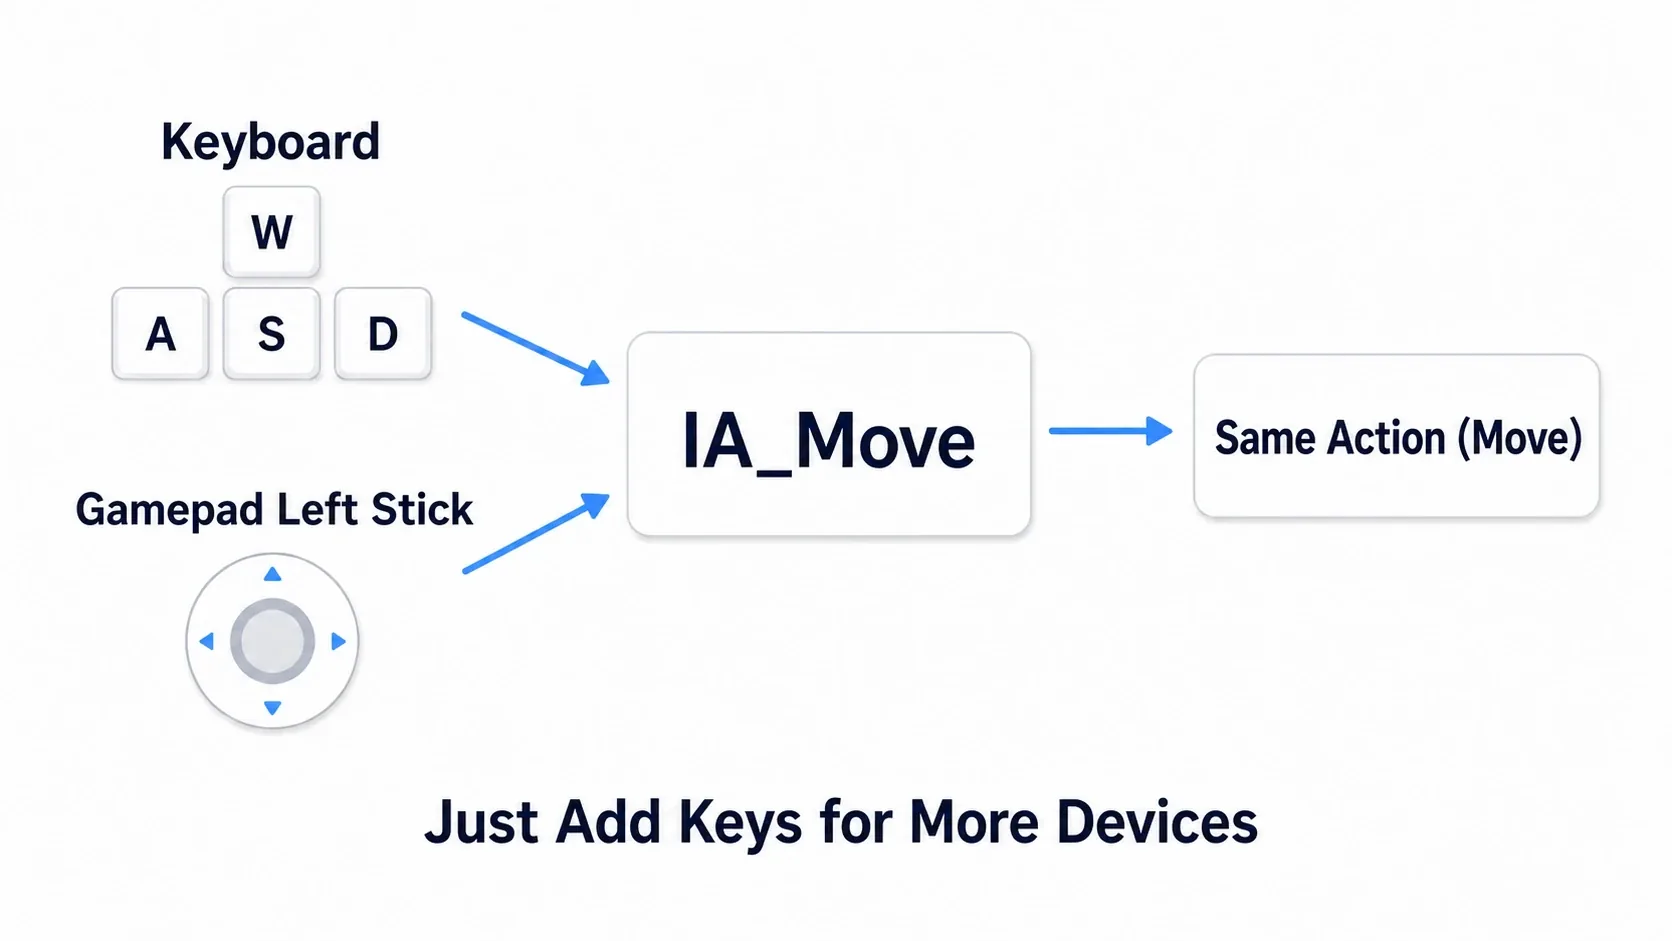
For example, in the "Move" Input Mapping Context (IMC), alongside the existing WASD keys, assign the gamepad left thumbstick . Now the same IA_Move fires on both keyboard and pad, and your game-side logic stays as one, supporting both.
This is Enhanced Input's strength. Because the action (Input Action) and the keys that trigger it (IMC) are separated, when input devices increase, you just add keys . Jump and other actions follow the same pattern, adding pad buttons (like a Gamepad Face Button).
Fixing Stick Drift with the Dead Zone
The first thing you'll hit in pad support is stick drift . The character keeps inching forward on its own even though you let go. This happens because the stick doesn't fully return to dead center and keeps sending its slight tilt as input.
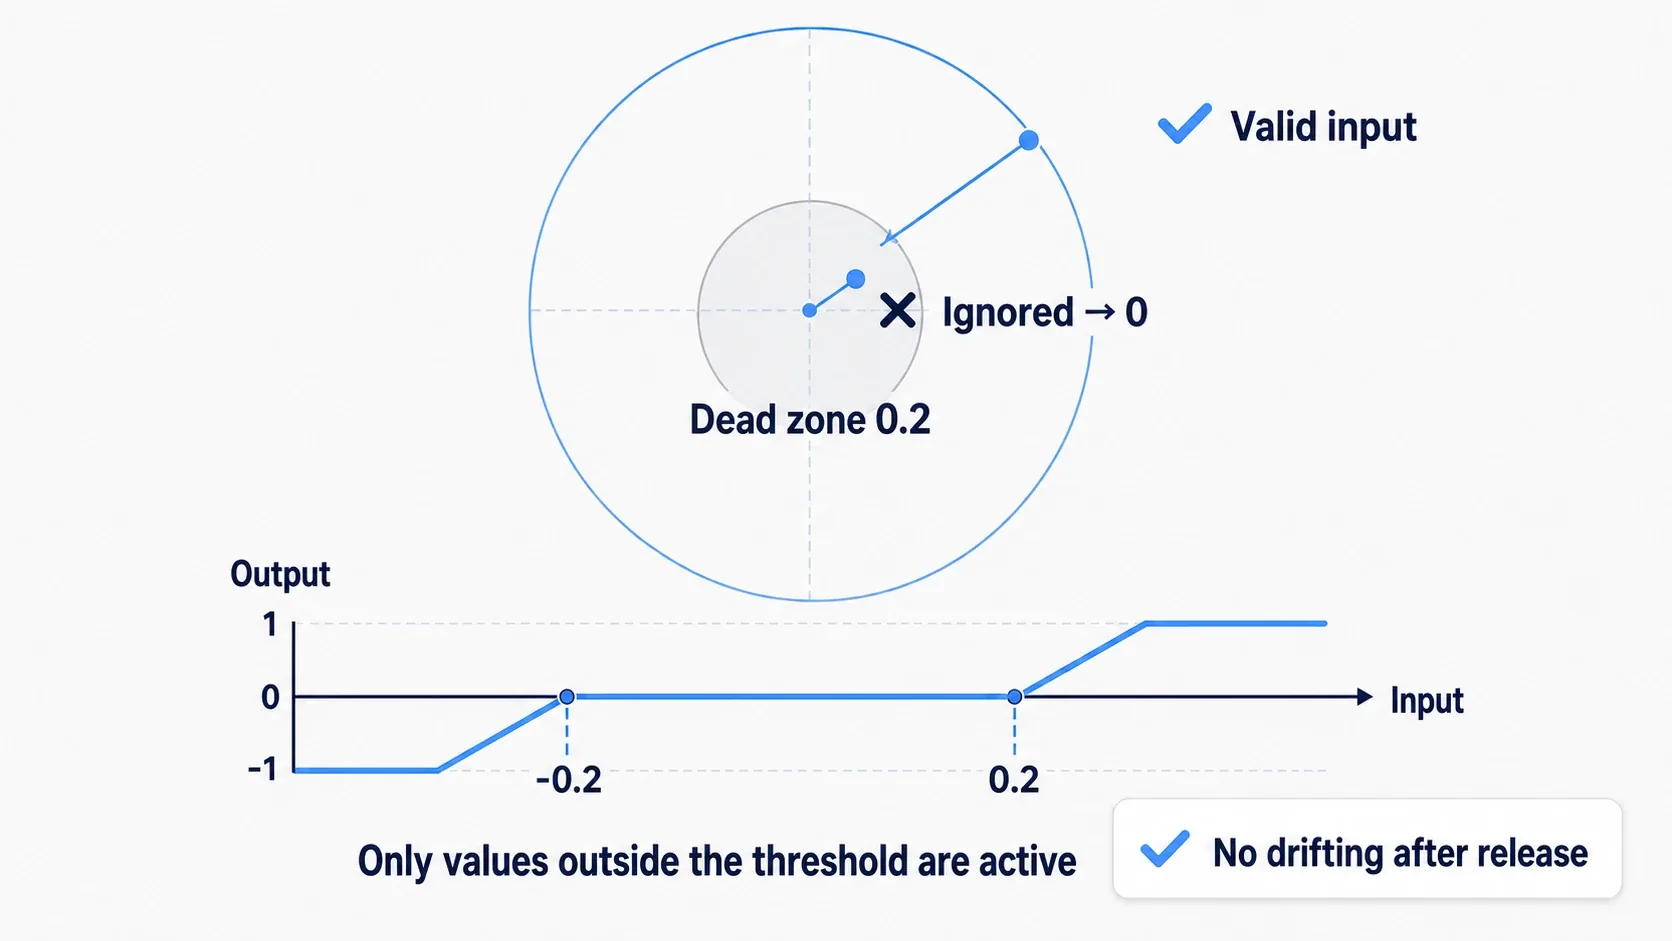
The fix is to add a Dead Zone modifier to the Move Input Action.
- Set the Lower Threshold to around
0.2 - Now any input where the stick's tilt is under 0.2 is treated as 0 and cut off
- The tiny drift when you let go doesn't exceed 0.2, so the character stops properly
You can put the Dead Zone on the Input Action overall, or on the IMC's gamepad mapping side. Putting it on the IMC's pad mapping side makes the intent clear ("this is a pad-only setting") and doesn't affect keyboard input. Stick modifiers also include Swizzle Input Axis Values (swapping axes) and Negate (inverting) for tidying input direction, but the first one to add is the Dead Zone.
Handling Triggers
A pad's triggers (L2 / R2, Gamepad Trigger) are Axis-style buttons where the press depth reads from 0.0 to 1.0. Not just on/off, they tell you how deep you pressed.
- Use as on/off: ignore a racing game's "just a touch of gas" and treat the button as pressed once it crosses a threshold (e.g. 0.5)
- Use as analog: use the press depth directly for accelerator strength or a bow's draw
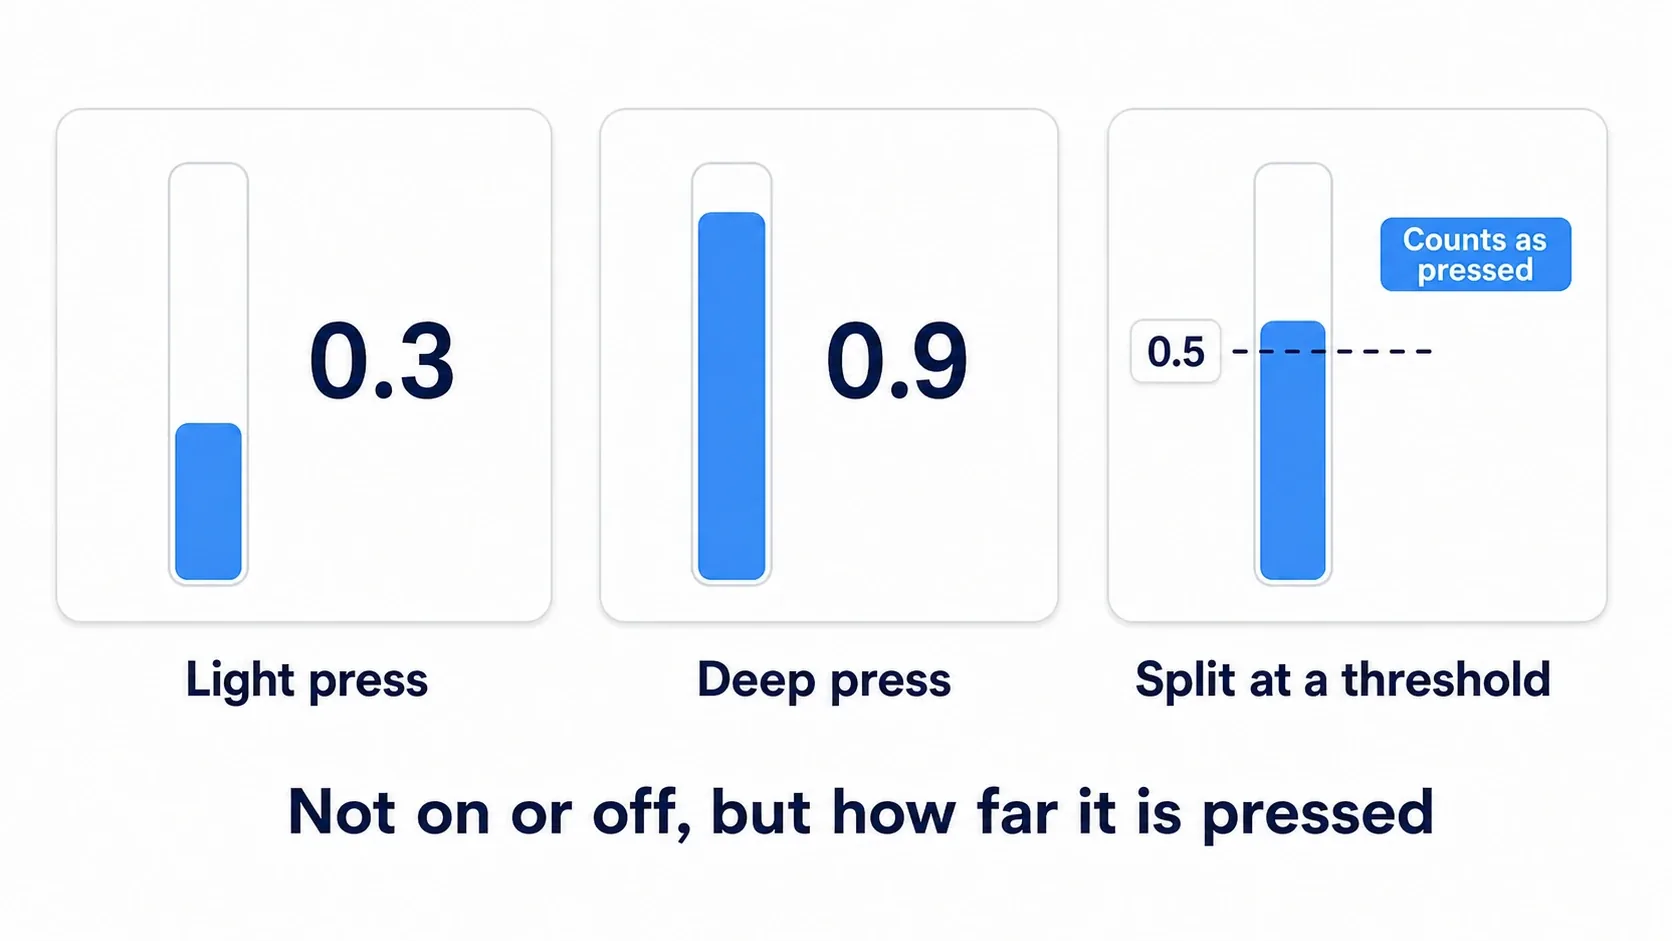
With Enhanced Input, a trigger too can be added to IA_Fire and the like as just a key assignment. When you want the analog value, set the Input Action's Value Type to Axis1D (float) and receive the press depth (0.0 to 1.0).
Detecting the Current Device
You want to change the prompt "Investigate with E" to "Investigate with X" while the player is holding a pad. For that, you need to know whether the player is currently on keyboard or pad .
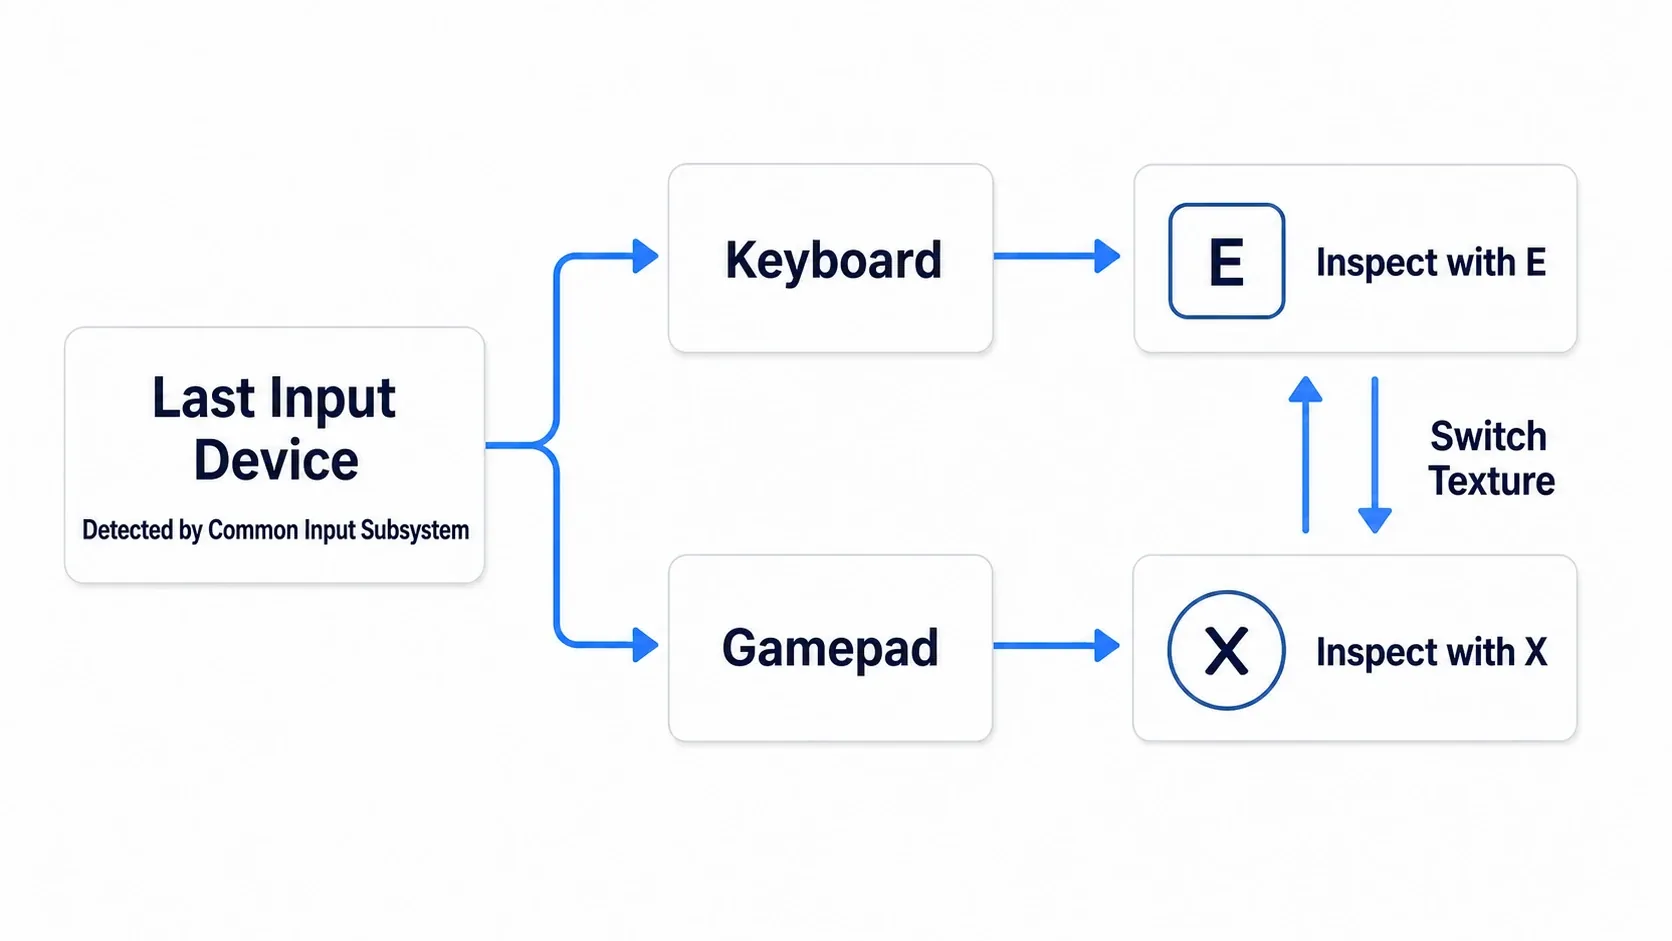
Let me be honest here. Enhanced Input alone has no clean built-in node for knowing the most recent device . Naively, you could record "was the last fired input from the keyboard or the pad" yourself, but it has many gaps and isn't stable.
The reliable way is the Common Input Subsystem provided by the Common UI plugin.
- Get Current Input Type: returns whether the current input is Mouse & Keyboard / Gamepad / Touch
- On Input Method Changed: notifies you the moment the input device switches
Take that notification and swap the button-prompt Texture (the "E" image and the "X" image), and the display switches the instant you grab a pad. If you want to build device detection and button prompts properly, adopting Common UI is the proper route (more on Common UI below).
Handing Focus to the UI
Another thing easy to forget in pad support is making the menu operable with the pad . With a mouse you click a button directly, but a pad needs a concept of "which button you're currently on (focus)".
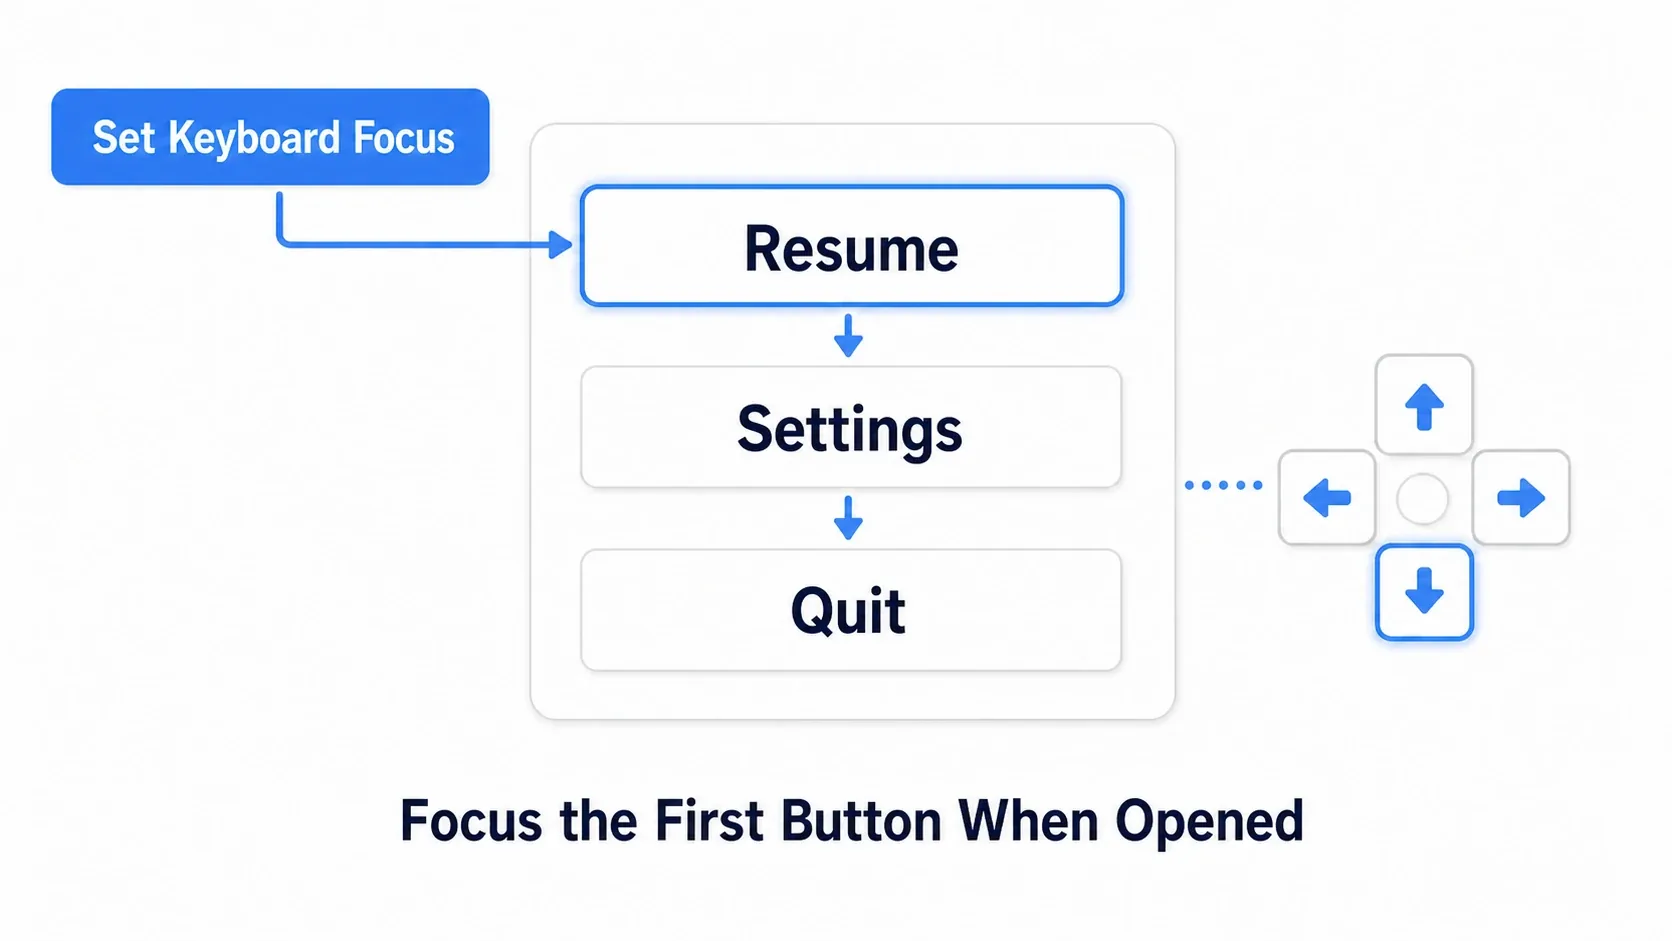
The key is to give focus to the first button the moment the menu opens . Forget this and the menu opens but pressing the D-pad selects nothing, the "lost cursor" state.
- Inside the event that shows the menu, call
Set Keyboard Focuson the first button (e.g. "Resume") - Now the menu opens with that button selected, and you can move between items with the D-pad
The important thing here is that this article stops at "giving the first focus" . How focus moves between buttons (Navigation settings) and what to do when it gets lost are covered in full by UI Focus Management. For now, just get "hand focus to the first one when it opens" down.
Hands-On: Making a Mini-Game Work on a Gamepad
A Third-Person-style action game, a top-down shooter, a puzzle game's menu navigation. "Making a keyboard-only game playable on a pad just by plugging one in" is a path every game goes down. Here we run one lap of it, with an addition to the existing IMC, a Dead Zone, and menu focus.
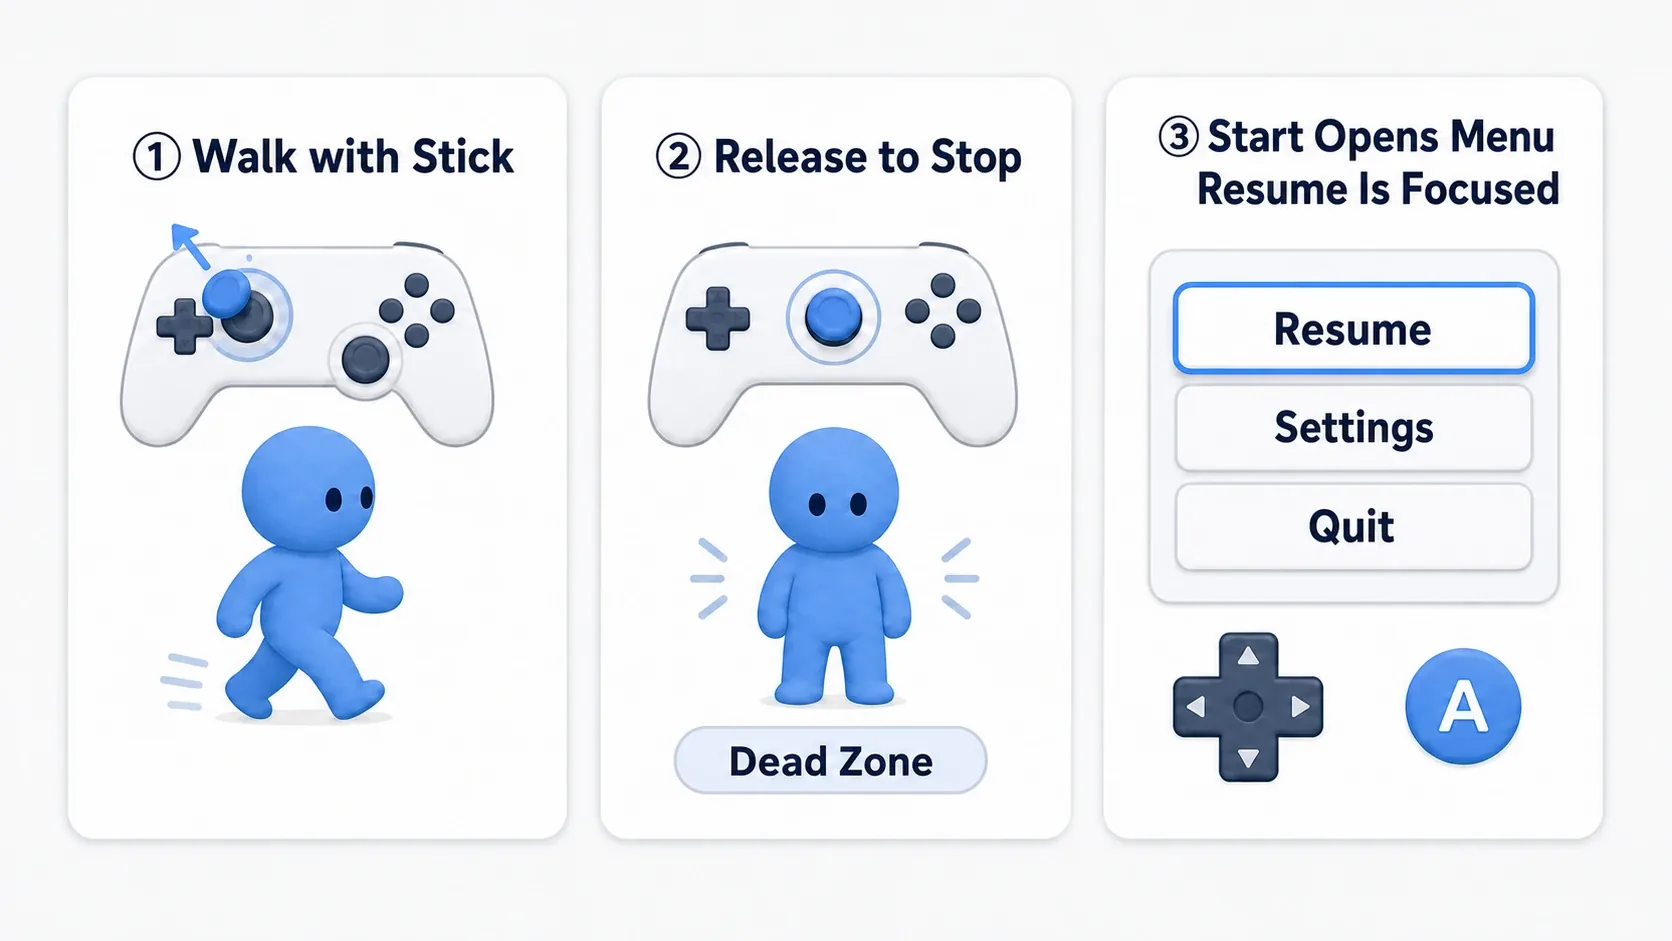
We're building a mini-game where you plug in a pad and walk with the stick, it stops when you let go (even with drift), and Start opens a menu you can navigate with the D-pad and confirm with A .
Here's what it looks like running. Plug in a pad, tilt the stick, and the character walks. Let go of the stick and it stops dead even with some drift. Press Start and the pause menu opens, with the "Resume" button already selected the moment it opens , and you can move to "Settings" and "Quit" with the D-pad and confirm with the A button.
Setup Conditions
| Item | Setting |
|---|---|
IMC_Default (Input Mapping Context) | Assign IA_Move the keyboard WASD plus the Gamepad Left Thumbstick |
IA_Move modifier | Add a Dead Zone (Lower Threshold = 0.2 ) |
Pause menu WBP_PauseMenu | Reuse the pause menu assets. Make "Resume" the first focus target |
| Key to open the menu | Assign IA_Pause the Gamepad Special Right (Start) |
Step 1: Add the Pad to the IMC and Attach a Dead Zone
Open IMC_Default and add the Gamepad Left Thumbstick to the IA_Move mapping. Add a Dead Zone to that pad mapping's Modifiers and set the Lower Threshold to 0.2.
IMC_Default
  IA_Move
    ├ W / A / S / D (keyboard)
    └ Gamepad Left Thumbstick (pad)
         Modifiers: Dead Zone (Lower Threshold = 0.2)
Step 2: Hand Focus When the Menu Opens
When IA_Pause fires, show the pause menu, and right after, call Set Keyboard Focus on the "Resume" button.
IA_Pause (Started)
  → Create Widget (WBP_PauseMenu) → Add to Viewport
  → Set Game Paused (true)
  → Get "Resume" button → Set Keyboard Focus   // this is the key
Verifying It
Plug in a pad and Play. If it worked, you walk with the stick and it stops even with drift when you let go . Press Start and the menu opens, and you can move between "Resume / Settings / Quit" with the D-pad and confirm with A .
Here's how to narrow it down when it doesn't work.
- Keeps walking after you let go → the
IA_Movehas no Dead Zone . Or the Lower Threshold is too small (make it around 0.2) - The menu opens but the D-pad selects nothing → you didn't call
Set Keyboard Focus. Hand focus to the first button (previous section) - The stick moves backwards or sideways → the axis direction is off. Tidy the axes with
Swizzle Input Axis ValuesorNegate
Two things to take away.
- Add the pad to existing assets: the action (IA) stays as-is; you just add pad keys to the IMC. If you built with Enhanced Input, supporting both is an "addition", not a "rebuild"
- The pad-specific traps are Dead Zone and focus: keeps walking means Dead Zone, can't select in the menu means focus. These two are the crux of pad support that keyboards don't have
Bonus: Good to Know for Later
Common UI as an option. If you want to seriously build automatic button-prompt swapping, unified handling of multiple devices, and robust console-oriented UI, Epic's Common UI plugin is the proper route. Not just device detection (Common Input Subsystem), but button-icon swapping and focus handling too come in a well-organized system. A naive build is plenty while small, but when you feel "I want pad, mouse, and console to coexist properly", consider adopting it.
Local co-op with two pads. With two pads, you can do two-player on one PC with split-screen local multiplayer. The mechanism for assigning a pad per player is covered there.
Combine it with key config. If you want players to be able to change pad button assignments too, the key rebinding mechanism works as-is. Pad support and key config are both compatible features that ride on top of Enhanced Input.
Summary
Making a keyboard game support the pad proceeds with this flow.
| Topic | What to do | Tool |
|---|---|---|
| Move | Add pad keys to existing IAs | Add Gamepad keys to the IMC |
| Stop | Cut off drift | Dead Zone modifier (0.2) |
| Detect | Know the current device | Common Input Subsystem (Common UI) |
| Select | Hand focus to the menu | Set Keyboard Focus (details in the UI article) |
And the principle running through it is that with Enhanced Input, it's an "addition", not a "rebuild" . Because action and keys are separated, when devices increase you just add.
With this, your game plays on a pad too. Plug in the pad in your hand and, first, walk one step with the stick.
Further Learning
- Enhanced Input System Complete Guide — the basics of IA/IMC
- Changing Key Bindings (Rebinding) — the mechanism for changing assignments
- UI Focus Management — focus movement and Navigation with a pad
- Split-Screen Local Multiplayer — two-player with two pads