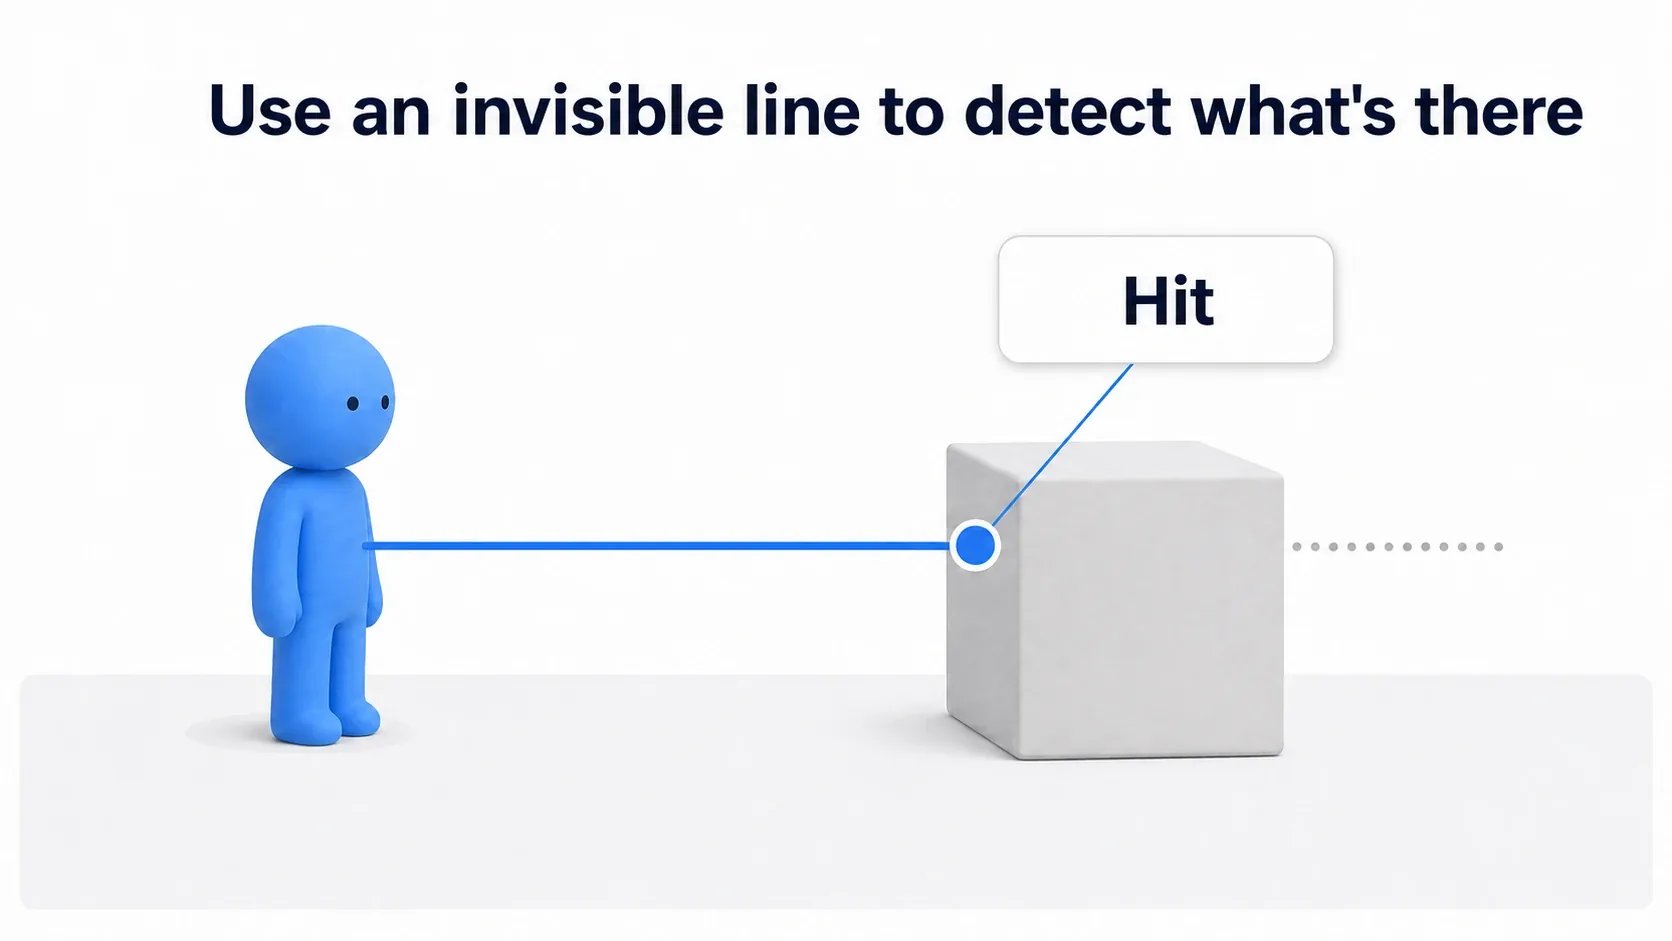
You want to inspect the door in front of you. You want to know who your shot hit. You want to check whether the ground below is floor or a cliff edge. Different goals, same underlying operation: extend a line from a point in a direction, and report back the first thing it touches.
In UE5 that's the job of Line Trace. Other engines call this a raycast. This article covers the basic shape of a Line Trace, the information you get back from a hit, and how to see the trace you built with your own eyes.
What You'll Learn
- Line Trace fires an invisible line and tells you what it hit
- When to use By Channel versus By Object Type
- How to build Start and End ( position + direction × distance )
- The four pieces of information you'll use from the Hit Result
- How to make the line visible with Draw Debug Type
- Hands-on: an interact feature that prints the name of whatever you're looking at
What a Line Trace Is
A Line Trace draws an invisible line through the level for a single instant and reports back what it touched. The line isn't a physical object, and it doesn't push anything it hits. It's purely a query.
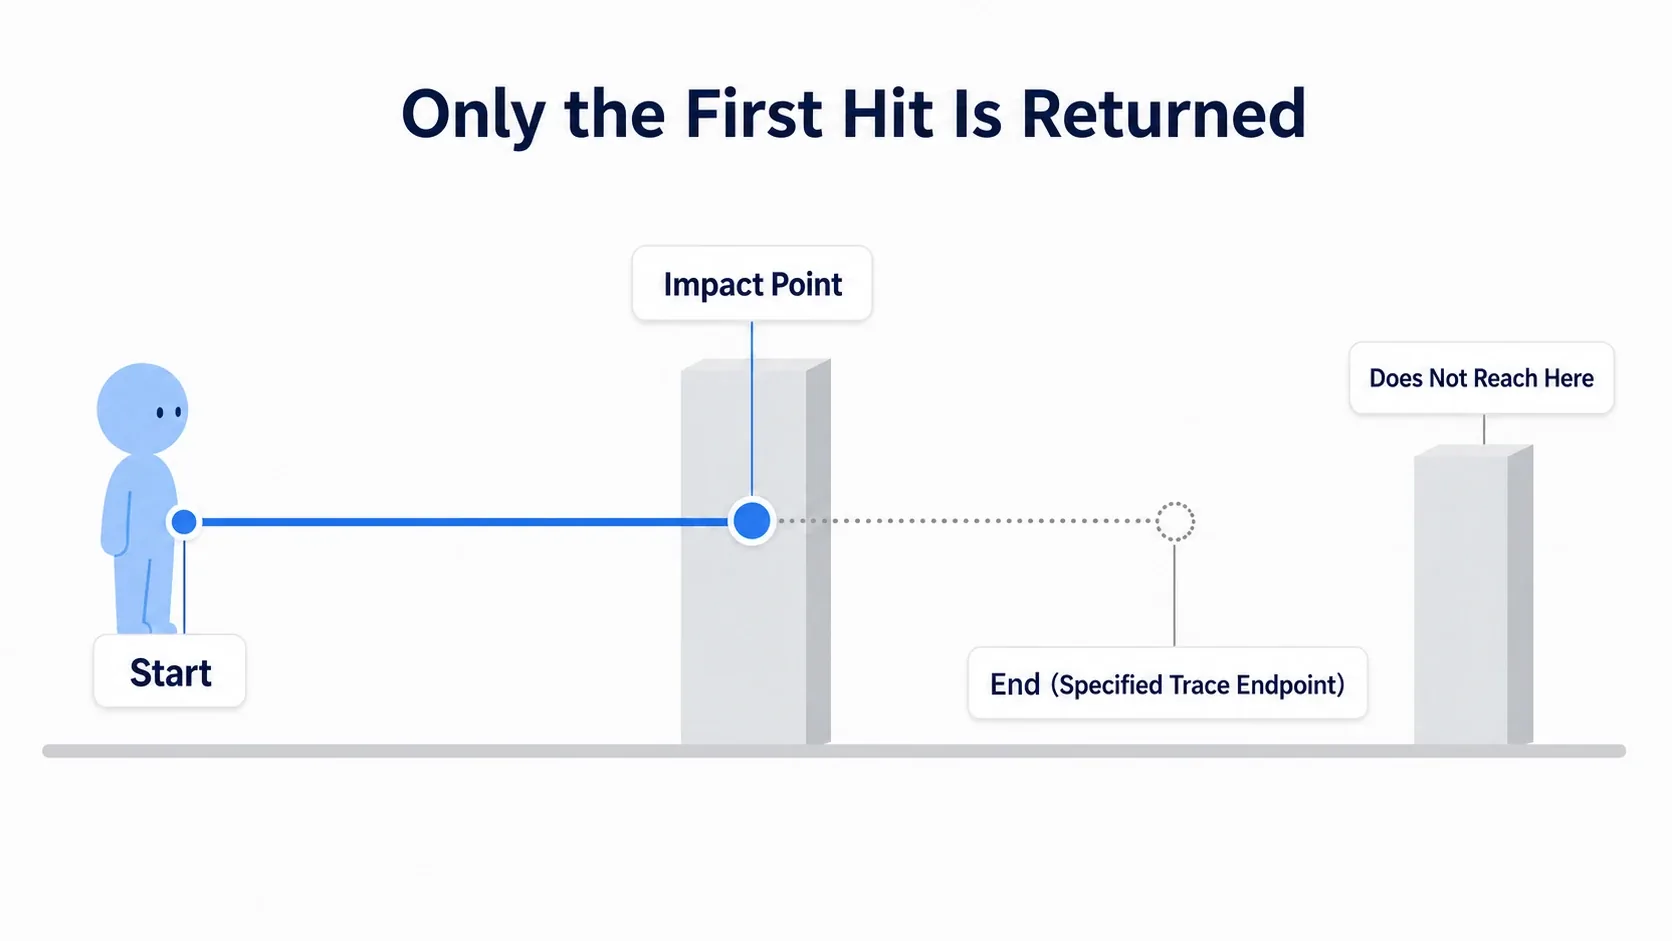
You only need three inputs.
| Input | Meaning |
|---|---|
| Start | The start of the line (a vector) |
| End | The end of the line (a vector) |
| Trace Channel / Object Types | What you're testing against |
And you get two outputs back.
| Output | Meaning |
|---|---|
| Return Value (Boolean) | Whether anything was hit |
| Out Hit (Hit Result) | The full details of what was hit |
The range of uses is what makes this so valuable. Hitscan weapons, line-of-sight checks, ground detection, picking whatever is under the mouse cursor. All of them are these same three inputs and two outputs — only how you build Start/End and what you do after the hit changes.
Building Start and End
Start and End are where people trip first. You want to write "300 cm forward," but the node wants two coordinates.
The answer is to turn this formula directly into nodes.
End = Start + (direction vector × distance)
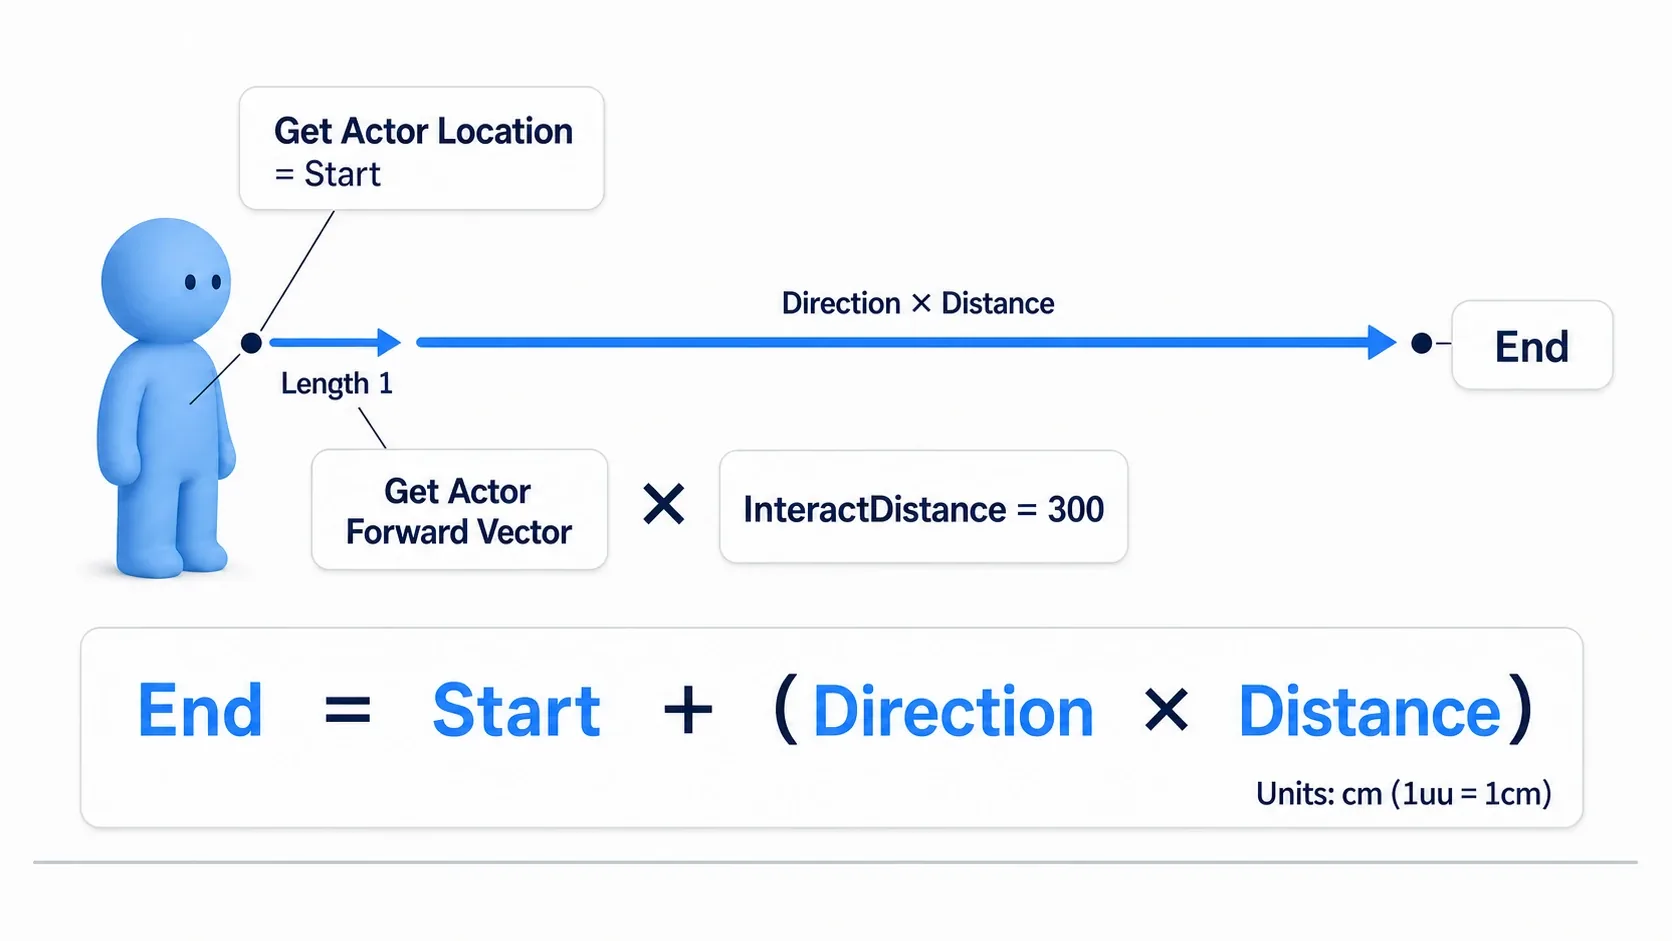
In Blueprint, that looks like this.
| What you need | Node to use |
|---|---|
| Start | Get Actor Location (your own position) |
| Direction | Get Actor Forward Vector (the way you're facing, a vector of length 1) |
| Multiply by distance | Multiply (Vector × Float) |
| Add | Add (Vector + Vector) |
Get Actor Forward Vector returns a vector of length 1. Since it only expresses direction, multiplying it by 300.0 gives you "300 cm worth of forward." Add that to Start and you have End.
The unit is centimeters. In UE's defaults 1 uu (Unreal Unit) = 1 cm, so 300 means three meters out.
To trace along the view direction instead, swap the origin and the direction. For third person, use the camera component's Get World Location and Get Forward Vector; for the controller's aim, run Get Control Rotation through Get Forward Vector. The shape of the formula never changes.
By Channel vs. By Object Type
There are several Line Trace nodes, but two are worth learning first.
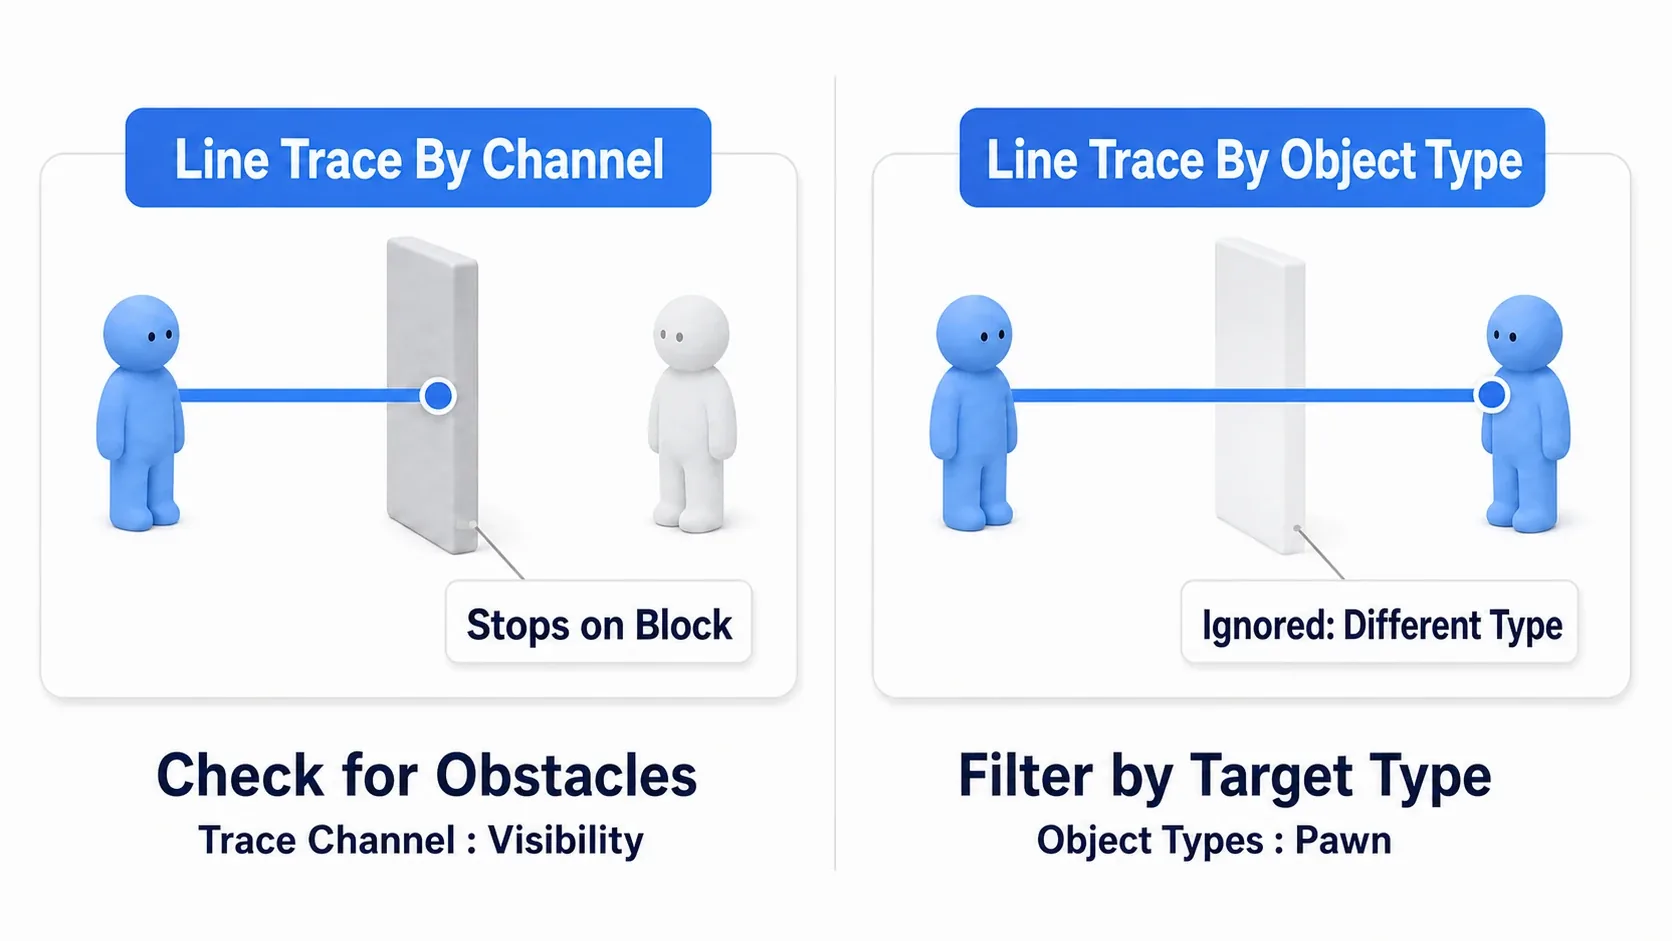
| Node | How it tests | Good for |
|---|---|---|
| Line Trace By Channel | Finds things set to Block on the channel you specify | Blocking geometry, line of sight, gunfire |
| Line Trace By Object Type | Finds the kinds of object you specify (WorldStatic / Pawn / PhysicsBody, etc.) | Picking up only enemies, only movable objects |
By Channel is the tool for "is there anything at all in between, wall or box or enemy?" Two channels are available by default, Visibility and Camera, and when in doubt pick Visibility.
By Object Type filters by what things are. Put only Pawn in the Object Types array and you'll ignore walls and pick up characters only.
Either way, each actor's collision settings decide the final result. When a wall you're sure should be hit isn't registering, look at the target's collision settings rather than the trace. Adding your own channel is covered in the collision profile article. For the shape of the collision itself, the Simple/Complex collision article is worth a read too.
Put Yourself in Actors to Ignore
Every trace node has an array input called Actors to Ignore. Actors listed there are skipped even if the line touches them.
Since the start point is your own position, the line begins inside your own body. If your collision blocks the channel you're tracing, the trace hits you the instant it leaves and stops there. The default Pawn profile ignores Visibility, so it doesn't always happen, but it will the moment you change your collision settings.
Feed a Make Array with one Self into Actors to Ignore. Feel free to make this a habit. It costs nothing and eliminates an entire class of hard-to-diagnose bug.
What You Get from the Hit Result
On a hit, Out Hit contains a struct packed with information. Wire it into a Break Hit Result node to expand it. Four pins do most of the work.
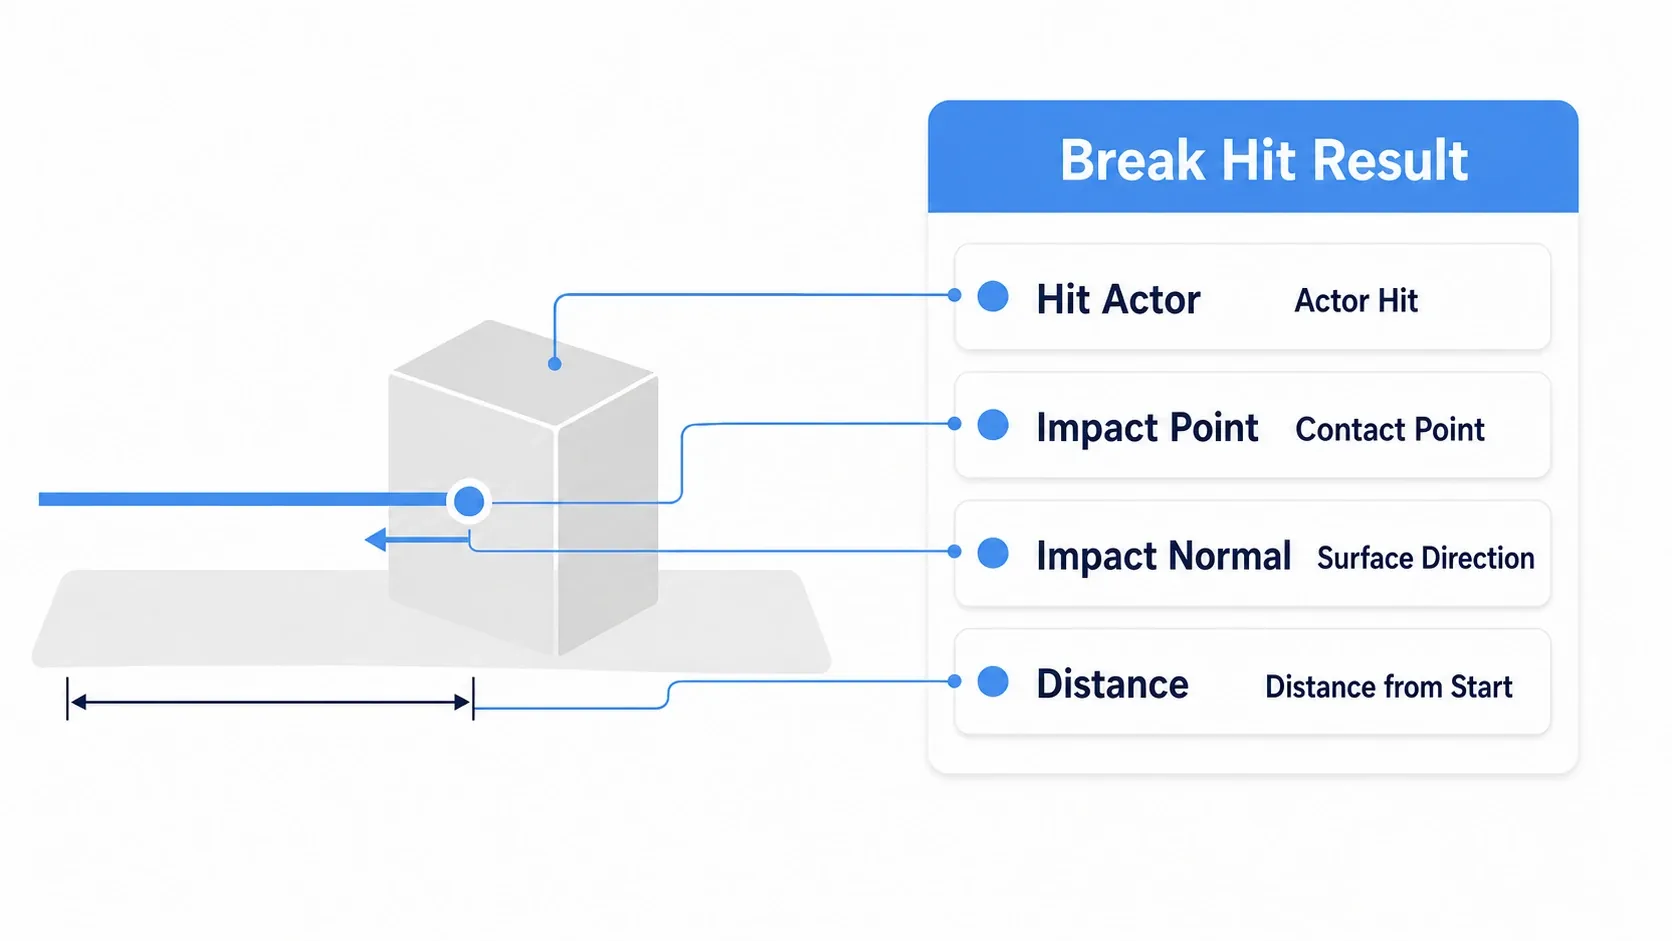
| Pin | Type | Contents | Where it's used |
|---|---|---|---|
| Hit Actor | Actor reference | The actor that was hit | Identifying the target, sending damage |
| Impact Point | Vector | The coordinate where the line touched the surface | Where to place bullet holes and effects |
| Impact Normal | Vector | The direction that surface faces (a perpendicular vector) | Aligning decals to walls, reading slope angles |
| Distance | Float | Distance from Start to Impact Point | Checking whether the target is in range |
Impact Normal is confusing at first, but it's just an arrow showing which way the surface you hit is facing. Hit the floor and it points straight up; hit a wall and it points sideways. Match your effect's rotation to this value and bullet decals sit flush against the surface.
You can also get Hit Component (the component that was hit) and Hit Bone Name (the bone that was hit). Having the bone name means you can tell a head shot from a body shot. Headshot detection is built off exactly this.
Note: You'll see two similar pins,
LocationandImpact Point. For a Line Trace they're the same value, but for the Sphere Trace covered later they diverge:Impact Pointis where the surface was touched, whileLocationis the center of the sphere at the moment of contact.
Seeing the Line with Draw Debug Type
Line Traces are invisible. That's exactly why, when nothing hits, you have no idea what to suspect.
Trace nodes have an input called Draw Debug Type, and changing it draws the line on screen.
| Value | Behavior |
|---|---|
| None | Draws nothing (default) |
| For One Frame | Draws for one frame. For traces fired every Tick |
| For Duration | Stays for the number of seconds set in Draw Time |
| Persistent | Stays forever |
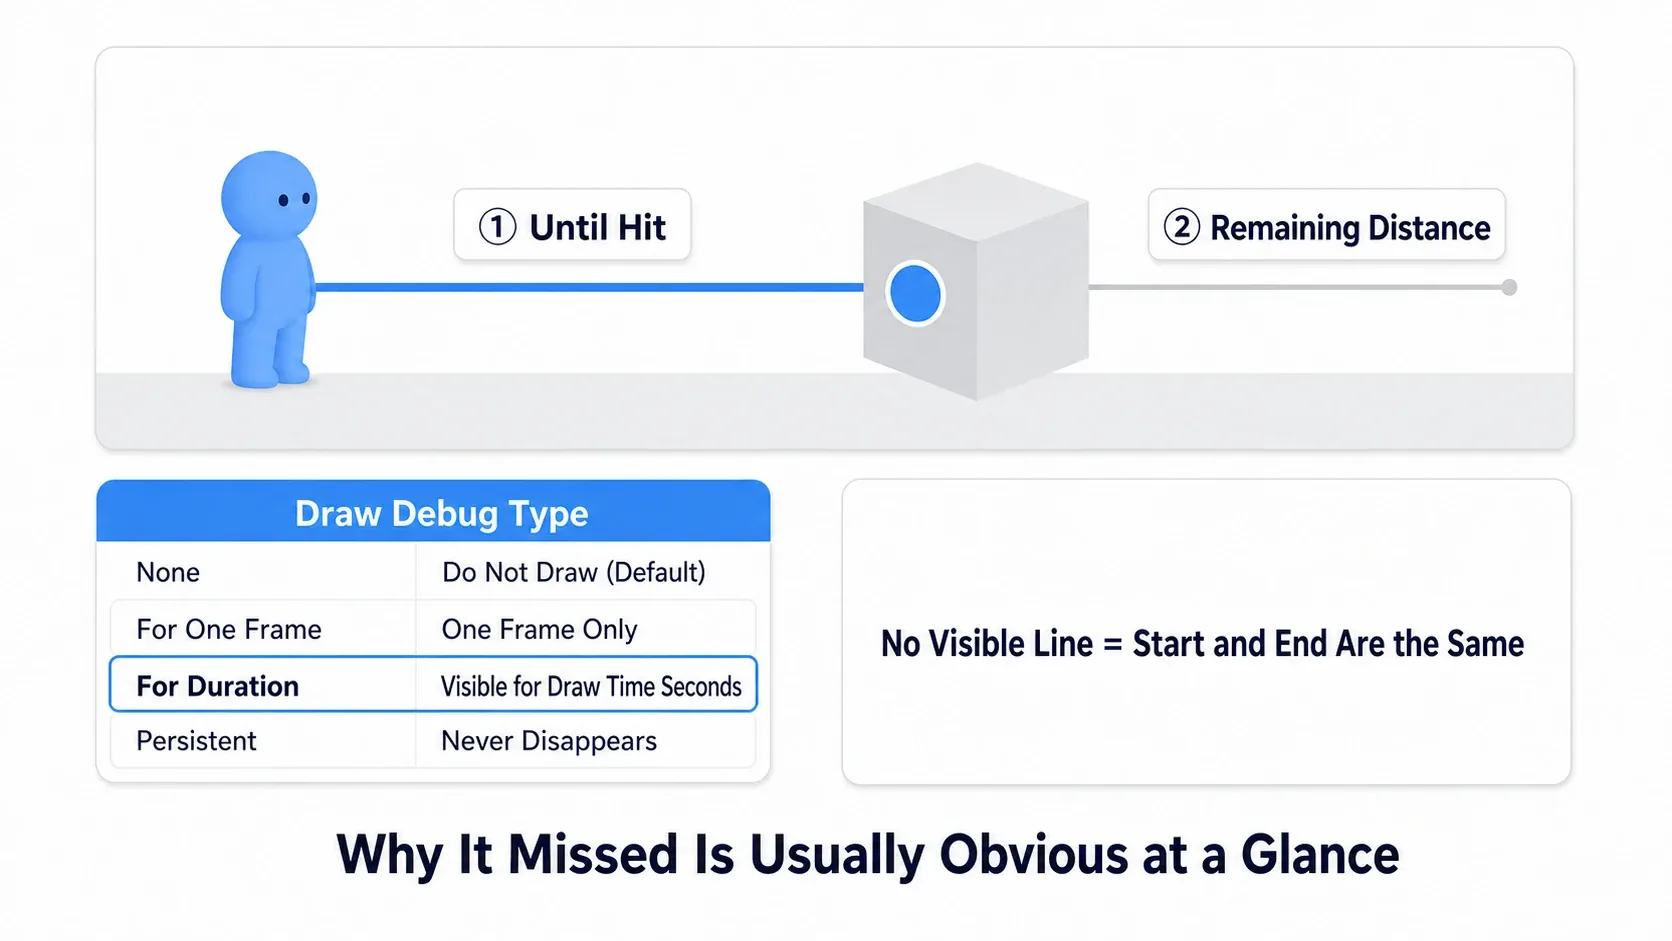
Setting it to For Duration with Draw Time at 2.0 is your first move. The lines that appear mean something specific.
- Red line: from Start to the point that was hit
- Green line: from that point to End (the part that didn't reach anything)
- Marker at the hit point: the Impact Point location
So all red and no green means the line flew the full distance without hitting anything. If you see no line at all, Start and End are the same coordinate. Most causes of "nothing hits" are visible at a glance here.
Debug drawing is stripped from Shipping builds, so leaving it in won't affect the released game. It does appear in Development packages, so before handing out a test build, check it alongside the packaging article. Other debugging tools are collected in the Print String article.
Hands-On: Inspecting What You're Looking At
Examining a door in a horror game, opening an ARPG treasure chest, flipping a switch in an escape room, picking up an FPS item. Press E to inspect what's in front of you works the same way in every genre. Here we'll build it all the way to displaying the name of whatever you're looking at.
The Goal
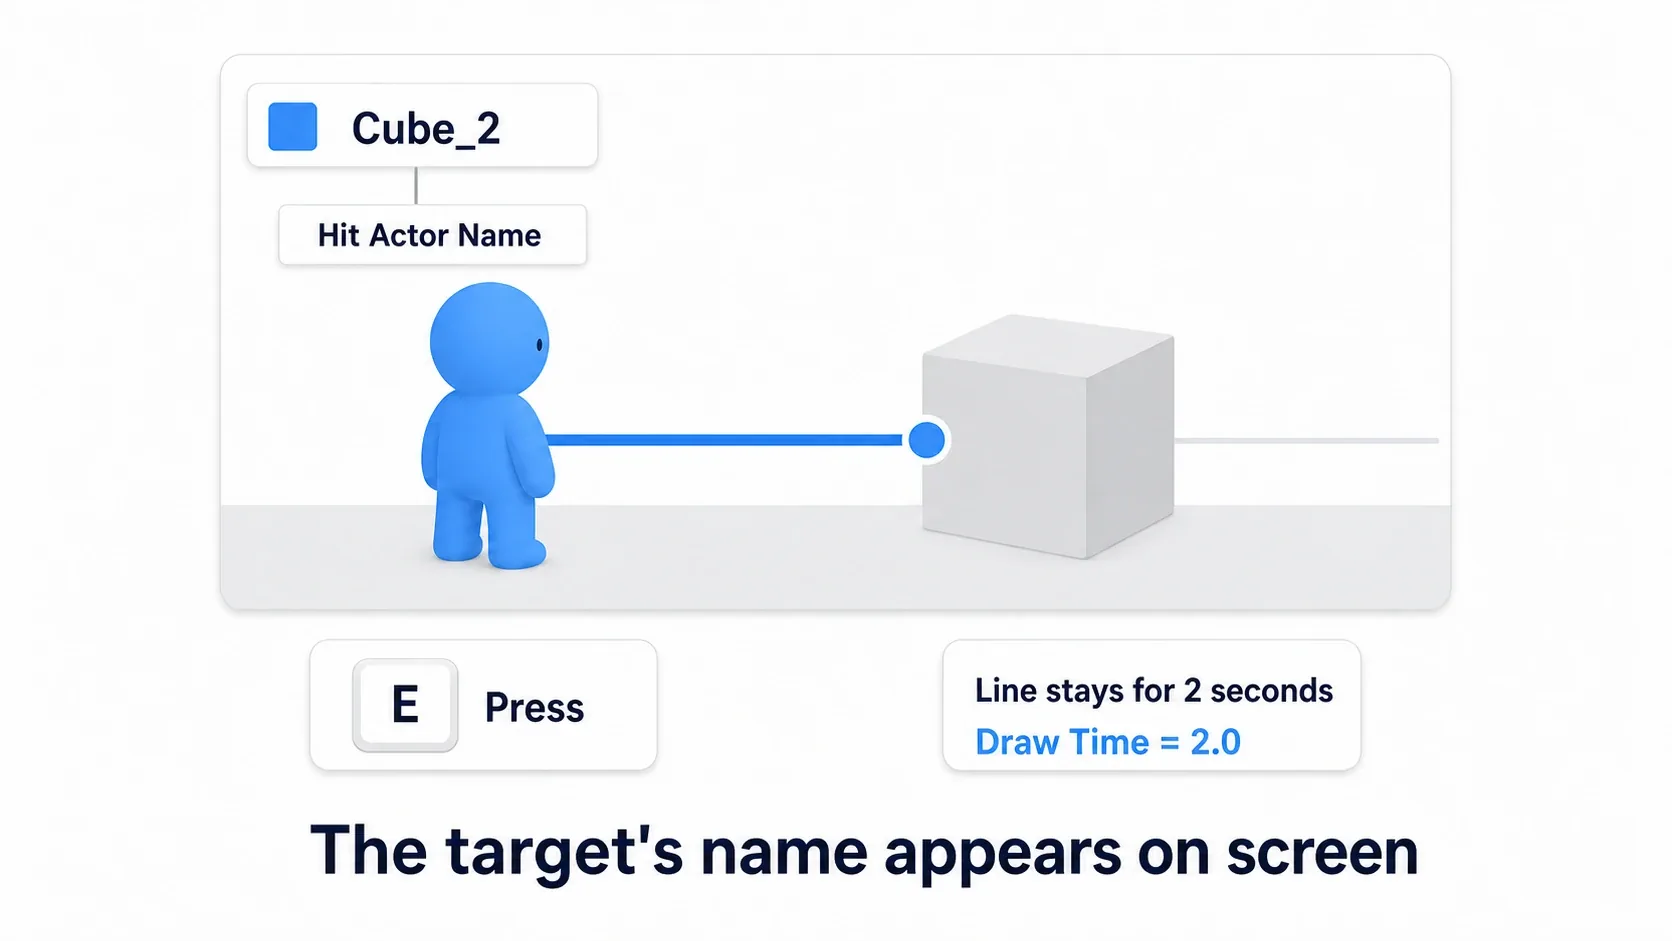
Face a box and press E, and a red line appears in front of you for two seconds while the name of the actor you hit shows up in the top-left of the screen. Press it facing nothing and it prints "None."
Setup
Create a new project from the Third Person template (Blueprint) and place two or three Cube actors in front of the character. You'll be editing BP_ThirdPersonCharacter.
Add one variable to that Blueprint.
| Variable | Type | Default | Role |
|---|---|---|---|
InteractDistance | Float | 300.0 | How far you can inspect (cm) |
After creating the variable, compile before entering the default value. The default value field isn't editable until you compile.
The Node Graph
Build this in the event graph.
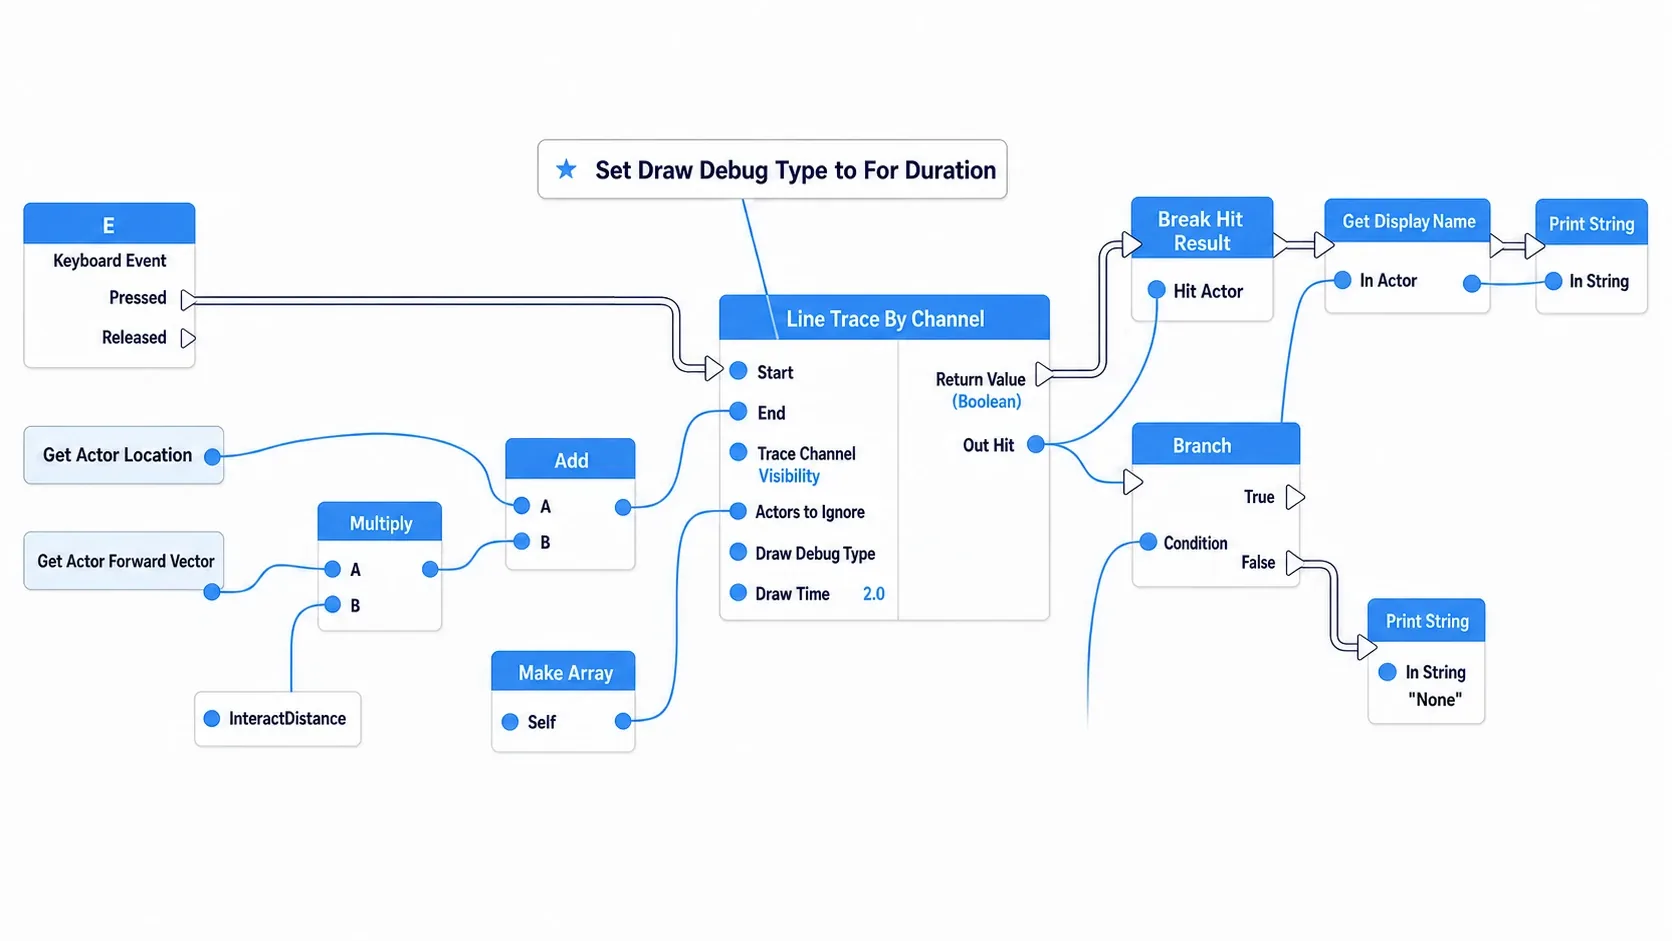
If you'd rather follow along in text, the same thing looks like this.
Event: Keyboard Event "E" (Pressed)
  ├ Get Actor Location ──────────────────────→ Start
  └ Get Actor Forward Vector
       → Multiply (A: Forward Vector, B: InteractDistance)
       → Add (A: Get Actor Location, B: result of Multiply) → End

  → Line Trace By Channel
       Start           : Get Actor Location
       End             : result of Add
       Trace Channel   : Visibility
       Actors to Ignore: Make Array (element 0 = Self)
       Draw Debug Type : For Duration
       Draw Time       : 2.0

  → Branch (Condition: Line Trace's Return Value)
       True  → Break Hit Result → Hit Actor → Get Display Name → Print String
       False → Print String (In String: "None")
Build it in this order.
- Right-click empty graph space, type
Ein the search box, and add Keyboard Events > E - Right-click again to add
Get Actor LocationandGet Actor Forward Vector - Drag from the Forward Vector output pin and add
Multiply. WireInteractDistanceinto B (drag the variable while holdingCtrlto get a getter node) - Add
Add, wiring Get Actor Location into A and the Multiply result into B - Add
Line Trace By Channeland wire up Start and End - Click the + next to
Actors to Ignoreto add one element, and wire inSelf - Set the
Draw Debug Typedropdown to For Duration and enter2.0forDraw Time - Wire Return Value into
Branch, and Out Hit intoBreak Hit Result - Wire Hit Actor through
Get Display NameintoPrint String
Verify
Press Play, stand in front of a box, and press E.
A red line extends forward from around the character's waist, stops at the box's surface, and continues past it in green. At the same time, a name like Cube_2 appears in the top-left for two seconds. Face an empty direction and the line stays red the whole way, printing "None."
- No line at all →
Draw Debug Typeis stillNone - The line draws but it's always "None" → the box is farther than 300 cm. Try
InteractDistanceat600.0 - The line shoots straight up or down from your feet → something other than Forward Vector is wired into
Multiply's A pin - Nothing happens on press → the Keyboard Event isn't firing. Wire
Print Stringdirectly to it and confirm the event is being called at all - It always prints your own name →
Selfisn't inActors to Ignore
Now try changing InteractDistance to 50.0. You'll have to walk right up to the box before it responds. That makes it obvious that this value is your interaction range.
Two things to take away.
- You calculate End yourself: Line Trace has no input for "300 cm forward." Building position + direction × distance is always the caller's job. Once you know this shape, guns and ground checks use the same skeleton
- Push the post-hit logic into an Interface: in a real game you don't just print a name — a door opens, a chest reveals its contents. Chaining
Cast Toper target type falls apart fast, so send an "I was inspected" message using the approach in the Blueprint Interface article
Multi Trace and Shape Trace
Once the basic form works, two variants will cover most of what comes next.
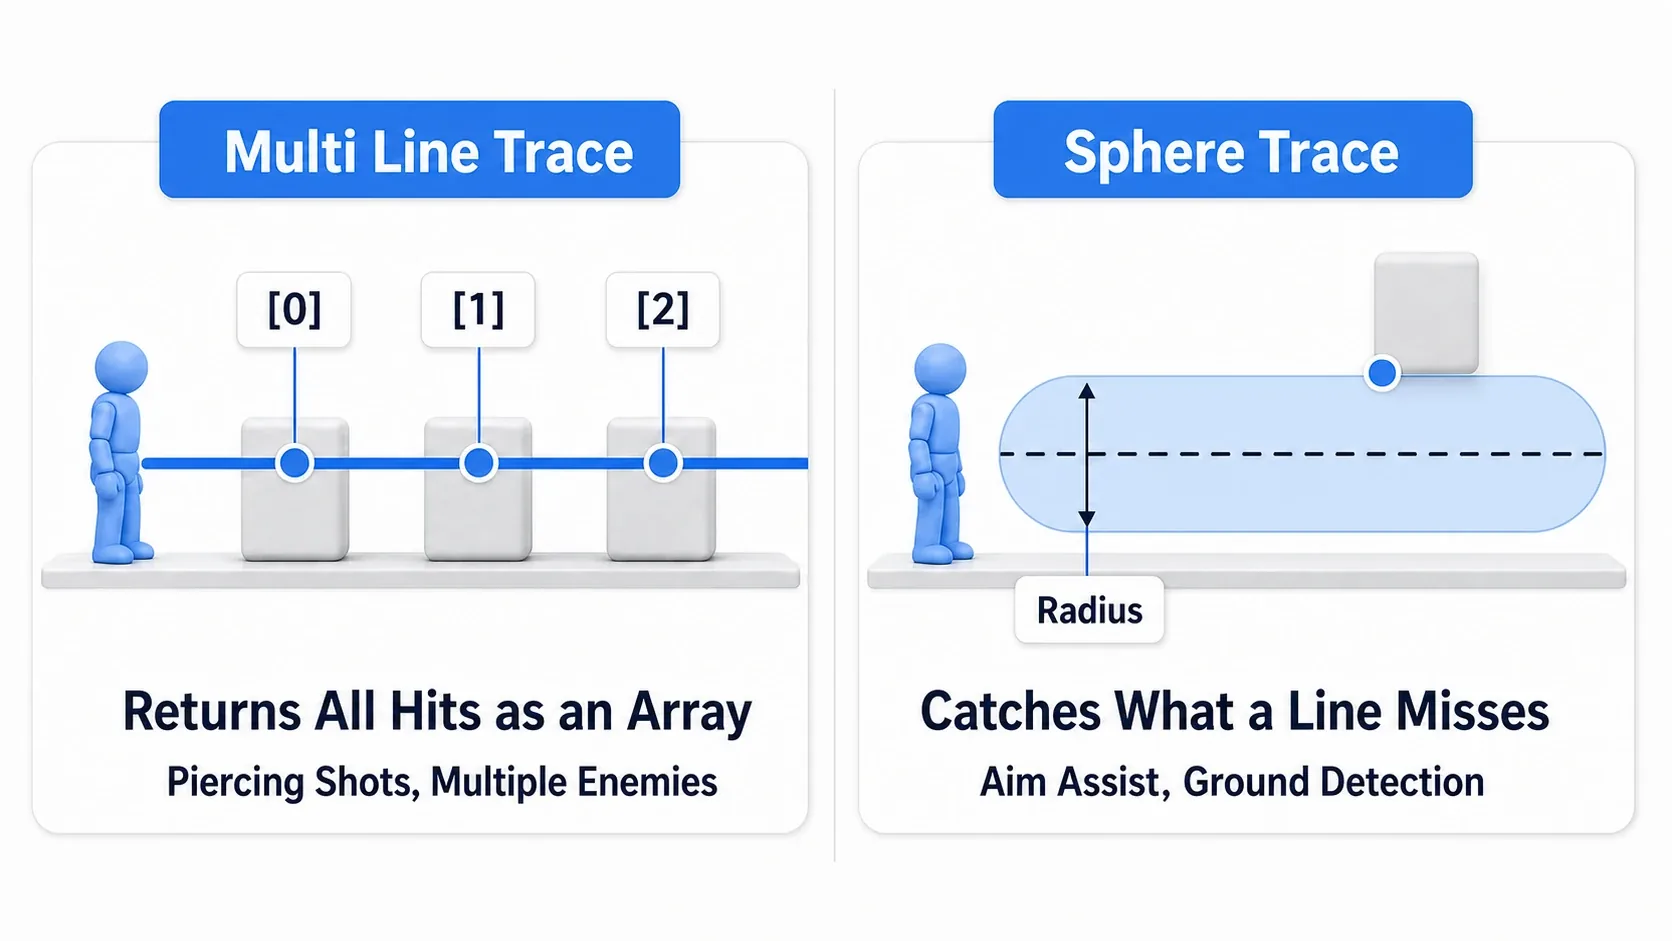
Multi Line Trace By Channel returns everything it hit as an array. Where a regular Line Trace stops at the first thing, this one collects everything along the way. Penetrating bullets and lasers that burn through a row of enemies are built with it. Out Hits is an array, so run it through a For Each Loop.
Sphere Trace By Channel sweeps a sphere of a given radius instead of a line. It's for situations where a thin line just doesn't catch things.
- Aim assist, giving players some slack when small enemies are hard to target
- Ground detection, where a single line can slip through gaps between steps
- Detecting pickups even when the player is slightly off
Start with a Radius around 30.0 and the difference is obvious. Box Trace and Capsule Trace work the same way; only the swept shape changes. They are heavier than a line, though, so try Line Trace first and only swap when the precision isn't enough.
Bonus: Good to Know for Later
- Tracing every frame in Tick is a last resort: some cases genuinely need it, like ground detection, but most are fine on input events or a timer. For the cost side, see the article on designing with less Tick
- Trace Complex is off by default: turning it on tests against the mesh's actual geometry, at a large performance cost. Leave it alone unless you specifically need fine surface detail
- Break Hit Result appears when you drag from Out Hit: it's faster to drag off the Out Hit pin and type
breakthan to search for the node by name - Tracing from the camera gives different results: in third person, a line fired from the character's position and one fired from screen center point in different directions. "I can see it but I can't hit it" usually comes from this gap
- Show the result in UMG, not Print String:
Print Stringis for development checks. To build an actual "Inspect" prompt, see the UMG article
Summary
- A Line Trace fires an invisible line and reports what it hit
- You calculate End yourself. Start + direction × distance is the basic form (in cm)
- Use By Channel for blocking geometry and line of sight, By Object Type to filter by target type
- The Hit Result gives you Hit Actor / Impact Point / Impact Normal / Distance
- Set Draw Debug Type to For Duration. Most causes of a missed trace become visible instantly
- Putting
SelfinActors to Ignoreis a habit worth forming - Use Multi Trace to penetrate, Sphere Trace to loosen the detection
In the game you're building right now, what will players want to inspect? Start by making the line visible and checking whether it even reaches.