[UE5] Event Dispatcher Basics: Announcing an Item Pickup and Trying Bind and Unbind

Created: 2025-12-12Last updated: 2026-09-05

Build a system where picking up an item updates the count and the display separately. Diagrams cover creating, Binding, Calling, and Unbinding an Event Dispatcher, the values a notification carries, how long you receive, and scaling to a central Dispatcher.

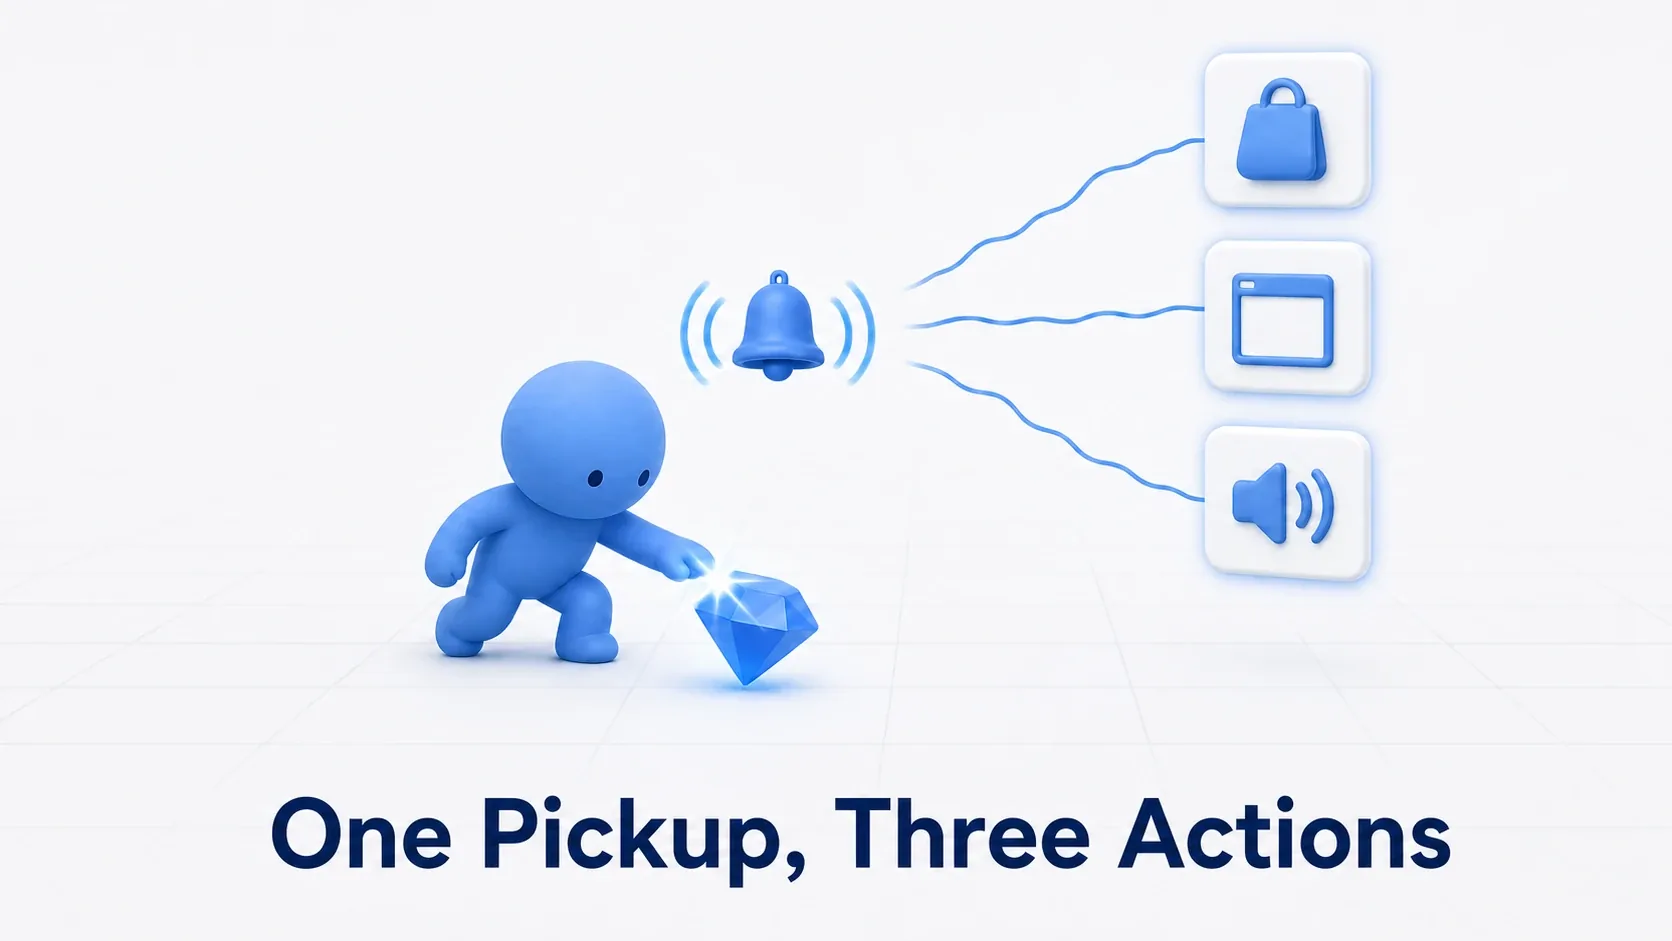
Pick up an item and you want to increase the count, notify the screen, and play a sound effect. Write all of it in the item's Blueprint and every added reaction means editing the pickup logic too.

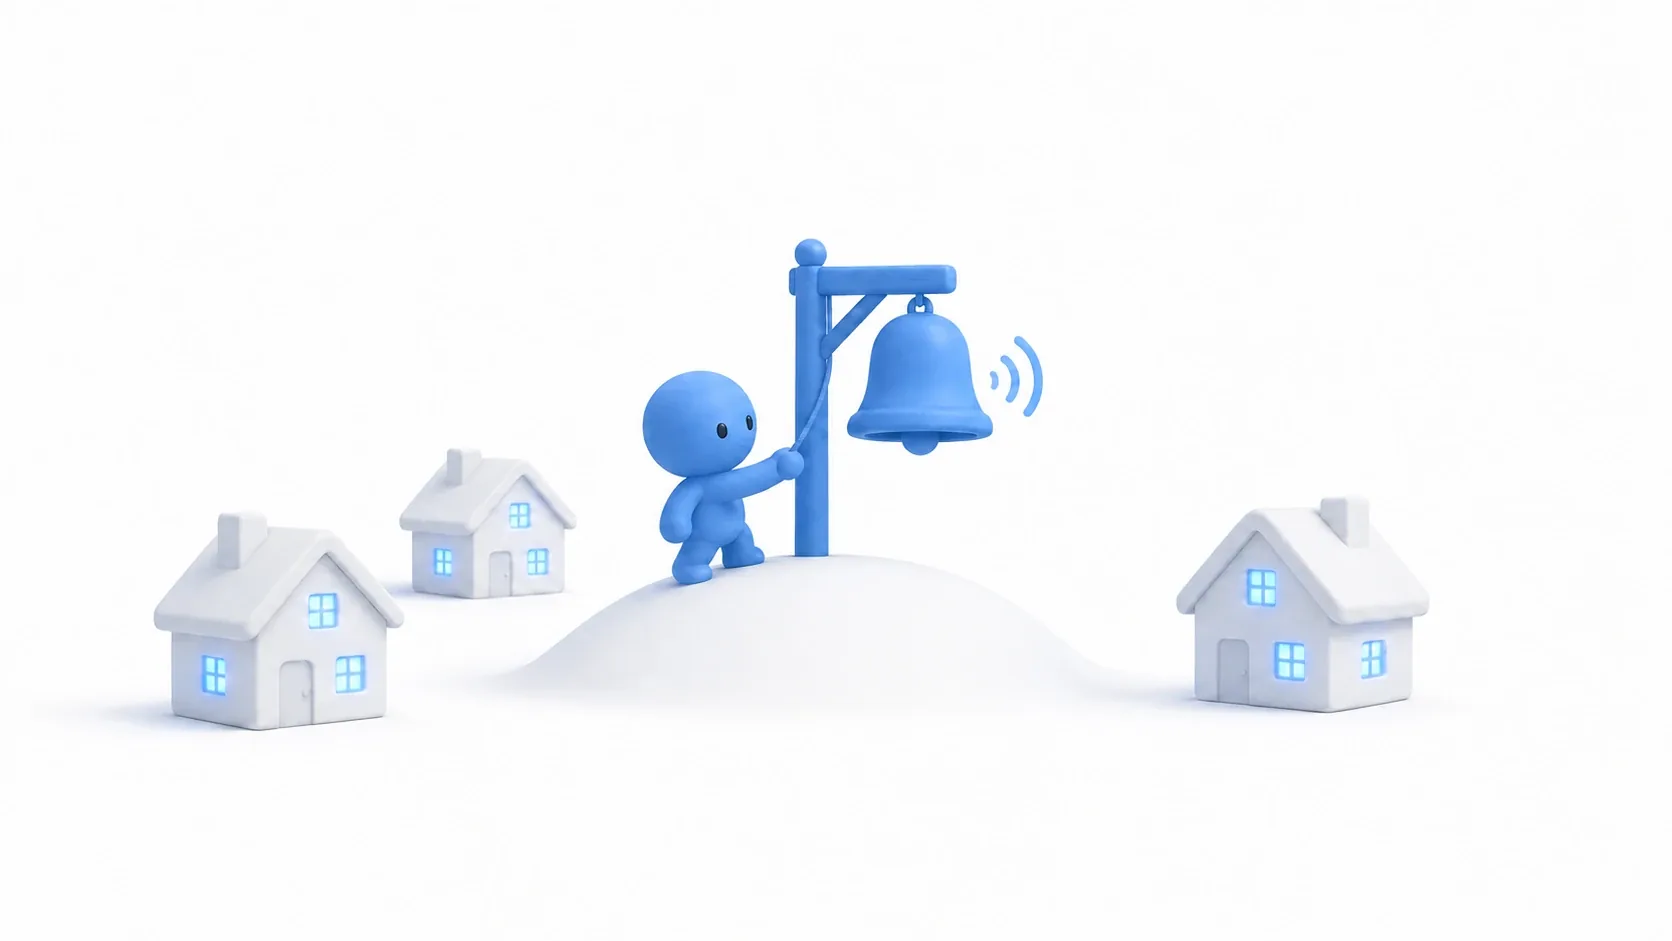
With an Event Dispatcher, the item announces "I was picked up" and each handler that receives it decides its own reaction. Picture separating the person ringing a bell from the people who act on hearing it.

In other engines: this corresponds to Godot's signal and Unity's UnityEvent or C#'s event. The point that the announcer need not know the receivers is the same too.

Here we build it in the order "make the bell, register, ring it," updating the count and the display. Then we stop reception on the display side alone and confirm that you can change how it is received without changing the logic that sends the notification.

A figure ringing a bell and a house whose lights come on. An image of announcing an occurrence and receivers reacting

What You'll Learn

  • Creating a Dispatcher, Binding to receive, and Calling to notify
  • How to put an item name and count on the notification
  • Hands-on running count management and display separately from one pickup
  • Stopping reception with Unbind and Binding again

Sponsored

Event Dispatcher: separating occurrence from reaction

A Dispatcher is where events that receive an occurrence register. Create a Dispatcher called OnItemPickedUp on the item and call it on pickup, and the registered events run.

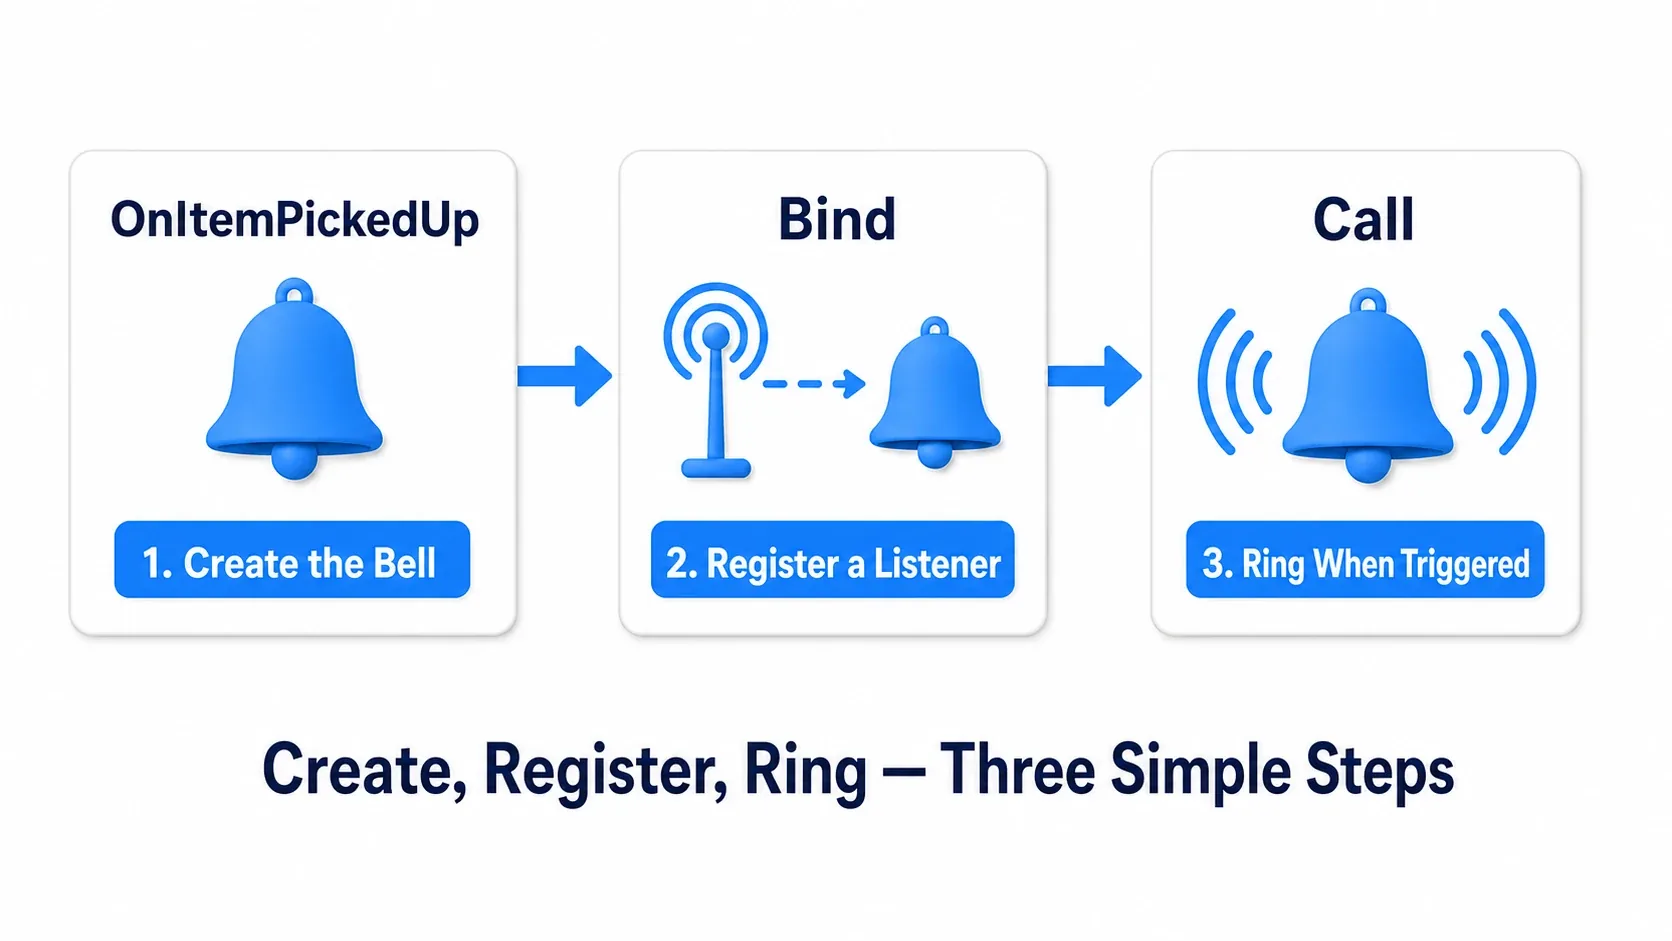
OperationMeaningIn bell terms
Create a DispatcherDecide the notification's name and the values passedPrepare the bell
BindRegister an event to run on this notificationDecide which bell you listen for
CallNotify the registered eventsRing the bell
UnbindRemove the specified event's registrationStop listening for that bell
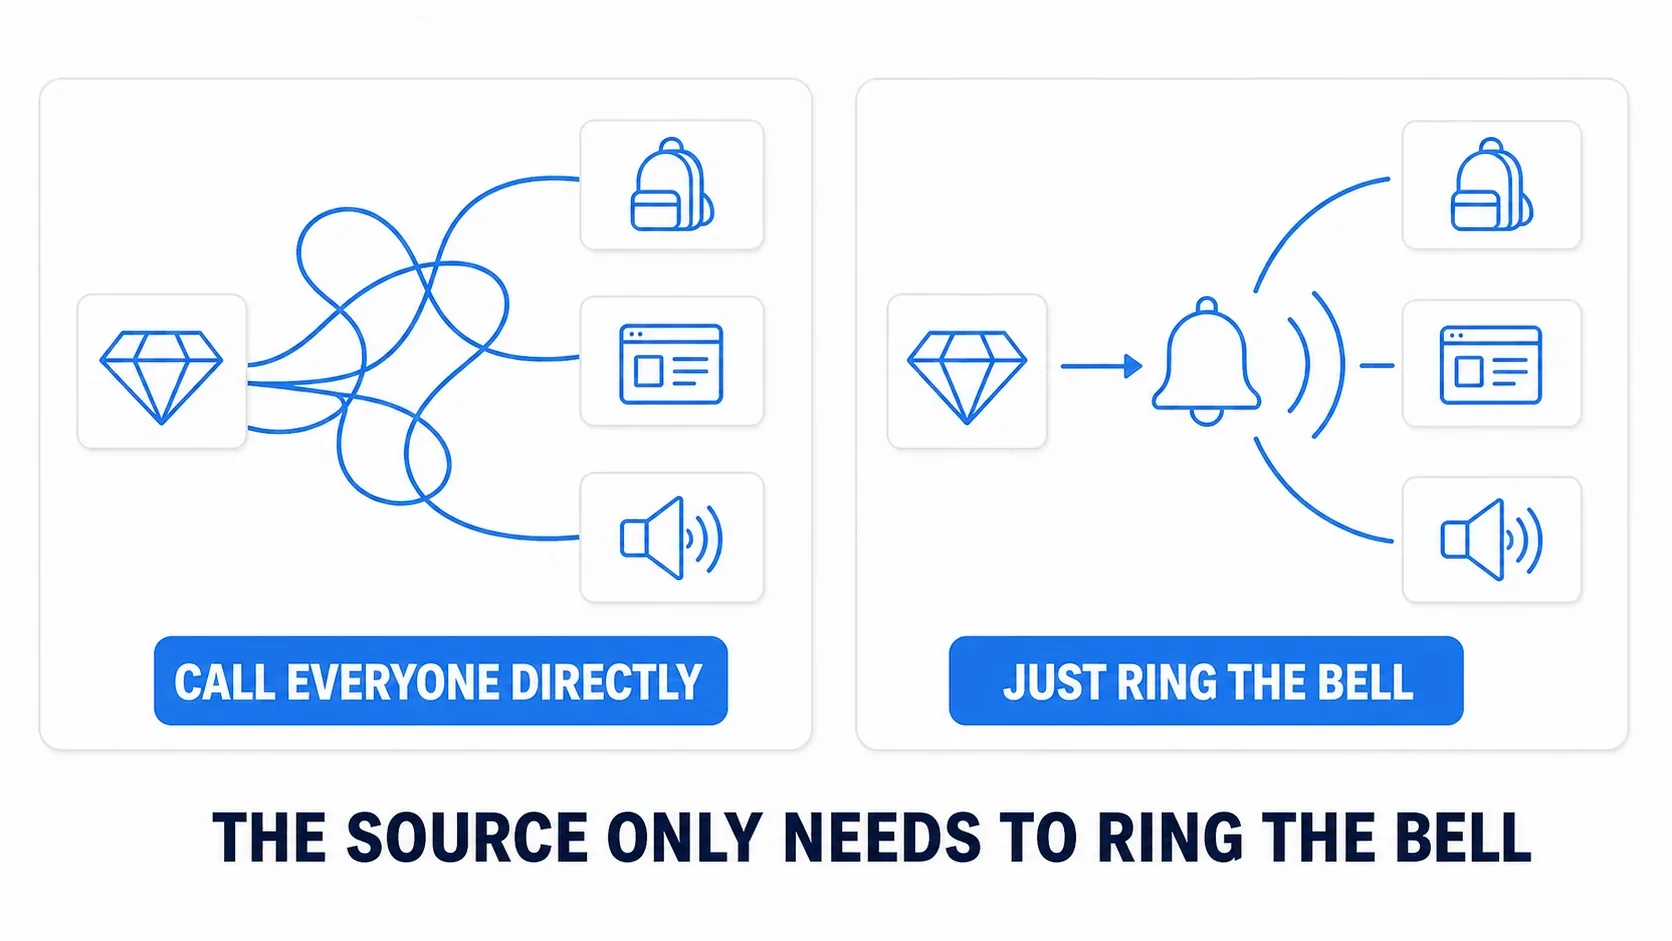
The item calling each handler directly, versus announcing the pickup through a Dispatcher

The benefit is that you no longer line up display and audio specifics on the item's side. Register a new reaction to the same notification and you add it without touching the pickup logic.

That said, the connection does not disappear. Registration needs a reference pointing at the sending instance. The receiver also matches the notification's name and the types of the values passed. A design that reduces reliance on the other party's internals like this is called loose coupling (→ choosing among three communication methods).

Hands-On: updating the count and display for a picked-up item

Touching one item notifies that 3 Gems were acquired. Two Actors — count management and display — receive it and produce these results.

Receiving handlerWhat happens
BP_InventoryManagerTotalCount goes from 0 to 3, confirmable with Print String
BP_PickupNoticeThe in-world text changes from Waiting... to Gem x3

Before building an inventory list or dedicated HUD, we test whether the values carried on the notification reach separate handlers.

The three stages: make the bell, receivers register, and ring it when something happens

1. Prepare a pickable item

One pickup raises the acquired count from 0 to 3 and changes the display from Waiting... to Gem x3 through the same notification

Use a Third Person Blueprint project. Choose None if there is a Variant option and open the template's walkable level.

Create BP_Item with Actor as parent. Add a Sphere Collision to Components, drag it onto DefaultSceneRoot, and make it the Root. Add a Static Mesh as its child and choose the engine's standard Sphere.

PartSetting
Sphere CollisionSphere Radius: 60, Collision Enabled: Query Only
Sphere Collision responsesOverlap for Pawn only, Ignore for the rest
Generate Overlap EventsOn
Static MeshSphere, relative location 0, Scale 0.4 on all axes
Mesh's Collision PresetsNoCollision
Mesh's Simulate PhysicsOff

Setting the Sphere Collision's Collision Presets to Custom lets you configure Collision Enabled and per-channel responses.

If you cannot find the standard Sphere, enable Show Engine Content in the asset picker and choose from Engine's BasicShapes.

Overlap detects the overlap of volumes instead of pushing the other party back. Turn Generate Overlap Events on for the player's Capsule Component too. Here you pick it up by touching an area slightly wider than the sphere's visual.

Create these two under Variables, Compile, then enter the defaults.

VariableTypeDefault
ItemIDNameGem
QuantityInteger3

ItemID is the name identifying the item and Quantity is how many this pickup grants. Compile, save, and place one BP_Item in the level. Set the Actor's Scale to 1, put its center about 60 cm above the floor surface, and place it roughly 500 cm from the player start. Make sure it does not overlap at startup.

2. Make the bell: decide the values it carries

From the "+" on Event Dispatchers in BP_Item's My Blueprint, create OnItemPickedUp. In the selected Dispatcher's Details → Inputs, add these two.

Input nameTypeWhat it tells receivers
ItemIDNameWhat was picked up
QuantityIntegerHow many were picked up

These Inputs are the values passed along when the notification is sent. The variables earlier are the item's own settings; the Dispatcher's Inputs are the fields the notification carries.

Our receivers need the name and count, so we pass only those. The picked-up Actor is destroyed later, but using the values received in the notification means you never need to query the vanished item again.

3. Build the count-managing Actor and register to receive

Create BP_InventoryManager with Actor as parent. No visual parts are needed. Add these variables.

VariableTypeSetting
TargetItemObject Reference to BP_ItemInstance Editable on
TotalCountIntegerDefault 0

An Object Reference is a value pointing at another instance. With Instance Editable on, you can designate the target from the Manager's Details in the level.

In the Event Graph, connect BeginPlay to an Is Valid with white exec pins and put Get TargetItem into Input Object. Is Valid confirms the target exists and is usable.

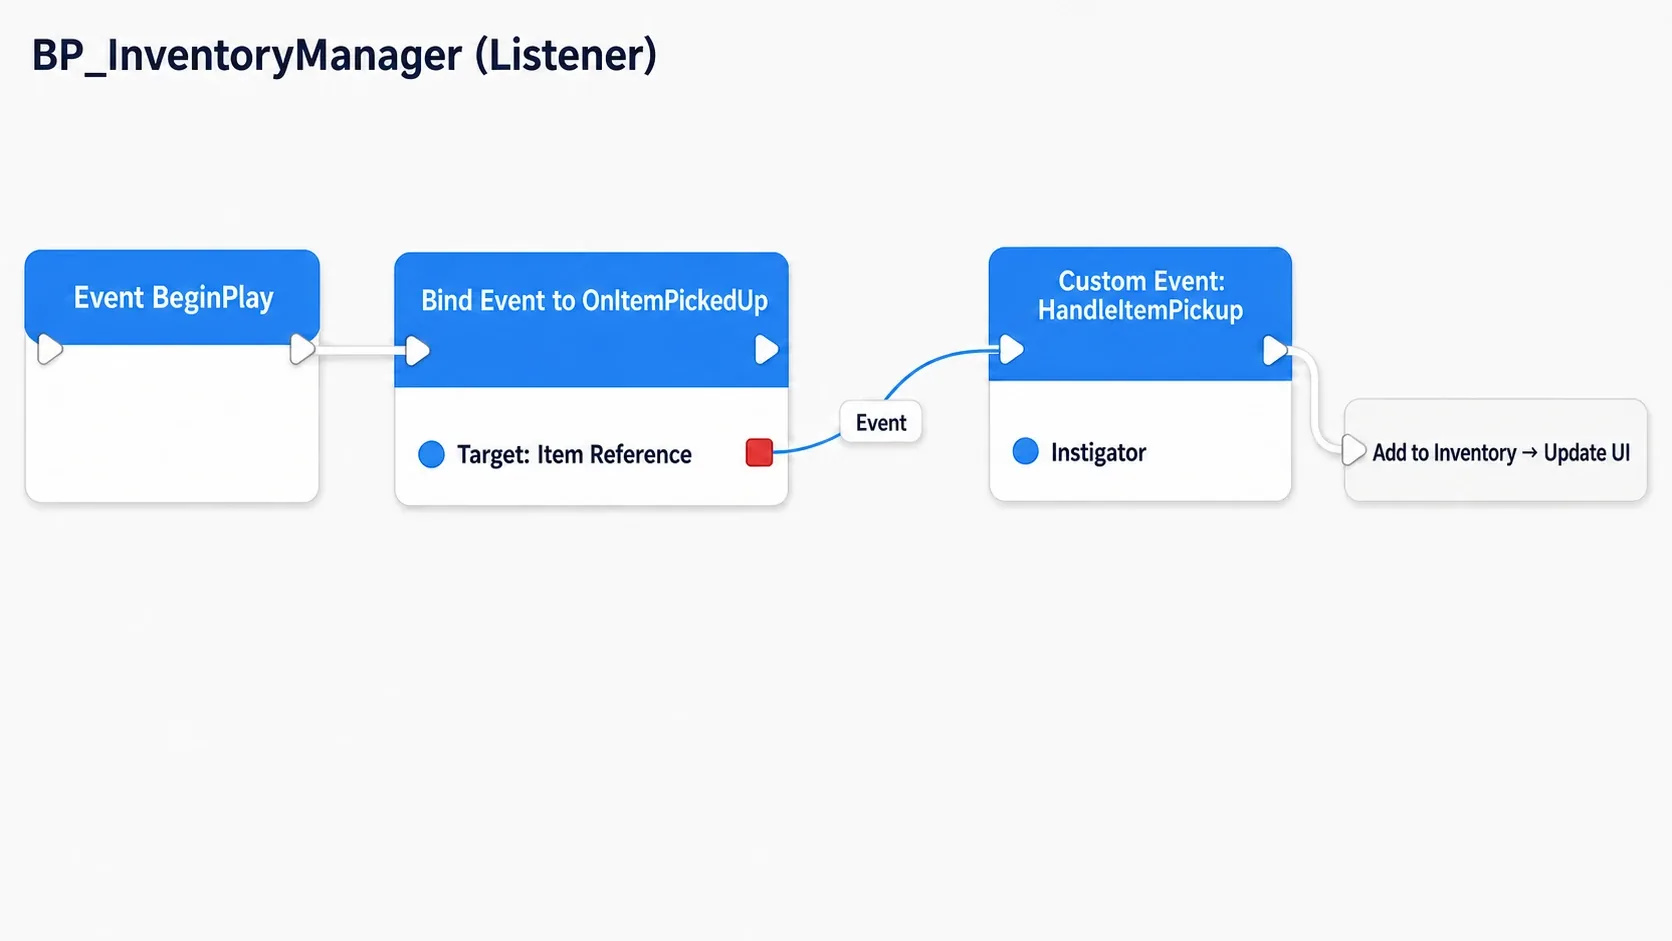
From Get TargetItem's blue pin, create Bind Event to OnItemPickedUp, and connect Is Valid's success side to Bind's white input. Bind's Target is TargetItem. The Is Not Valid side does nothing.

Drag from Bind's red Event pin and use "Add Custom Event for Dispatcher" to create HandleItemPickup. An event with ItemID and Quantity inputs matching the Dispatcher is created and connected to Bind with a red line.

That is now the registration "when this item's notification arrives, call HandleItemPickup." The white line shows the order the registration runs and the red line shows which event is registered.

Designating TargetItem as the sender and connecting HandleItemPickup's red Event output to Bind's Event input

The diagram shows from Is Valid's success side onward. The "from Is Valid's success" at the top left is a note about the connection source.

4. Add the count when the notification arrives

Connect HandleItemPickup's white output to Set TotalCount. Build the value with an Integer addition of Get TotalCount + the event's Quantity.

Adding the Quantity received in HandleItemPickup to the current TotalCount and passing the result to Set TotalCount

What you use here is the HandleItemPickup you connected to Bind. There is no need to create another event.

Connect a Print String after the Set with Duration 10 seconds. Build the string with Append, A set to TotalCount: and B to the String conversion of the updated TotalCount.

Now a notification of 3 adds 3 to 0 and displays "TotalCount: 3." We handle only the total acquired here; per-item lists go to the inventory article.

Compile, save, place one Manager in the level, and set Target Item in its Details to the placed BP_Item. Creating the reference variable alone does not fill in the target. Complete the assignment.

5. Have the display handler receive the same notification

Create BP_PickupNotice with Actor as parent, add a Text Render Component, and name it NoticeText. Text Render is a part that displays text in the world.

Set Text to Waiting..., World Size to 40, and Text Render Color to a deep blue. Compile, save, place it in the level about 150 cm above the floor, and rotate it so it is readable from the Play start. If you are looking at the back of the text, adjust the Actor's rotation.

Also create TargetItem on BP_PickupNotice as an Object Reference to BP_Item, turn on Instance Editable, and Compile and save. From the level Notice's Details, designate the same BP_Item as the Manager.

Create a Custom Event StartListening in the Event Graph and, from it, build the same Is Valid → Bind Event to OnItemPickedUp as the Manager. Input Object and Target are Get TargetItem.

Create HandleNotice from Bind's red Event pin. From BeginPlay, call StartListening (Target: self). Gathering the registration behind a named entry point also helps when you re-register later.

From HandleNotice's white output, use the NoticeText reference to create Set Text. Target is NoticeText, not the Actor's self. Put the following Format Text result into Value.

Format Text setting / inputValue
Format{ItemID} x{Quantity}
ItemIDThe ItemID received in HandleNotice
QuantityThe Quantity received in HandleNotice
Where Result connectsSet Text's Value

Format Text is a node that builds text by inserting values into the {name} slots. Entering it in the Format field adds matching pins. Receive Gem and 3 and the result is "Gem x3."

Passing HandleNotice's values into Format Text and updating NoticeText with the result. The white exec line goes straight to Set Text

This display does not read the Manager's TotalCount. Since it can display from the item's information alone, it does not depend on which of the two receiving events runs first.

6. Ring the bell the moment it is picked up

Back in BP_Item, add On Component Begin Overlap from the Sphere Collision's Details → Events.

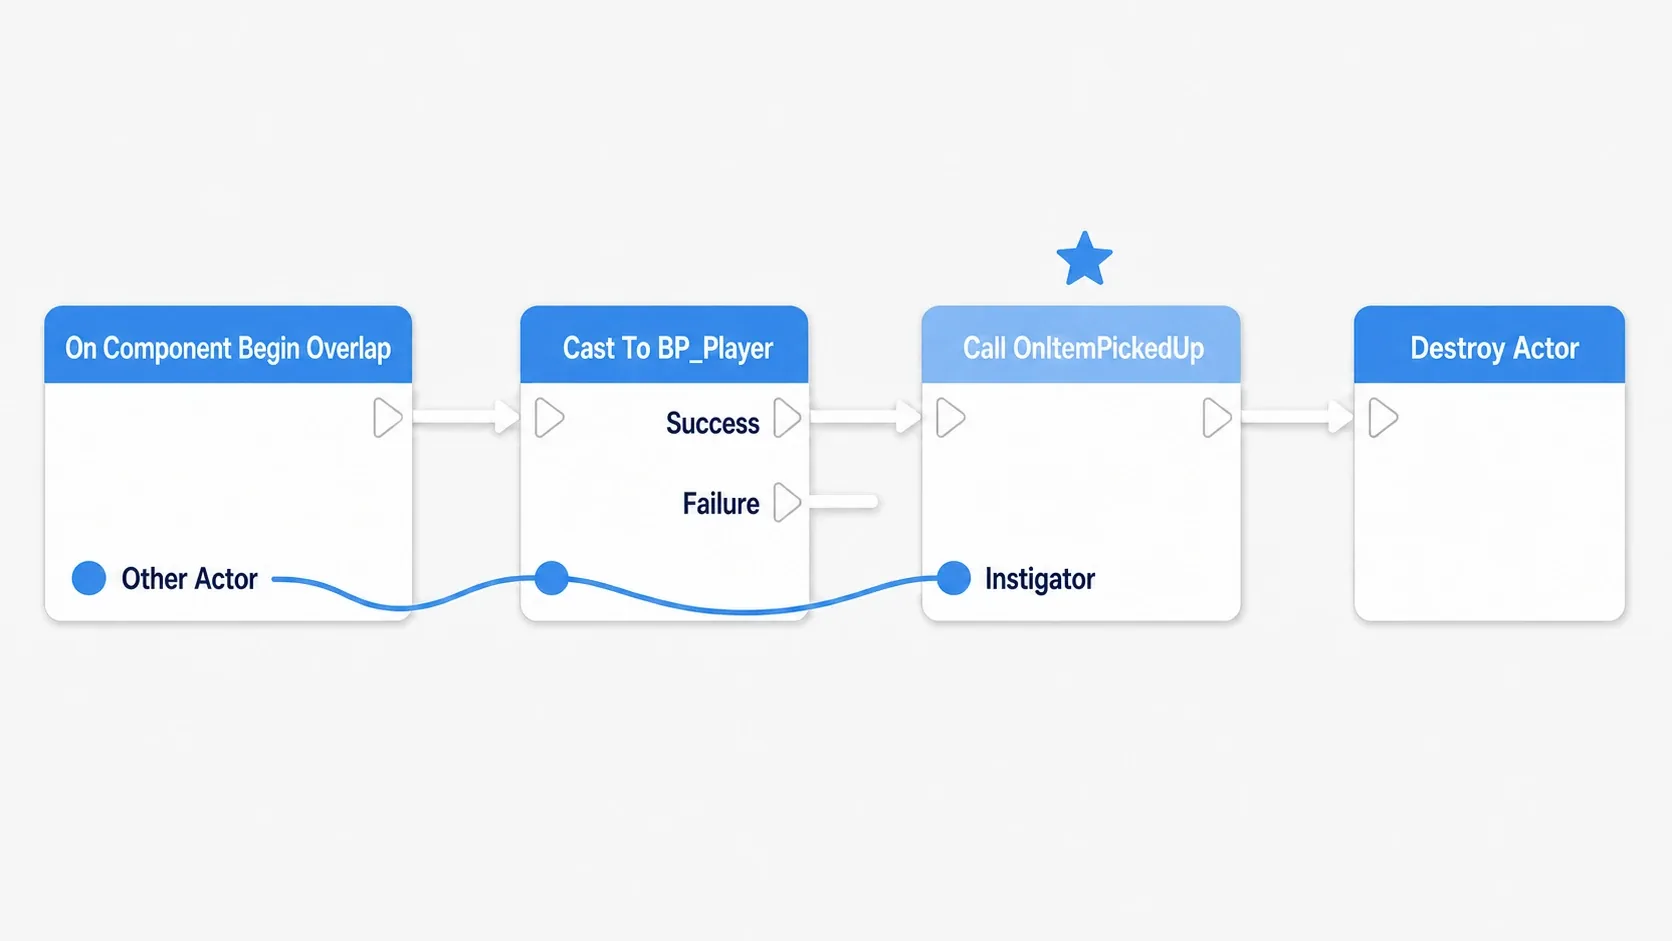
Create Cast To BP_ThirdPersonCharacter from Other Actor and connect Overlap's white exec output to the Cast too. Other Actor is whoever entered the volume, and Cast confirms whether it can be treated as the specified Class. Here we react to the template's playable character.

Passing Overlap's Other Actor into the Cast's Object and connecting the success side to DoOnce

Connect the following in order from the Cast's success side. The Cast Failed side does nothing.

  1. DoOnce. Start Closed off, Reset unconnected.
  2. Call OnItemPickedUp. Target is self, with Get ItemID to ItemID and Get Quantity to Quantity.
  3. Destroy Actor. Target is self.
From DoOnce's Completed into the Call, notifying ItemID and Quantity before calling Destroy Actor

DoOnce limits pickup to once, and we send the notification before destroying the item. The Call does not directly invoke the logic that adds to the count or changes the text. The registered side handles those.

7. Confirm the result of picking it up

Compile and save all three Blueprints, then Play. Click the game view and walk up to the item.

StateExpected result
Before pickupThe item is visible and the display is Waiting...
Touching the sphereThe item disappears and TotalCount: 3 appears
From the same pickupNoticeText changes to Gem x3
Walking over the spot againNo additional pickup happens

If nothing happens, confirm with a Print right after Overlap that the overlap is detected. If the item disappears but nothing reacts, check each TargetItem assignment, the white lines from BeginPlay to Bind, and the red Event connections.

If the Print appears but the text does not change, inspect the Notice's Bind and Set Text's Target. If you cannot see the text in the editor either, first check its rotation, position, and World Size.

Next, stop Play and change BP_Item's Quantity to 5. Picking it up again giving TotalCount: 5 and Gem x5 means both sides use the values carried on the notification. Restore Quantity to 3 afterwards.

Sponsored

Unbind: stopping reception on the display side only

You want to stop watching for display, or display a different target. In those cases, remove the existing registration with Unbind. You can stop reception without destroying the Actor.

Unbinding only the display side leaves the count going 0 to 3 while the text stays Waiting...

Remove the same event's registration

Add a Custom Event StopListening to BP_PickupNotice's same Event Graph.

  1. Connect StopListening to an Is Valid with Get TargetItem in Input Object.
  2. Create Unbind Event from OnItemPickedUp from Get TargetItem.
  3. Connect Is Valid's success side to Unbind's white input. Target is TargetItem.
  4. Connect the red Event output of the HandleNotice you already made to Unbind's red Event input as well.

Rather than creating a new event with the same name, designate the same HandleNotice you registered. It is fine to run lines from the red output to both Bind and Unbind. Unbind's Is Not Valid side does nothing.

Connecting the registered HandleNotice's red Event output to Unbind on the same TargetItem

The diagram shows only the lines used for unregistering. Leave the white line and value lines from HandleNotice to Set Text in place.

Stop with U, re-register with B

Select the BP_PickupNotice placed in the level, right-click in the Level Blueprint, and choose "Create a reference to [name]." From that reference, build these calls.

Key PressedCustom Event to callTarget
UStopListeningThe placed BP_PickupNotice
BStartListeningThe same BP_PickupNotice

Compile, save, and try the following two in separate Plays.

ActionCount managementText display
Press U before picking up, then pick upTotalCount: 3Stays Waiting...
New Play, press U → B before picking up, then pick upTotalCount: 3Gem x3

You stopped and restored just the display side's reaction without changing the item's pickup logic. Since the Manager was never unbound, both cases receive the count.

Pressing B after picking up in the first test does not resend past notifications. Since the item itself is gone here, StartListening stops at its Is Valid. To redo it, stop and start a new Play.

The purpose of unregistering is deciding "until when do I receive"

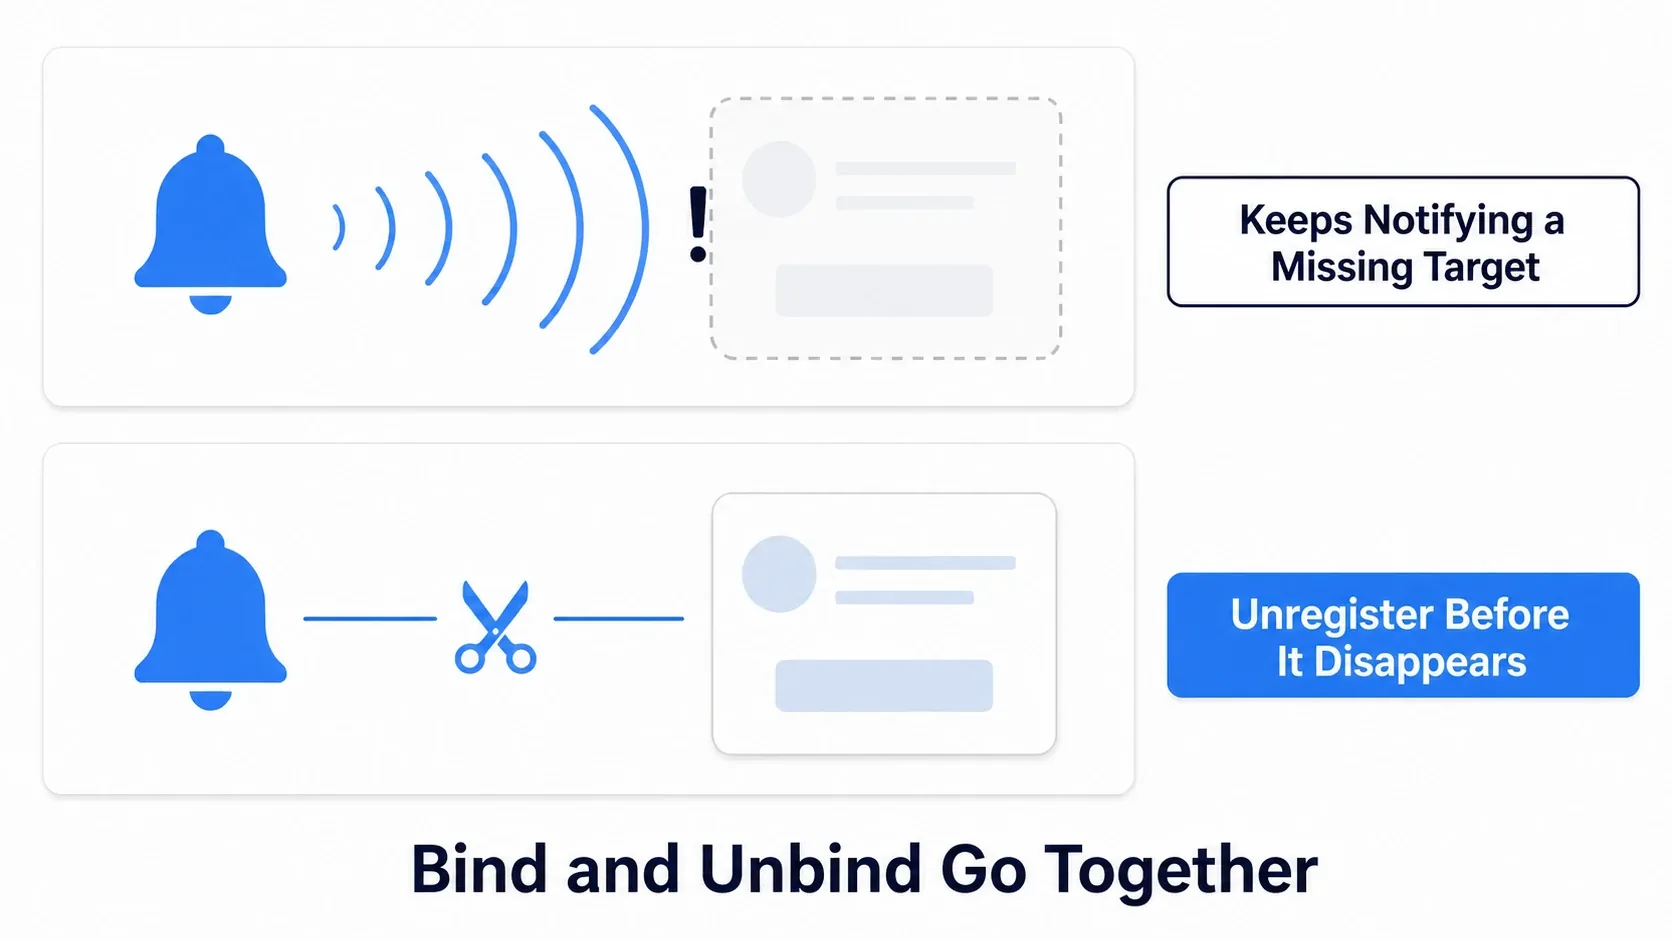
When the UI switches the item it watches from A to B, for example, Unbind A's notification before Binding to B. Even if A still exists, having the display change from an old target's notification is a problem.

Also, removing a Widget from the screen with Remove from Parent is not the same as the Widget object disappearing. If you want reception to stop when the screen closes, design the unregistering at that point.

You do not need to memorize "Blueprint Dispatchers always deliver to destroyed receivers and crash unless you Unbind." Decide where to register and unregister based on whether you still want that party's notifications.

Sponsored

Bonus: Good to Know Up Front

Adding receivers requires no edits to the item

To add an audio handler, for example, Bind a new Actor to the same TargetItem and play a prepared sound effect with Play Sound 2D from the receiving event. BP_Item's Call stays as is.

A real inventory list and HUD can add their reactions in the same place as our count management and text display (→ inventory, UMG).

Do not assume notification order

Several receiving events do not necessarily run in the order they were Bound. The Notice here uses the notification's ItemID and Quantity directly, so it never has to wait for the Manager's logic to finish.

When you want "update the count first, then tell the UI the confirmed value," having the count-managing side send a separate notification carrying that value after finishing makes the order explicit.

What if I Bind the same thing repeatedly?

Binding the same event repeatedly to the same Dispatcher produces one registration. When a reaction fires twice, check whether another receiving event is also registered or whether the sender's Call runs twice.

The DoOnce here limits the number of sends. That is a different role from preventing duplicate Binds.

Unbind All removes other receivers too

Unbind Event removes the event you specify. Unbind All removes every registration on that Dispatcher at once. Using Unbind All to stop only our display would also remove the Manager's reception.

As items multiply, think about where the notification lives

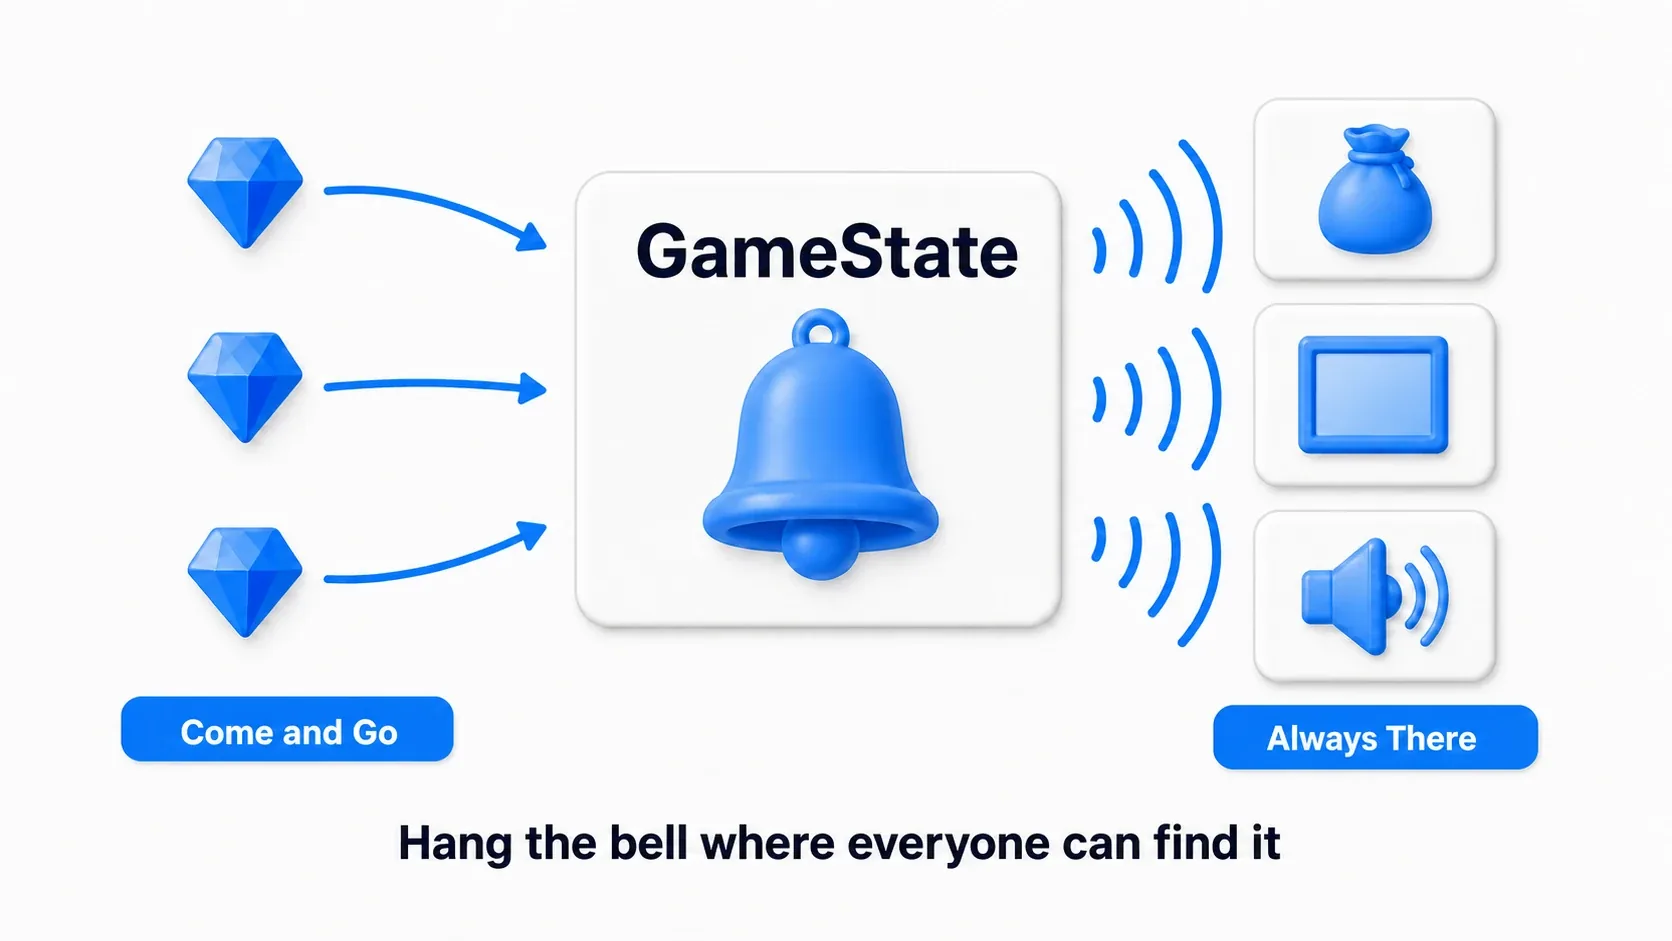
Right now one item is designated by two handlers. In a game where many items spawn at runtime, rather than registering to each one individually, you can gather notifications into a handler that collects pickup information.

Gathering each item's occurrences into a shared sender such as GameState, with receivers registering there

Within one level, for instance, put OnAnyItemPickedUp on GameState or an inventory-managing Component and have items pass information there. The UI Binds to that shared sender rather than to individual items.

GameState and GameInstance differ in how long they persist. Choose while considering not only "a place everyone knows" but how long that information is used (→ Game Framework, reusing Components).

Name notifications after what happened

Naming them after occurrences, as with OnItemPickedUp and OnHealthChanged, makes it easy for display, audio, and achievements to use the same notification. Naming them after a specific reaction, as with UpdateUI, makes them look like an entry point dedicated to that use.

Incidentally, OnClicked used on a UMG Button is a member of the same family, announcing that it was pressed. Your own Dispatchers are a familiar mechanism in the sense of registering reactions on a receiver.

For those who want the C++ mapping

The C++ mechanism corresponding to Blueprint's Event Dispatcher is the dynamic multicast delegate. You can start from grasping it as "something that registers several receivers' logic and calls them together."

The mapping between Blueprint's Dispatcher operations and the C++ delegate side's names
Blueprint-side operationWhat you use in C++
Defining the DispatcherA DECLARE_DYNAMIC_MULTICAST_DELEGATE declaration
Exposing to BlueprintUPROPERTY's BlueprintAssignable
BindAddDynamic
CallBroadcast
UnbindRemoveDynamic

C++ is not required for this article's hands-on. When you want to expose notifications from the C++ side, go to first steps from Blueprint into C++ and Epic's Dynamic Delegates.

Summary

We registered count management and display on BP_Item's OnItemPickedUp. The item announces the name and count, and each receiver handles addition and display. Unbinding only the display left the item and count management working the same.

When creating a notification, lining up "what happened," "which values are passed," and "who receives, and until when" makes the division of work easy to follow. Asking a target for a shared operation is covered in Blueprint Interface.

Further Reading

Unreal Engine Notes in this section98