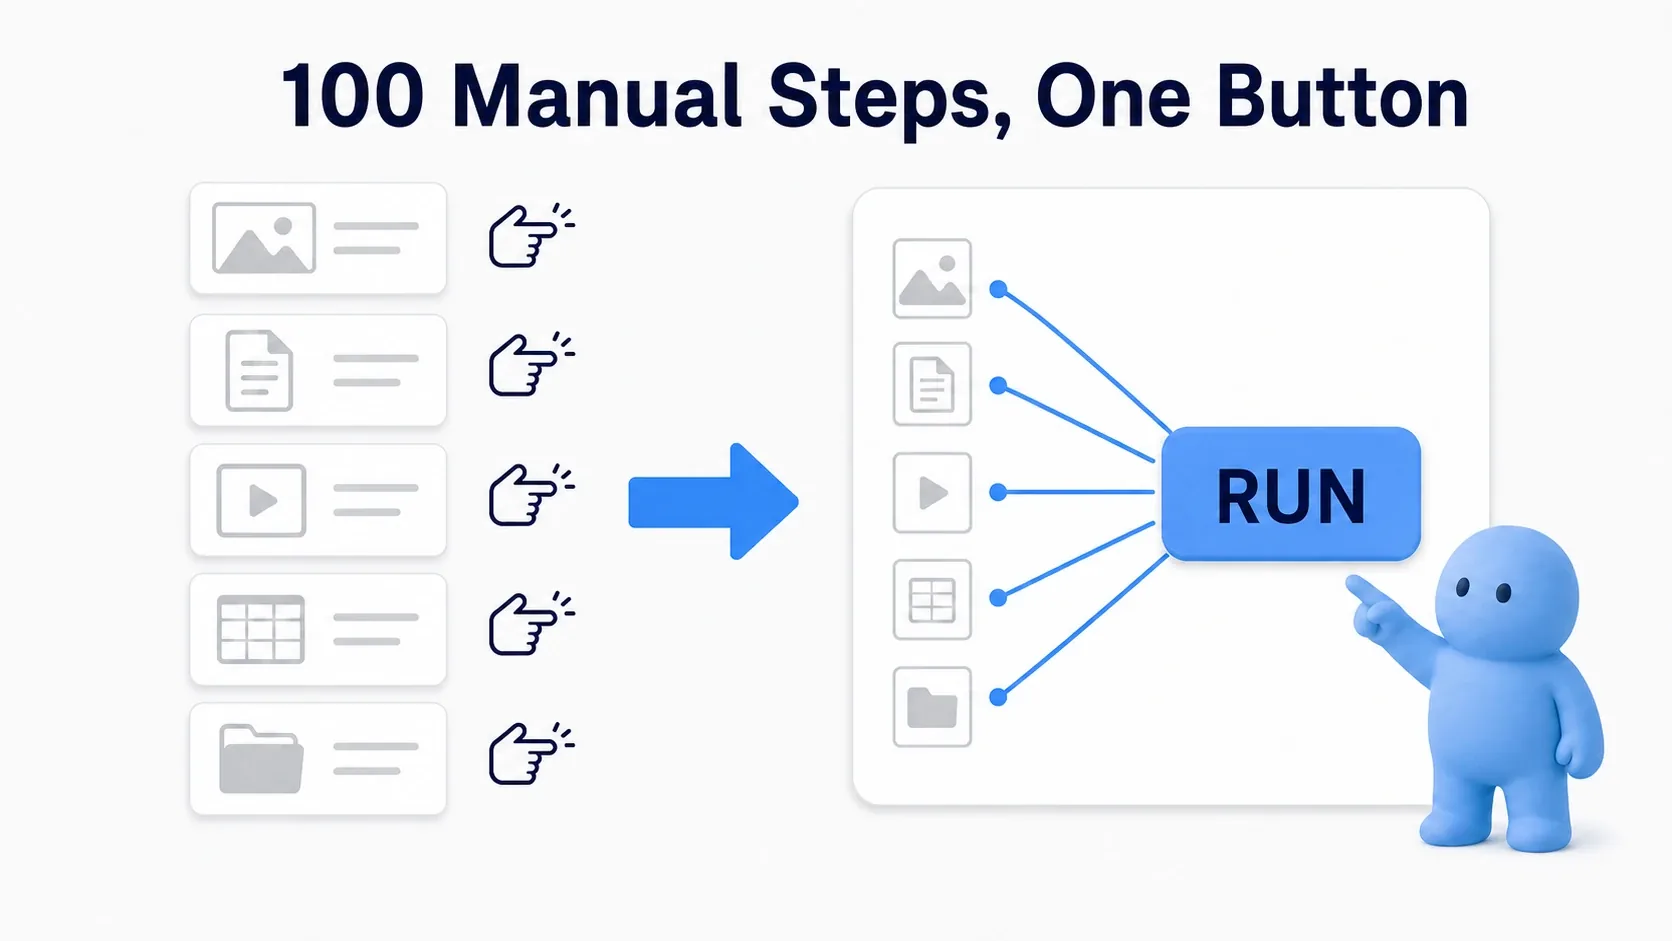
There are moments where you're doing the same thing a hundred times. Opening 50 assets one by one to change the same setting. Selecting 30 trees you just placed and nudging each one's rotation slightly. Your hands are busy, but your brain isn't.
Work like that can be collapsed into a single button. UE5 has a feature called the Editor Utility Widget that lets you build editor tools in Blueprint alone, with no C++. Wire up a button and a few nodes and you can process everything you've selected at once. This article covers how to build an Editor Utility Widget and walks all the way through a tool that re-scatters selected meshes in one shot.
What You'll Learn
- The difference between Editor Utility Widget and Editor Utility Blueprint
- How to create a tool, open it, and dock it as a permanent tab
- Common nodes: Get Selected Assets / Get Selected Level Actors / Set Editor Property
- How to wire a button so it processes your whole selection
- Hands-on: a tool that randomly rotates and slightly rescales selected trees
- Why you should never mix editor-only logic into gameplay Blueprints
What Editor Utility Is
Editor Utility comes in two flavors that look quite different. What they share is that they only run inside the editor.
- Editor Utility Widget: a tool with a small screen (UI) holding buttons and sliders. Pressing a control runs your logic. Best for things a person operates by hand.
- Editor Utility Blueprint: the UI-less variant. You call its functions directly from the right-click menu on assets or Actors (Scripted Actions). Best for firing off a fixed operation in one go.
This article focuses on the Editor Utility Widget, the kind you press a button to use. Having a UI makes it obvious what you select and which button you press, and it's easier to hand to other people.
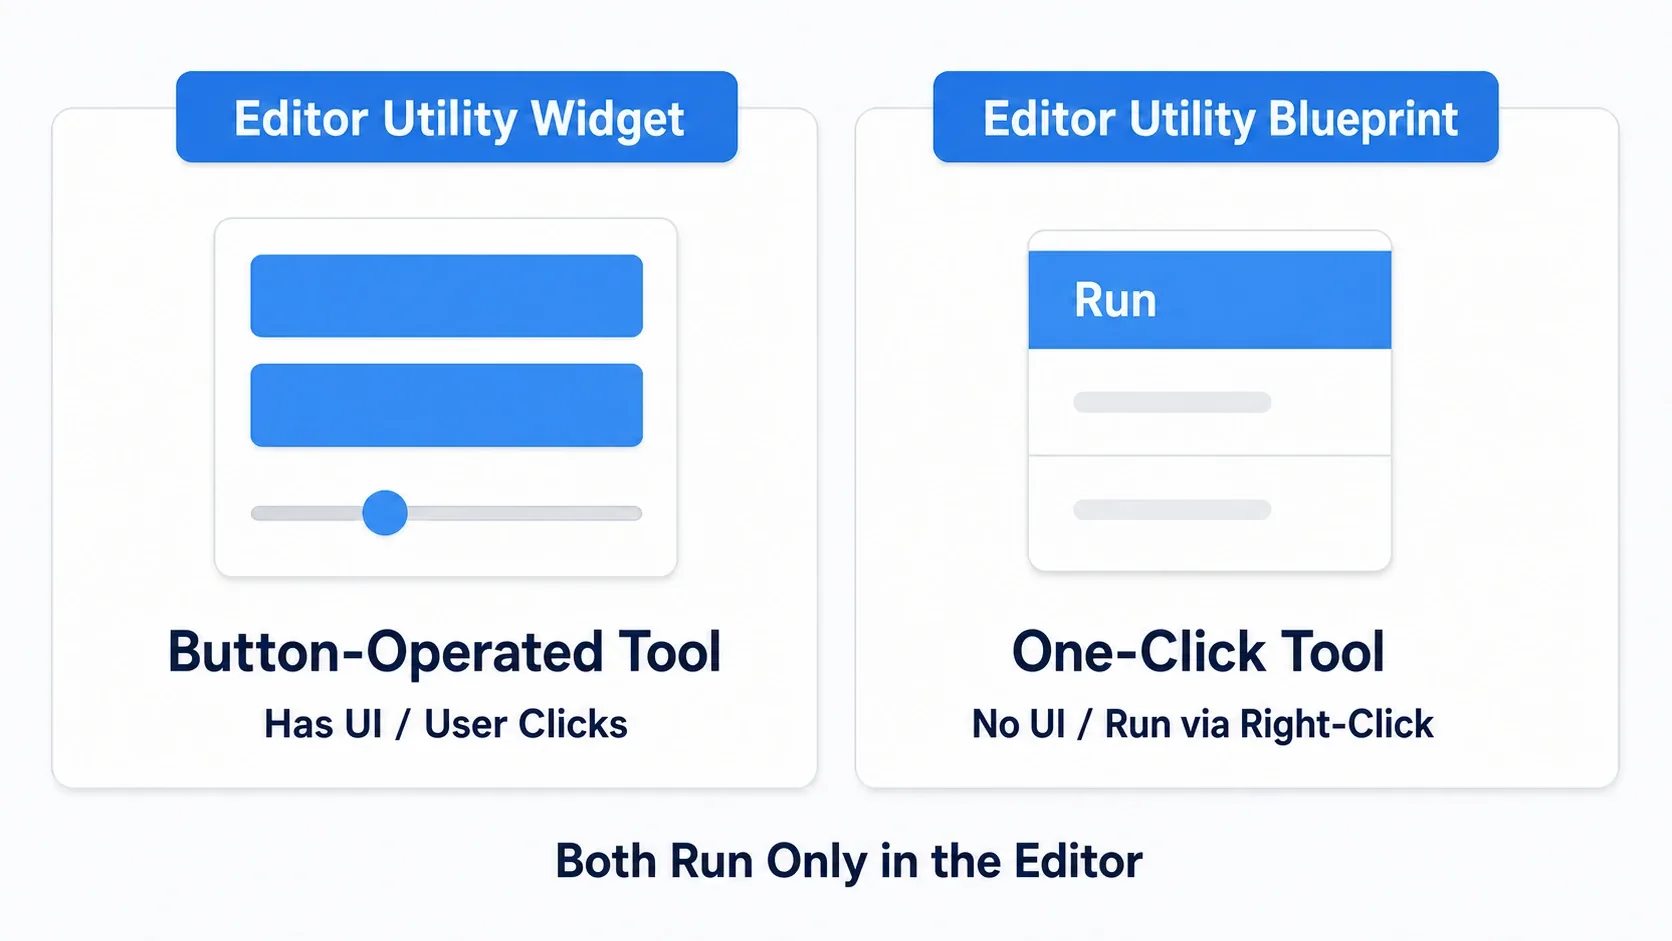
The key point is that none of this ends up in your game. It won't be inside your packaged exe. These are purely tools you use while building.
Creating and Opening a Tool
Creating one takes three steps.
- Right-click in the Content Browser and choose Editor Utilities > Editor Utility Widget. Name it and create it (for example,
EUW_ScatterTool). - Double-click to open it and you get the same UI editor as a Widget Blueprint. Place one Button here, put a Text Block as its child, and change the text to something like "Scatter" (a Button holds no text of its own, so nesting a Text Block inside is the standard UMG approach).
- Right-click the asset you created and choose Run Editor Utility Widget to open the tool as a tab.
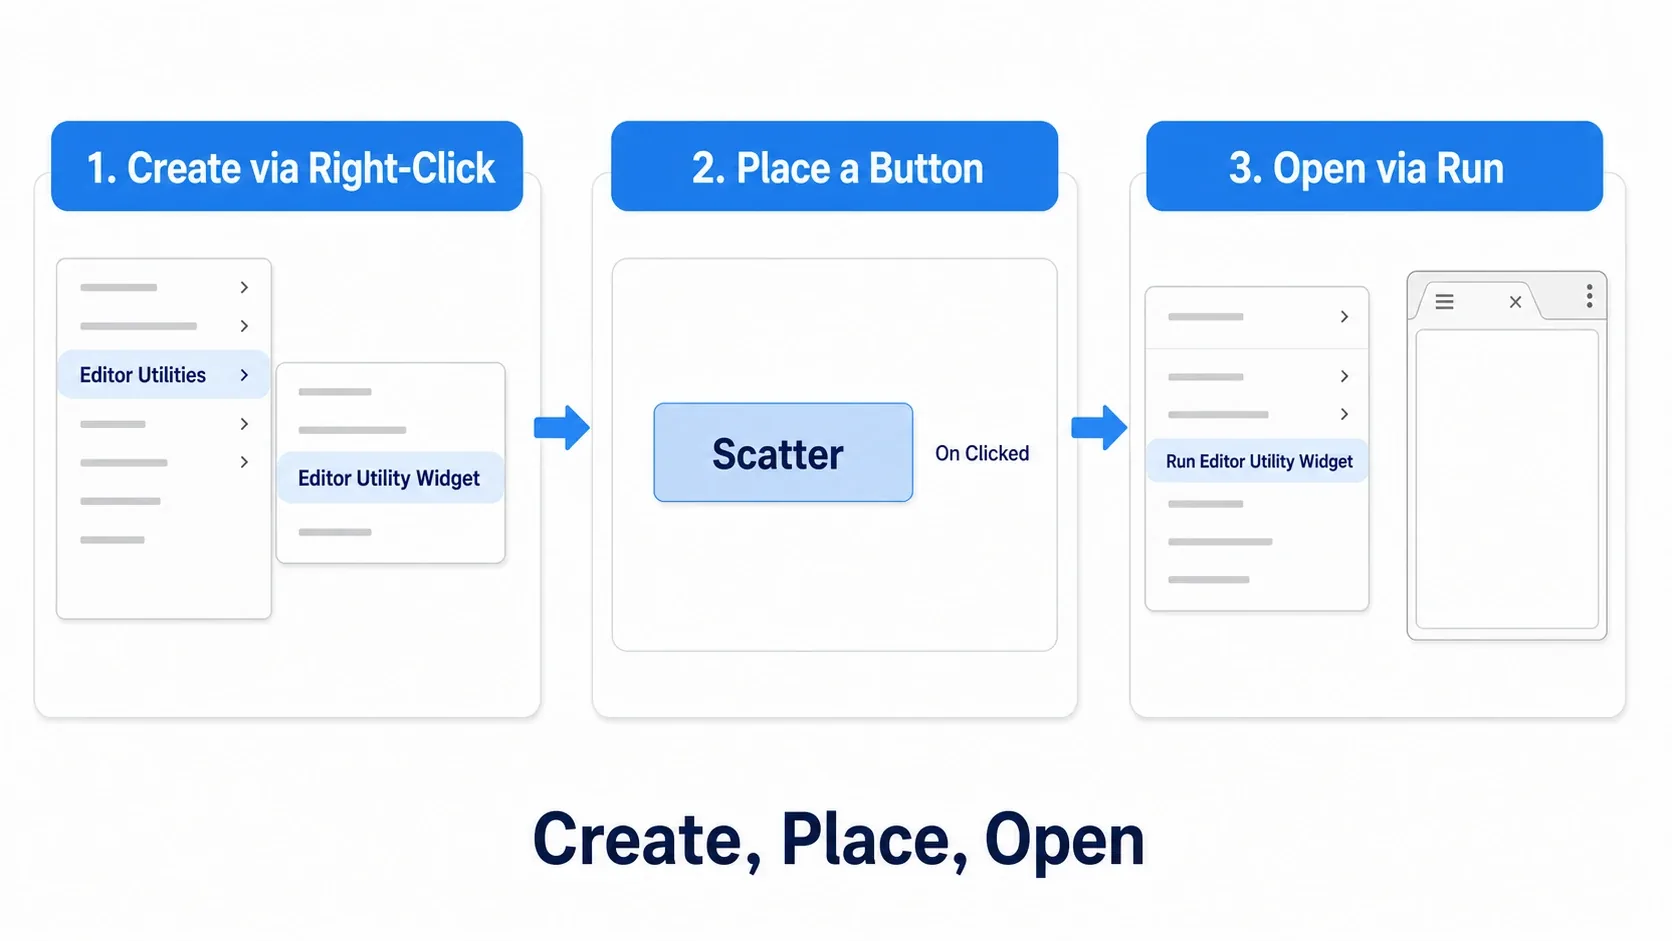
The tab you get can be dragged and docked like any other panel. Park it next to the details panel and you have a tool that's always one click away.
You write what happens on a button press by switching to Graph in the top right of the UI editor. With the button selected, click the "+" next to On Clicked in the details panel to create the event node that fires when it's pressed. Build your logic out from there.
Common Nodes
The nodes you'll reach for constantly fall into two groups: getters and setters.
| Node | What it does | Where it lives |
|---|---|---|
| Get Selected Assets | Returns the assets currently selected in the Content Browser as an array | Editor Utility Library |
| Get Selected Level Actors | Returns the Actors currently selected in the level as an array | Editor Actor Subsystem |
| Set Editor Property | Rewrites a property on an asset or Actor by name | Kismet System Library (connect the target to the Object input) |
| Set Actor Transform | Sets an Actor's location, rotation, and scale together | Actor |
The easy mistake is that assets and Actors use different getter nodes. Use Get Selected Assets for files picked in the Content Browser (textures, the mesh asset itself), and Get Selected Level Actors for instances placed in the level (the trees you've already positioned). Mix them up and you'll get an empty array back despite having things selected.
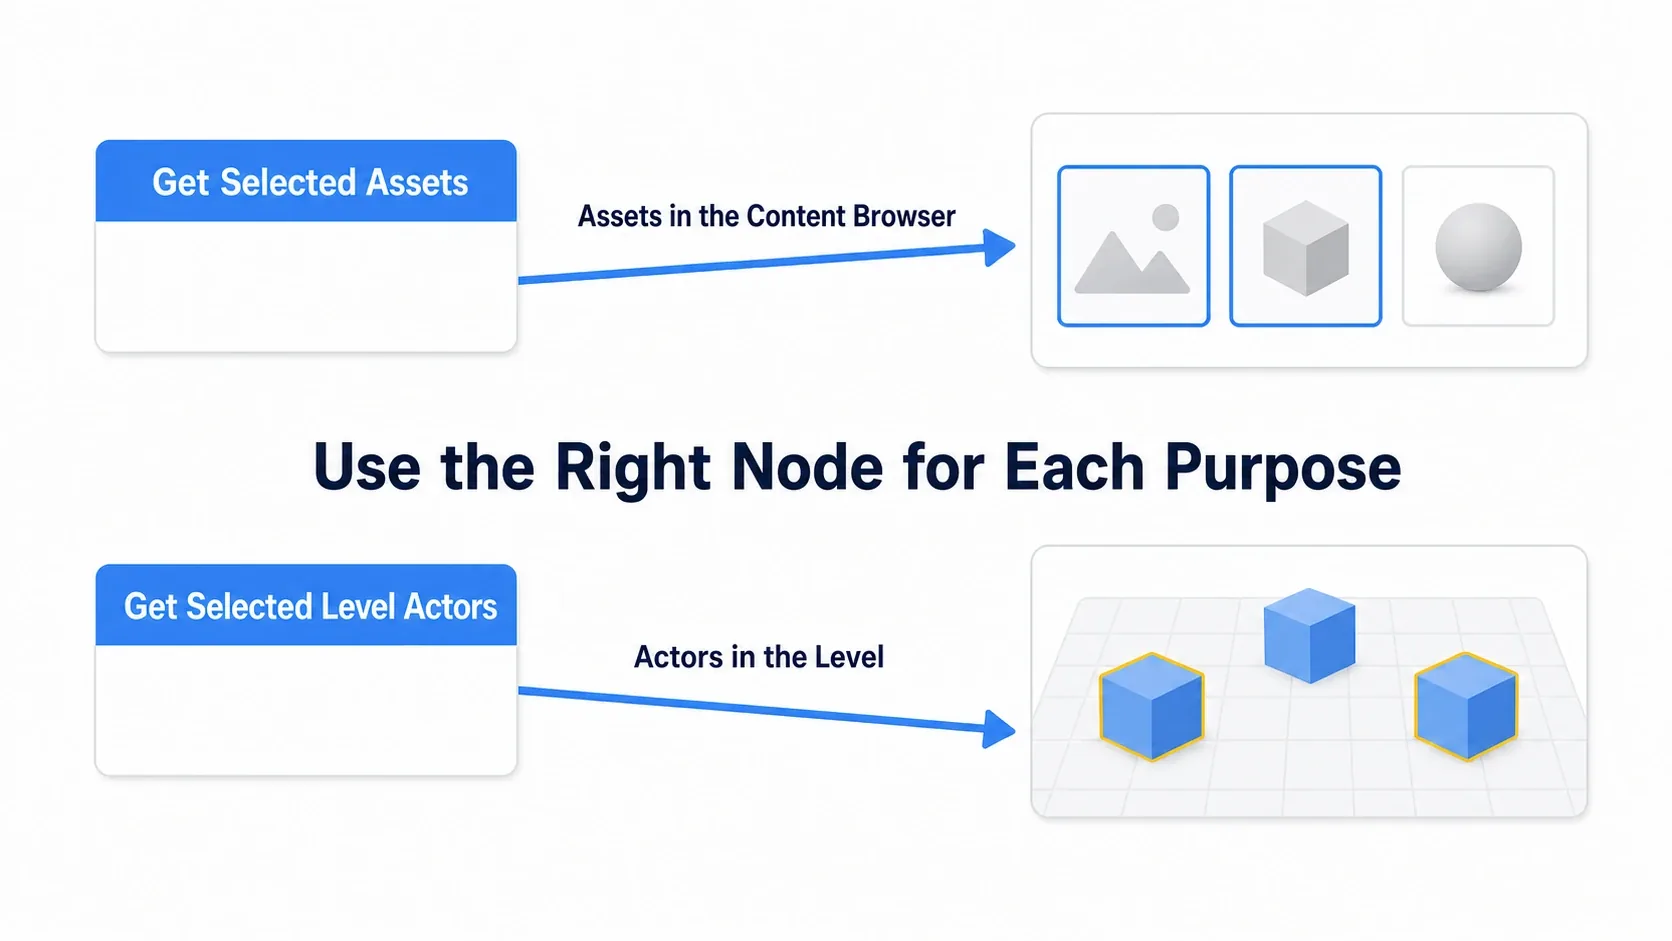
The basic shape is to run the returned array through a For Each Loop and call your setter nodes inside. Select 10 items and the loop runs 10 times, applying the same operation to all 10.
Hands-On: A Tool to Scatter Trees in Bulk
Let's build one concrete tool all the way through.
You're placing trees to make a forest. Lined up perfectly they look artificial, so you select them one at a time and hand-vary the rotation and scale. The background of a metroidvania, the forest in a top-down ARPG, the obstacles in a tower defense game: in any genre, you will eventually place a lot of the same mesh and need to add slight variation. We're going to replace that per-tree hand work with one button press.
Why not just use the Foliage tool? If you're painting a lot of vegetation, UE's built-in Foliage tool is faster and can randomize rotation and scale for you (see Landscape: building terrain and growing vegetation, or PCG at thousands-of-instances scale). A custom tool earns its keep when the things are already placed in the level as Actors, or when they aren't vegetation at all — rubble, props, spawn points. Painting? Foliage. Fixing what's already placed? Build a tool.
We'll build a tool that applies a random Yaw rotation (0 to 360 degrees) and a scale between 0.9 and 1.1 to every Actor selected in the level. Set Actor Scale 3D replaces world scale with an absolute value, so as long as your trees start at a scale of (1,1,1), the result is variation in the 0.9 to 1.1 range.
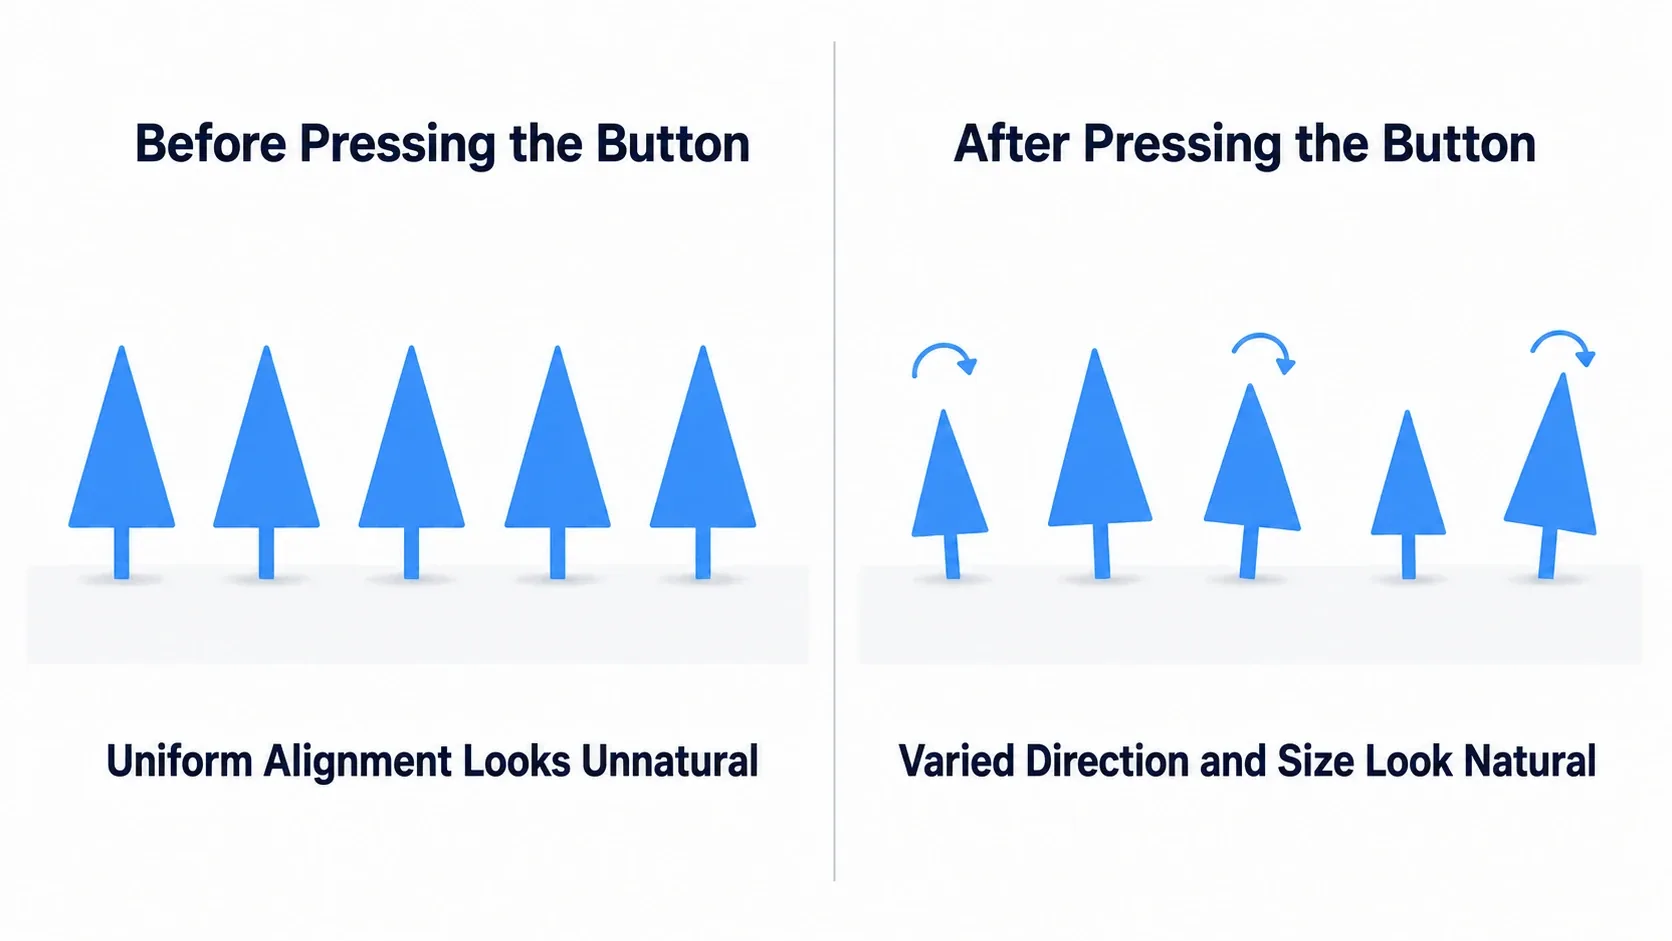
Here's what you'll see. Select a batch of identically oriented trees, press the button, and the facings scatter while the sizes go slightly uneven, moving the group toward a natural-looking forest.
Steps
Start with the UI. Open EUW_ScatterTool, place one Button, add a Text Block as its child, and set the text to "Scatter". Select the button and create the event with the "+" next to On Clicked.
Next, in the Graph, wire the nodes as shown below.
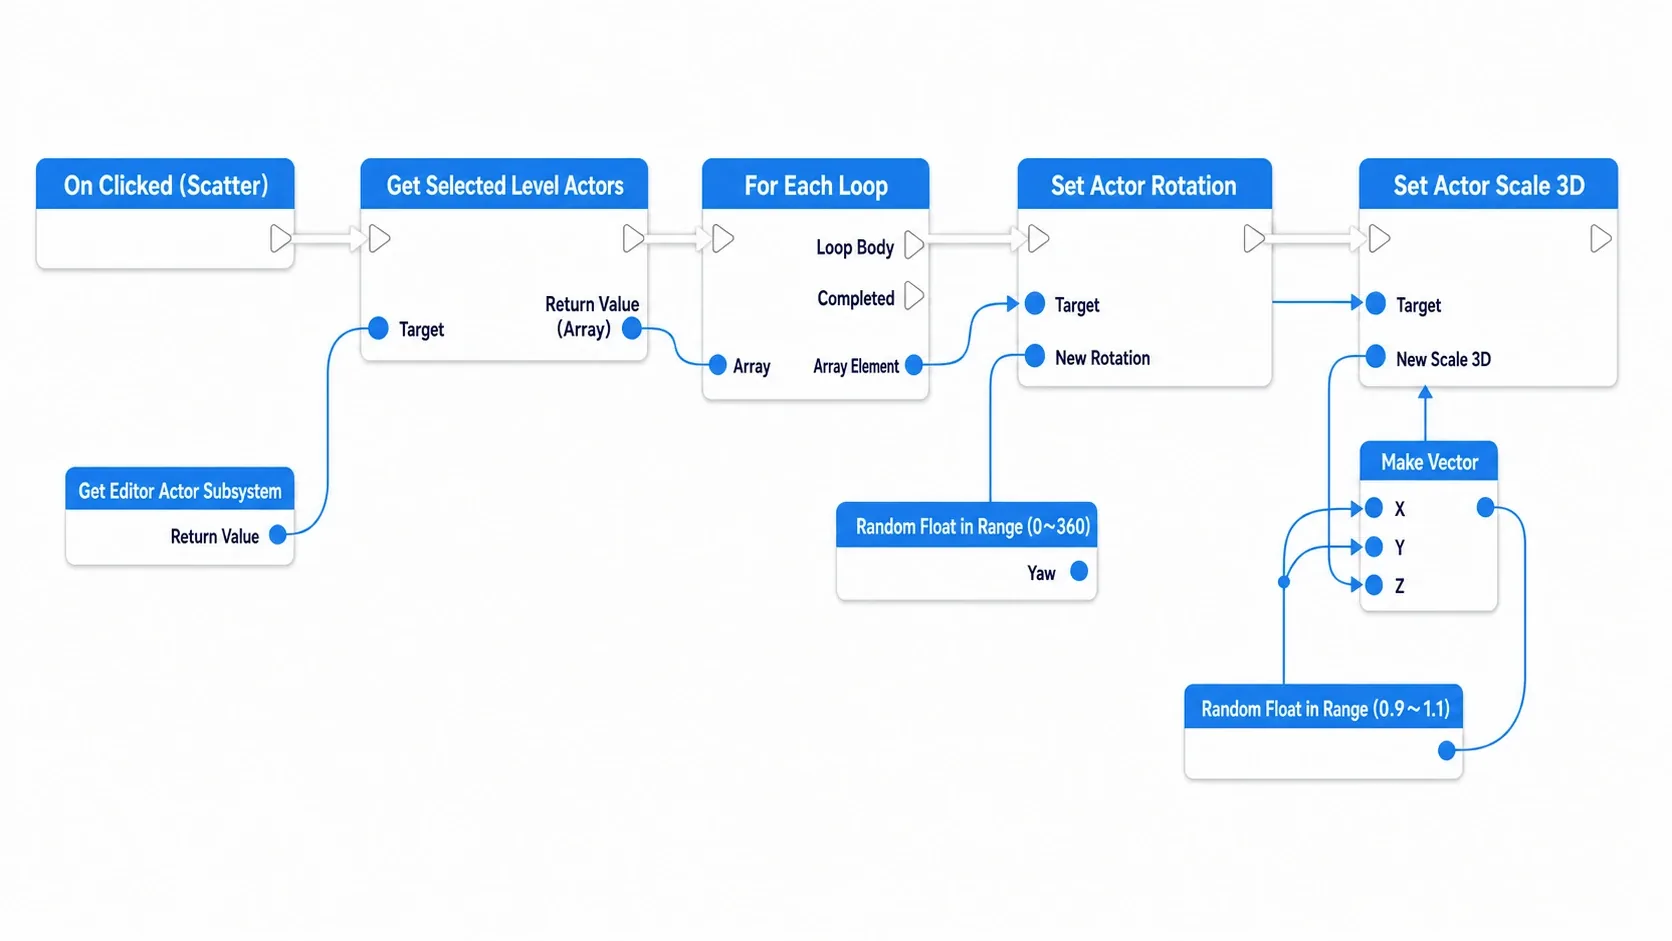
Described in words, the connections go like this.
- From the On Clicked execution pin, connect Get Editor Actor Subsystem → Get Selected Level Actors (feed the Return Value of Get Editor Actor Subsystem into the Target of Get Selected Level Actors)
- Connect the returned array to a For Each Loop
- From Loop Body, call Set Actor Rotation. Connect
Random Float in Range (Min 0, Max 360)to the Yaw of New Rotation (leave Pitch and Roll at 0) - Then call Set Actor Scale 3D. Create one
Random Float in Range (Min 0.9, Max 1.1)and feed that value into X, Y, and Z of a Make Vector so the scale stays uniform - Connect the For Each Loop's Array Element to the Target of both Set Actor Rotation and Set Actor Scale 3D. Wire the two nodes' white execution pins in series, left to right
- When you're done, hit Compile and Save before running it
Written out as pseudocode for reading, the graph looks like this.
On Clicked (the "Scatter" button)
  Actors = GetEditorActorSubsystem.GetSelectedLevelActors()
  For Each (actor in Actors):
      yaw   = RandomFloatInRange(0.0, 360.0)
      scale = RandomFloatInRange(0.9, 1.1)
      actor.SetActorRotation( MakeRotator(0, 0, yaw) )
      actor.SetActorScale3D( MakeVector(scale, scale, scale) )
Verify
Place 10 to 20 copies of the same Static Mesh in the level, all facing the same way, at scale (1,1,1) and rotation 0. Select only the tree Static Meshes (if you include lights or cameras in the selection, they get rotated and rescaled too) and press the tool's "Scatter" button.
If it worked, every tree changes facing the instant you press it, and the sizes spread out slightly within a 10% range. The neat row should break up and read like a natural grove. If nothing changes at all, the selection is probably empty, so check that Actors are actually selected in the level (look for the yellow outline) before pressing. If only some of them change, suspect that the For Each Loop's output is wired to Completed instead of Loop Body.
Two things to take away.
- Pick the getter node by what you're touching: you're manipulating trees placed in the level, so use Get Selected Level Actors for Actors, not Get Selected Assets for assets. Get this wrong and nothing happens
- Feed one random value into all three scale axes: separate random values on X, Y, and Z squash the trees tall or wide and look wrong. One value across all three axes changes only the size while keeping the shape
The same skeleton adapts easily: change the rotation to "random in 90-degree steps on Z" for tiling rubble, or widen the scale range for varied rocks. This pattern of looping over a selection as an array goes smoothly if you're comfortable with choosing between arrays, maps, and sets.
Bonus: Good to Know for Later
Don't mix editor-only nodes into gameplay Blueprints. Nodes like Get Selected Level Actors only mean anything inside the editor. They don't even appear in the search results of a normal character Blueprint, but stale references left by copies or old assets can cause errors during cook (packaging). Keep tool Blueprints and game Blueprints in separate folders.
Undo doesn't work automatically. Changes your tool makes don't land in the undo history on their own (making them properly undoable requires wiring up Begin Transaction / Transact Object / End Transaction). For risky operations, saving the level before you run the tool and closing without saving if you dislike the result is quick and reliable.
Start small. Aim for a feature-rich tool right away and you'll drown in tangled UI and nodes. Begin with one button and one operation, get it working, then add features. That way you never lose your place.
Summary
An Editor Utility Widget is an editor tool you can build entirely in Blueprint. Grab your selection as an array, then process it one item at a time with a For Each Loop. Once that shape clicks, bulk renaming and bulk placement come from the same skeleton. Before you repeat a manual task a hundred times, collapse it into a button.
What's the most repetitive manual task in your project right now? That's almost certainly the first tool you should build.