You found a good-looking run animation on Mixamo and imported it into UE. But when you try to pick it in your character's Anim Blueprint, it isn't in the list. Force it in as the same skeleton and your character folds up into a mangled pose.
The cause is a difference in skeletons, and the system that bridges it is retargeting. In UE5 you use two kinds of assets: IK Rig and IK Retargeter. This article covers why the animation can't be used as-is, then walks through the full process of moving a Mixamo animation onto the mannequin.
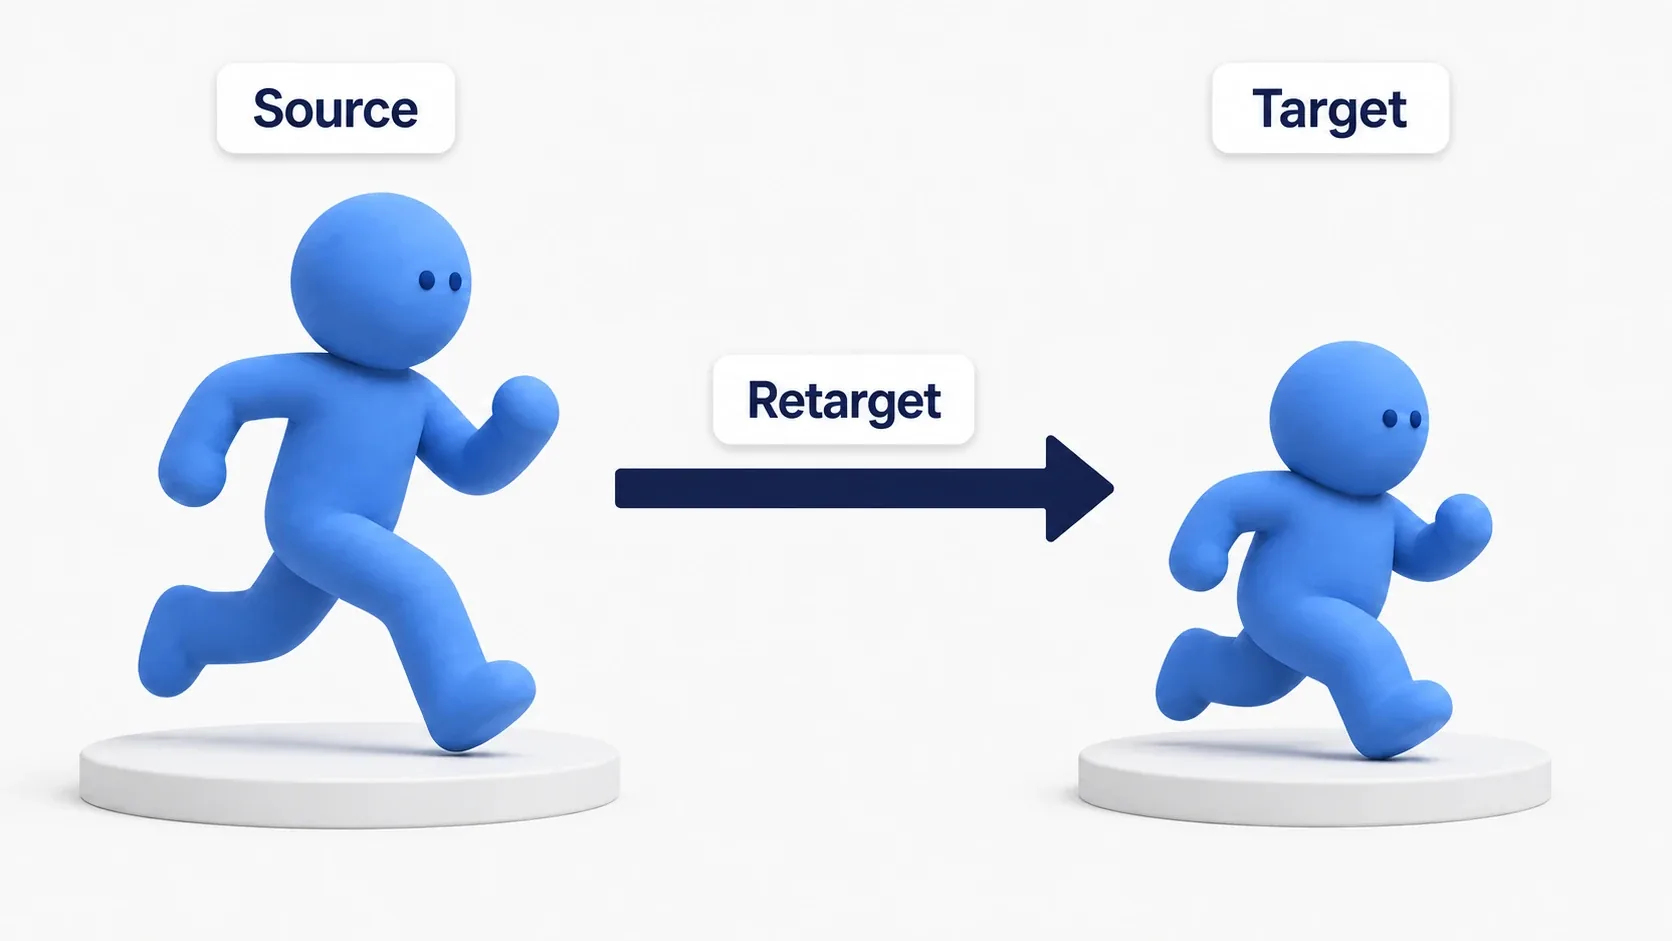
What You'll Learn
- Why animations can't be reused: they're tied to a skeleton
- IK Rig = an asset that maps "this is the arm" for one character
- IK Retargeter = an asset that maps two of those together and converts
- Where to fix arms clipping and feet sliding after retargeting
- Hands-on: the full process of moving a Mixamo animation onto the mannequin
Why It Doesn't Just Work
What's inside an animation asset isn't the character's appearance. It's a record of "which bone, on which frame, rotates how much." In other words, it's a list of bone names plus rotation and translation values.
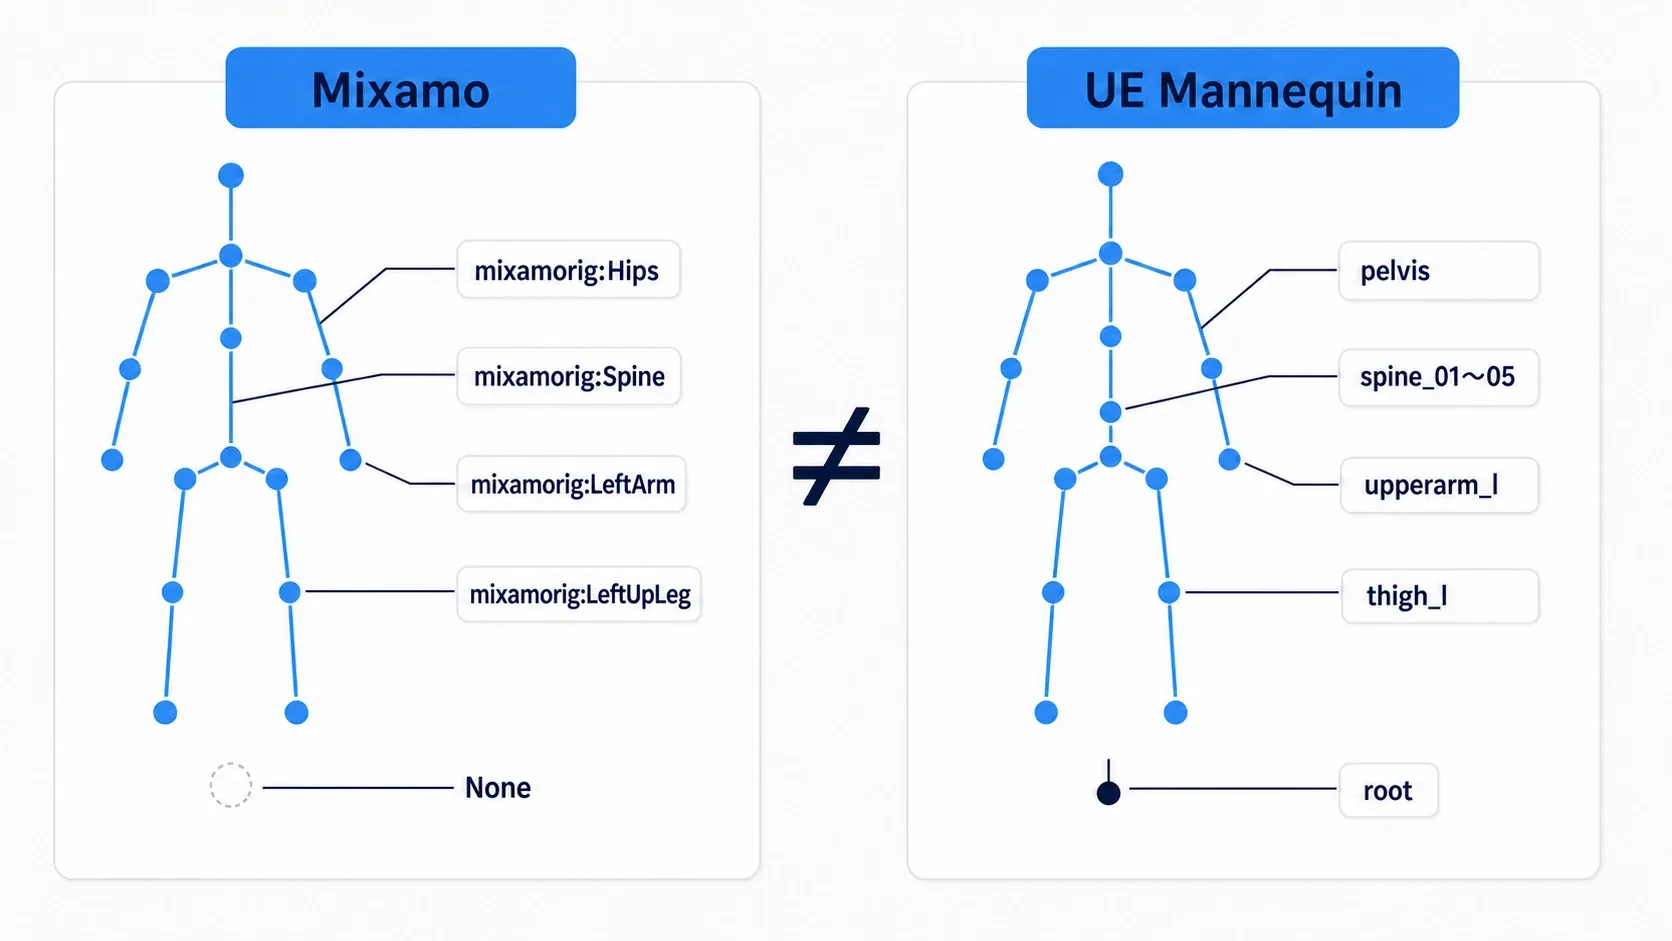
Put Mixamo and the UE mannequin side by side and the names look nothing alike.
| Body part | Mixamo | UE5 mannequin |
|---|---|---|
| Pelvis | mixamorig:Hips | pelvis |
| Spine | mixamorig:Spine / Spine1 / Spine2 | spine_01 to spine_05 |
| Left upper arm | mixamorig:LeftArm | upperarm_l |
| Left forearm | mixamorig:LeftForeArm | lowerarm_l |
| Left thigh | mixamorig:LeftUpLeg | thigh_l |
| Topmost bone | mixamorig:Hips (the hips are the top) | root (there's a root above the hips) |
And it isn't only the names. The number of spine bones differs, and the UE mannequin has a root bone that drives movement while Mixamo has none. That's why you can't paste an animation across mechanically.
UE strictly tracks which Skeleton asset an animation belongs to. That's exactly why it never shows up in the Anim Blueprint's list.
Retargeting is the work of absorbing this gap through "body part correspondence." Instead of mapping bone names one at a time by hand, you map groups like "arm," "leg," and "spine" (chains) — that's the UE5 approach.
IK Rig: Mapping One Character
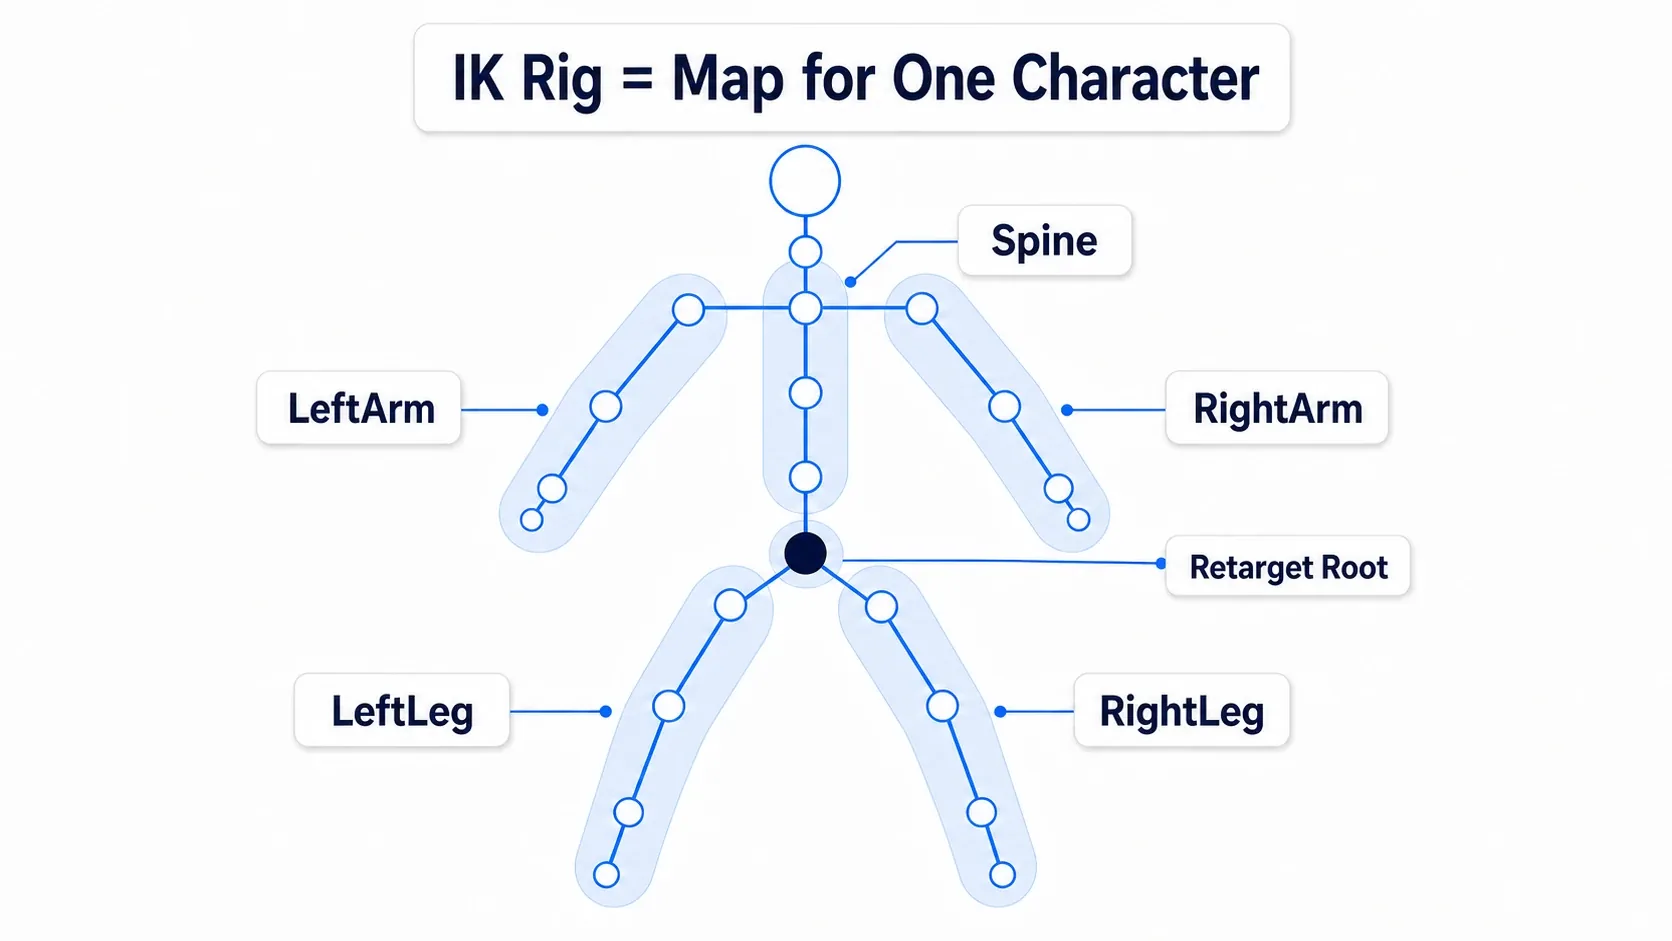
An IK Rig is an asset that declares "which bones make up the arm" for a single skeleton. You need one each for the source and the target.
To create one, right-click in the Content Browser → Animation → IK Rig. You can also right-click a Skeletal Mesh and choose Create → IK Rig, which opens it with the mesh already assigned.
Once the editor is open, there are two things to do.
1. Set the Retarget Root. In the hierarchy, right-click the pelvis bone (pelvis on the mannequin, mixamorig:Hips on Mixamo) and choose Set Retarget Root. This becomes the reference point for the character's overall movement.
2. Define Retarget Chains. Select a run of consecutive bones, then right-click → Add New Retarget Chain. Give each chain a name.
| Example chain name | Bones to include (mannequin) |
|---|---|
Spine | spine_01 to spine_05 |
Head | neck_01 to head |
LeftArm | upperarm_l → hand_l |
RightArm | upperarm_r → hand_r |
LeftLeg | thigh_l → ball_l |
RightLeg | thigh_r → ball_r |
The important part here is using identical chain names on the source and target. Later on, the IK Retargeter auto-maps based on those names, so if one side says LeftArm and the other says Arm_L, they won't connect automatically.
The UE5 mannequin ships with an IK Rig.
IK_Mannequinlives inCharacters/Mannequins/Rigs, so if your target is the mannequin you don't need to build one. You only build the source side (Mixamo).
IK Retargeter: Connecting Two Maps
An IK Retargeter places two IK Rigs side by side, maps them, and actually converts the animation. Create one with right-click → Animation → IK Retargeter, and pick the source IK Rig at creation time.
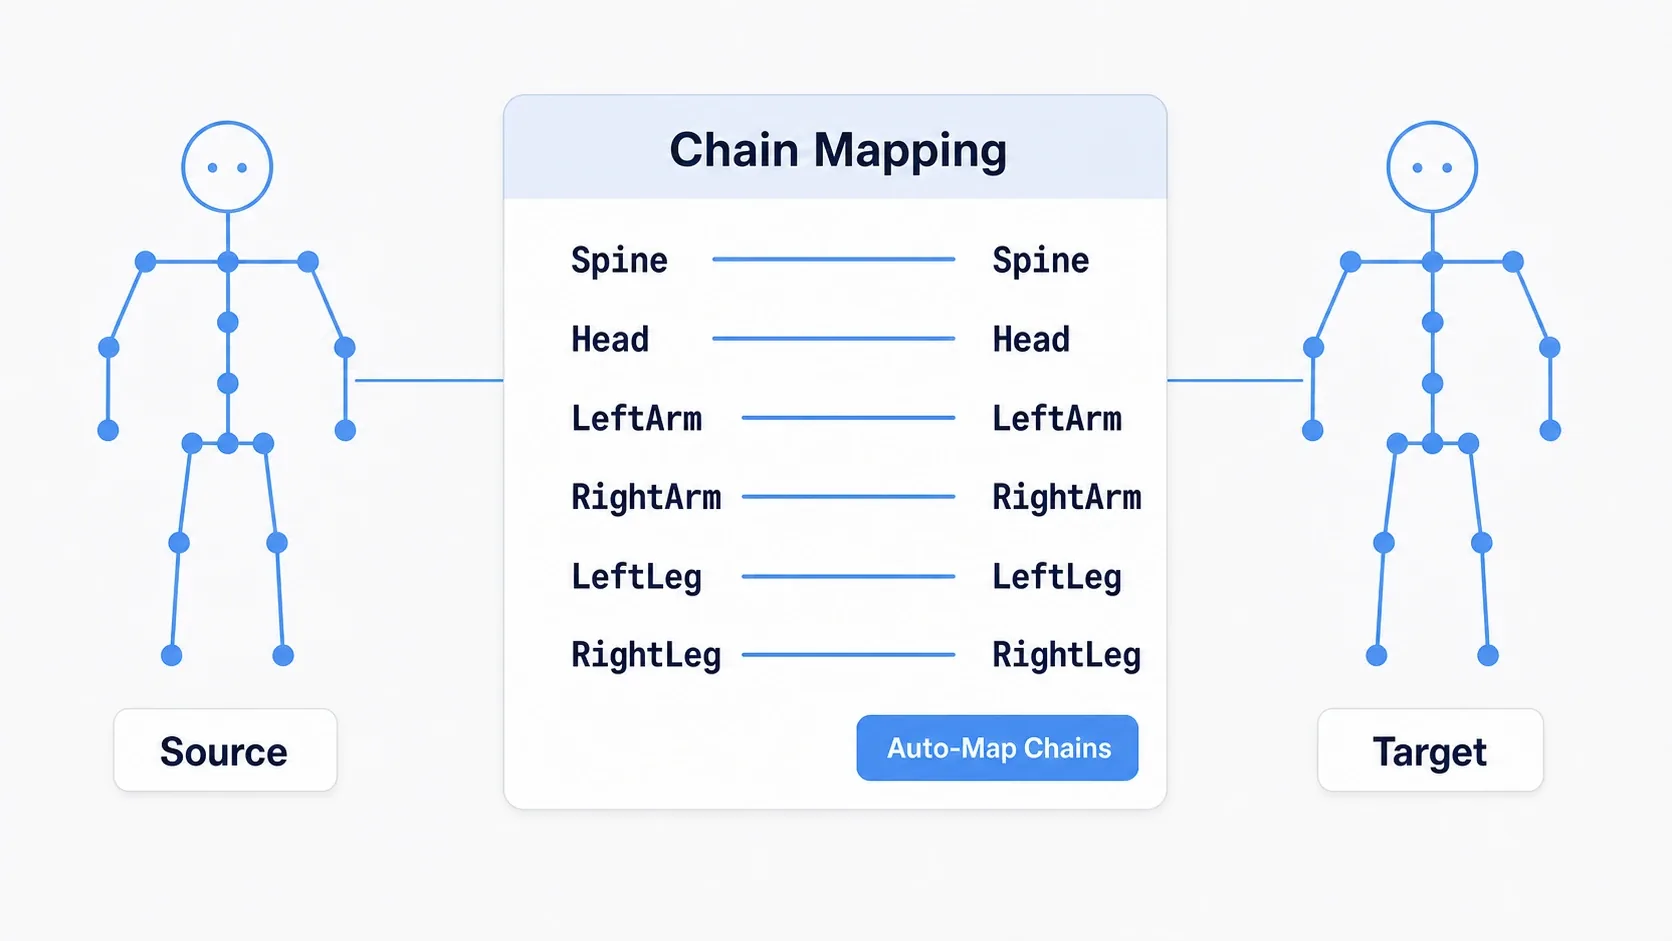
Once the editor is open, set Target IKRig Asset in the details panel to the target's IK Rig. When two characters appear side by side in the viewport, you're ready. The left one is the source, the right one is the target.
Next, look at the Chain Mapping panel. It lists the target's chains along with "which source chain feeds each one." Press Auto-Map Chains and it fills in automatically wherever the names match. Fill in any remaining rows manually from the dropdown.
Once the mapping is done, pick a source animation in the Asset Browser tab. If the character on the right side of the viewport moves, the conversion is working.
No assets have been created yet at this point. The IK Retargeter viewport is a preview. To actually create animation assets, you need
Export Selected Animations, covered below.
Matching the Retarget Pose
The thing that decides retargeting quality is the retarget pose. It's the reference for "what stance is the character in when nothing is playing," and if it's off, every converted result is off.
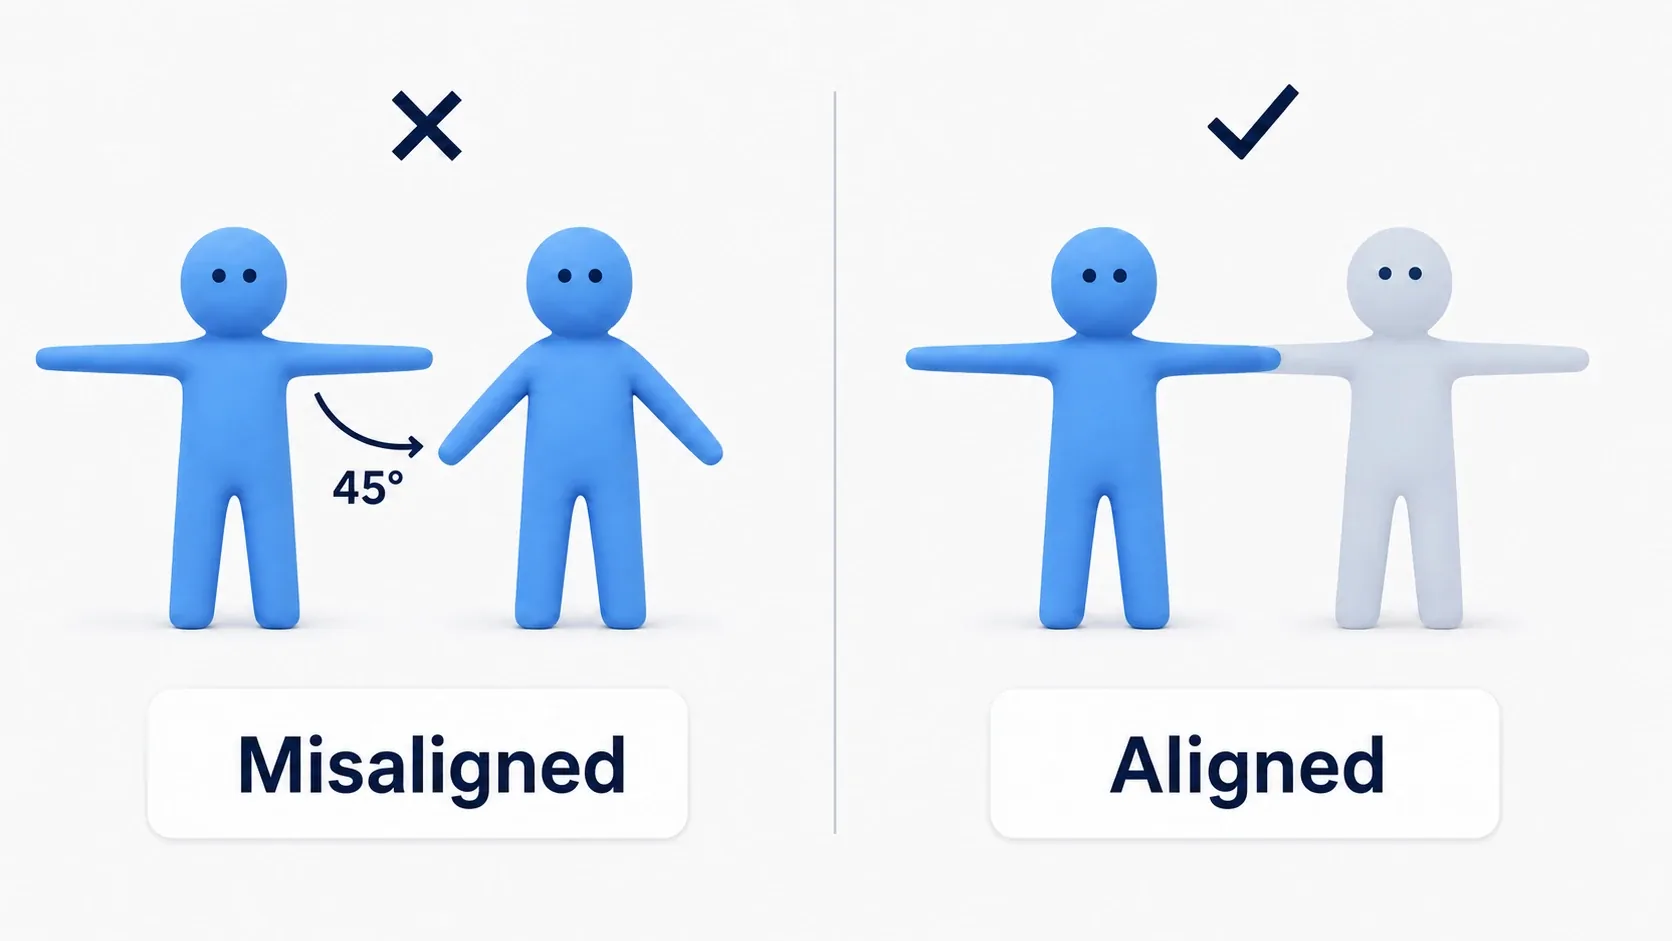
Mixamo characters are built in a T-pose (arms straight out to the sides), while the UE5 mannequin is built in an A-pose (arms angled down). Retarget in that state and the converted arms end up about 45 degrees too high, giving you an unnatural shrugged look.
Here's how to match them. Switch to Edit Pose mode in the IK Retargeter toolbar, select upperarm_l / upperarm_r on the target (or source) side, and match the angle with the rotation gizmo. The goal is to rotate until the two silhouettes overlap.
- You're only editing the reference pose, which has no effect on the animation itself
- The result is saved to the asset as a
Retarget Pose. You can also build several poses and switch between them from the dropdown - IK Rig and IK Retargeter in UE 5.4 and later include automatic setup that analyzes humanoid skeletons and estimates chains and the reference pose. When it lands well it saves manual work, but always confirm the result with your own eyes
Once the arms match, return to Running Retarget mode, play the animation, and check that the silhouette looks natural. This is the crux of retargeting work.
Hands-On: Moving a Mixamo Animation onto the Mannequin
A dodge roll in an action game, a wandering enemy in a horror game, a small idle gesture in a visual novel. "Put an off-the-shelf animation on your character instead of animating it yourself" is a situation every genre runs into. Here we'll build the full process of moving a Mixamo run animation onto the UE5 mannequin.
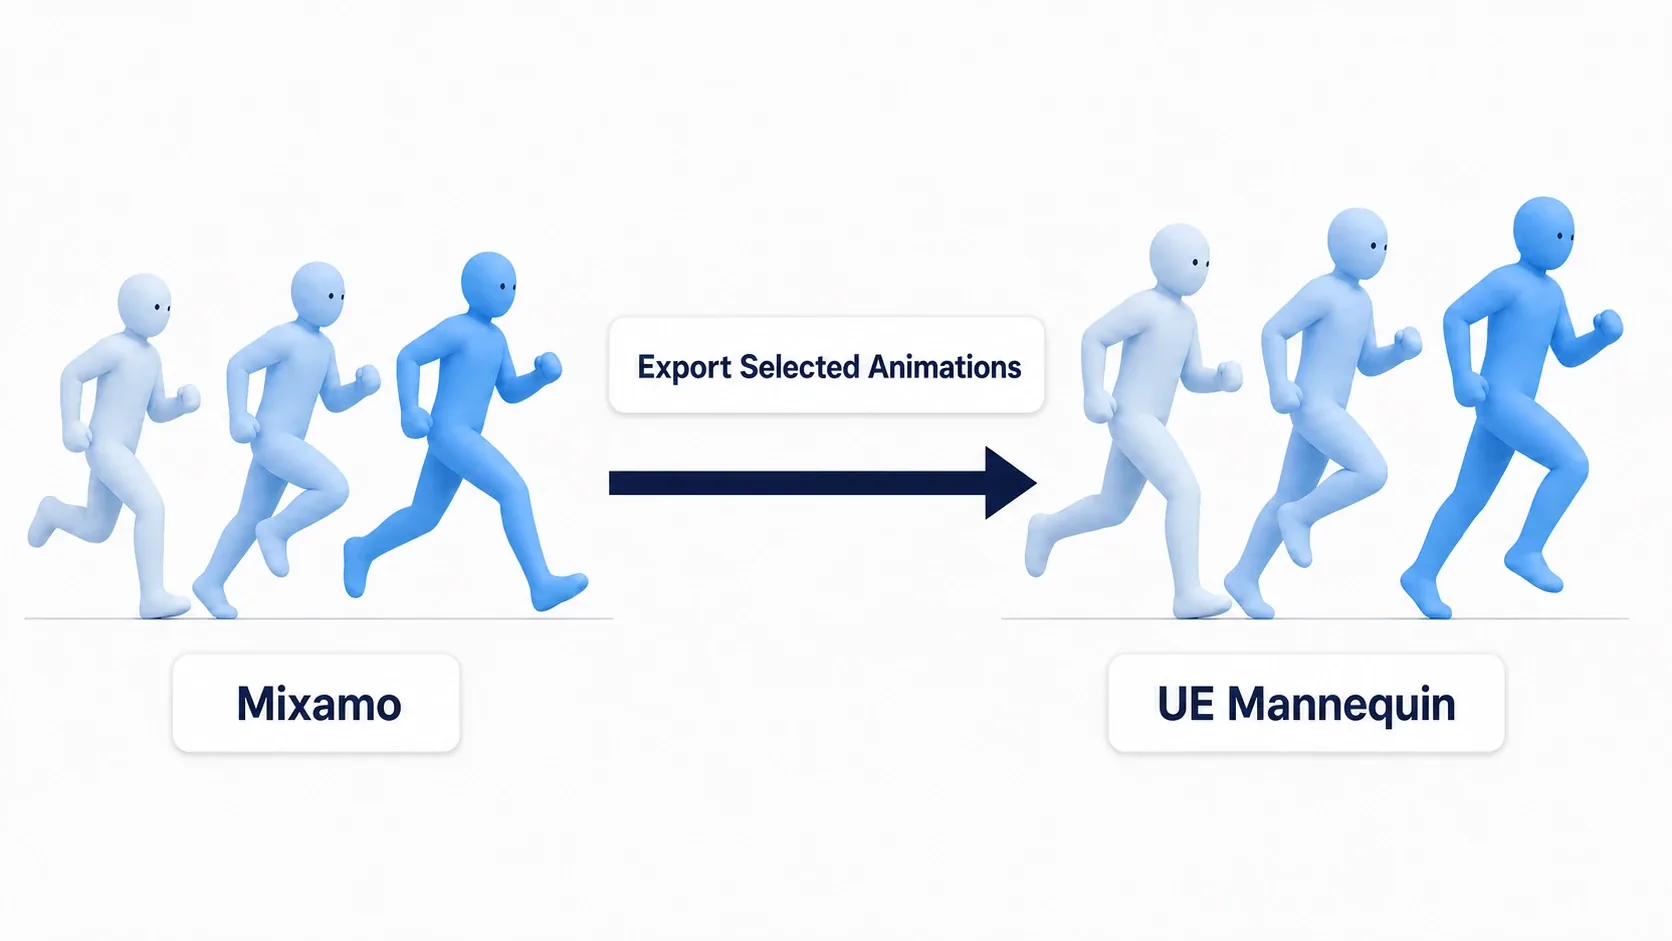
Setup to follow along: create a new UE5 project from the Third Person template. From Mixamo (an Adobe account is required), download one character and one animation.
| Type | Name | Settings |
|---|---|---|
| Mixamo download (character) | Ch_Source | Format: FBX Binary, Pose: T-pose |
| Mixamo download (animation) | Running | Format: FBX Binary, Without Skin checked, FPS: 30, Keyframe Reduction: none |
| IK Rig (source) | IK_Mixamo | Build it yourself |
| IK Rig (target) | IK_Mannequin | Included (Characters/Mannequins/Rigs) |
| IK Retargeter | RTG_Mixamo_To_Manny | Build it yourself |
| Output folder | /Content/Animations/Retargeted | Create it yourself |
The split is: the character needs a mesh, so download it "With Skin" (leave Without Skin unchecked), while the animation only needs bones, so use Without Skin.
Step 1: Import the Mixamo character. Drag Ch_Source.fbx into the Content Browser. In the import settings, leave Skeleton empty (creating a new skeleton) and keep Import Mesh and Import Animations on. This generates SK_Ch_Source and SK_Ch_Source_Skeleton.
Step 2: Import the animation. Drag in Running.fbx and, in the import settings, set Skeleton to the SK_Ch_Source_Skeleton created in Step 1. Turn Import Mesh off and Import Animations on. Pick the wrong skeleton here and nothing downstream will line up.
Step 3: Create the source IK Rig. Right-click SK_Ch_Source → Create → IK Rig. Name it IK_Mixamo and open it.
- In the hierarchy, right-click
mixamorig:Hips→Set Retarget Root - Select the bones listed below, then right-click →
Add New Retarget Chainto add each chain
| Chain name | Start bone | End bone |
|---|---|---|
Spine | mixamorig:Spine | mixamorig:Spine2 |
Head | mixamorig:Neck | mixamorig:Head |
LeftArm | mixamorig:LeftArm | mixamorig:LeftHand |
RightArm | mixamorig:RightArm | mixamorig:RightHand |
LeftLeg | mixamorig:LeftUpLeg | mixamorig:LeftToeBase |
RightLeg | mixamorig:RightUpLeg | mixamorig:RightToeBase |
Spell the chain names exactly as they appear in IK_Mannequin. Opening it and checking the actual names before you start is the safe route.
Step 4: Create the IK Retargeter. Right-click → Animation → IK Retargeter. Choose IK_Mixamo as the source and name it RTG_Mixamo_To_Manny. Once open, set Target IKRig Asset in the details panel to IK_Mannequin. Two characters appear side by side.
Step 5: Map the chains. Click Auto-Map Chains in the Chain Mapping panel. If the names match, all six fill in. Pick any blanks manually.
Step 6: Match the retarget pose. Enter Edit Pose mode and rotate the target's upperarm_l / upperarm_r until the arms are straight out to the sides, matching the T-posed source (since the mannequin is in an A-pose, that's roughly 45 degrees up). When the two silhouettes overlap, return to Running Retarget mode.
Step 7: Export. Select Running in the Asset Browser tab and click Export Selected Animations. Set the destination to /Content/Animations/Retargeted and run it.
How to check. Double-click the generated animation to open it. If the mannequin runs with the same arm swing as the Mixamo character, it worked. If the arms are lifted above the shoulders, your pose matching in Step 6 didn't go far enough.
The generated animation belongs to the mannequin's Skeleton, so it shows up normally in the Anim Blueprint's list. For how to wire it into a Blend Space, see Animation Blueprint Basics.
There are two key points.
- Match the chain names first:
Auto-Map Chainsonly looks at name matches. Open the targetIK_Mannequinand check the spelling before building the source side, and the mapping takes one click - A retargeter is reusable: build
RTG_Mixamo_To_Mannyonce and it works for every animation on the same skeleton. Multi-select in theAsset Browserand hitExport Selected Animationsto convert 100 clips in one go
What to Fix When It Goes Wrong
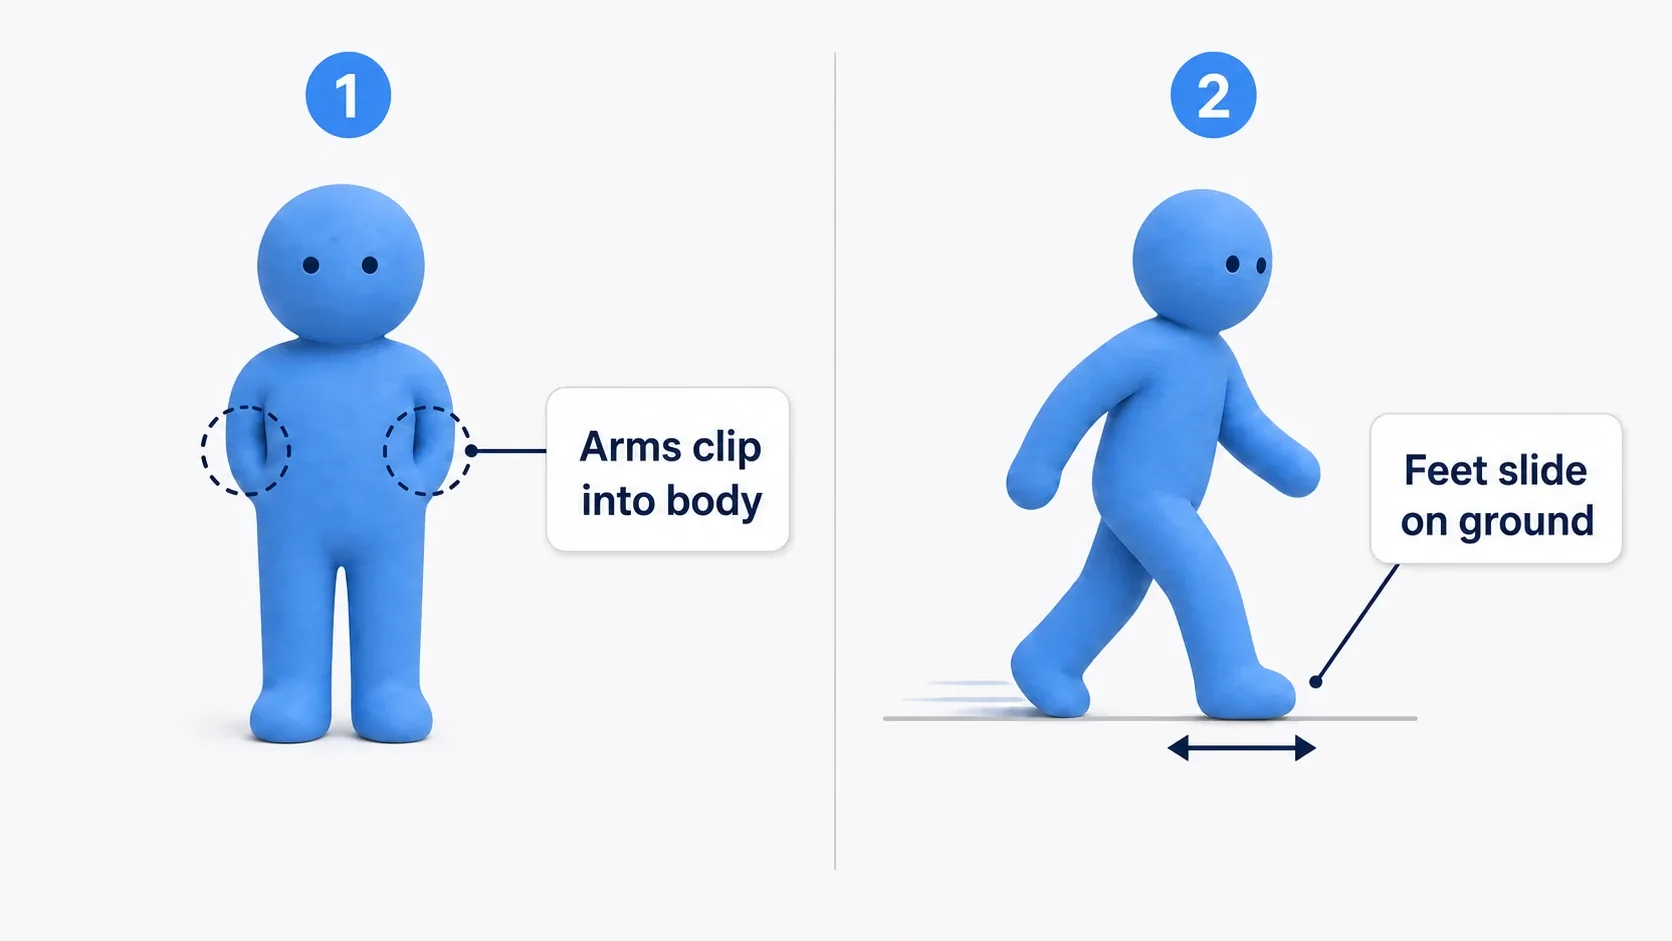
- Arms clip into the body / shoulders stay shrugged → the retarget poses don't match. Rotate
upperarm_l/upperarm_rinEdit Posemode until the two silhouettes overlap - Feet slide along the ground → caused by a difference in leg length. If the hips move at the source's stride length, a shorter-legged character's feet can't keep up. Enable
IKunderChain Settingsand useSpeed Plantingto pin the foot while it's grounded - Feet sink into or float above the ground → adjust
Scale VerticalunderRetarget Root Settings. For a smaller target, you're lowering the hip height - Runs in place without moving forward → Mixamo animations are in-place by default. Uncheck
In Placeon the Mixamo download screen, or skip Root Motion in UE and drive movement with Character Movement - Root Motion doesn't work → Mixamo skeletons have no
rootbone. Converting hip movement into root motion takes extra work, so while you're starting out it's more reliable to export in place and let Character Movement handle it - Fingers look wrong or jitter → finger chains are the part where bone counts most often disagree. Removing the finger mapping and leaving the target's fingers in their rest pose breaks less
Bonus: Good to Know for Later
Retargeting is baked at export time. The generated animation asset is an independent asset holding the converted result. Fixing the pose in the IK Retargeter afterward doesn't change assets you already exported. Once you change settings, you need to export again.
You can retarget an Anim Blueprint too. Right-click the Anim Blueprint asset → Retarget Anim Blueprints → Duplicate Anim Blueprints and Retarget creates a copy with the referenced animations swapped out. Use it when you want to swap characters without rebuilding your logic.
The big application of these steps is Epic's official Game Animation Sample. The free sample with over 500 movement motions can be moved onto your own character with the same IK Rig / Retargeter steps you learned here. When you want AAA-like smooth movement, head to Motion Matching Basics.
Decide where assets live before you start. Once you begin retargeting, IK Rigs, IK Retargeters, source animations, and converted animations pile up fast. Splitting them into something like Animations/Source and Animations/Retargeted saves you trouble later (see Asset Management Best Practices).
Retargeting to a quadruped creature is a different problem. The idea of chain-based mapping is the same, but going from humanoid to quadruped forces awkward pairings like "arms to front legs." In that case, don't lean on auto-mapping; go in expecting to design the chains by hand.
Summary
| Asset | What it does | How many to build |
|---|---|---|
| IK Rig | Defines chains on one skeleton | One each for source and target |
| IK Retargeter | Maps two IK Rigs and converts | One per pair |
The process has four stages: define chains → map them → match the reference pose → export. Quality comes down to the third one, the retarget pose. Get that right and the rest mostly runs itself.
The stage of actually wiring the resulting animation into a character is covered by Animation Blueprint Basics. This article is about getting animations; that one is about switching between the ones you have.
How many motions do you have ready for your character right now?