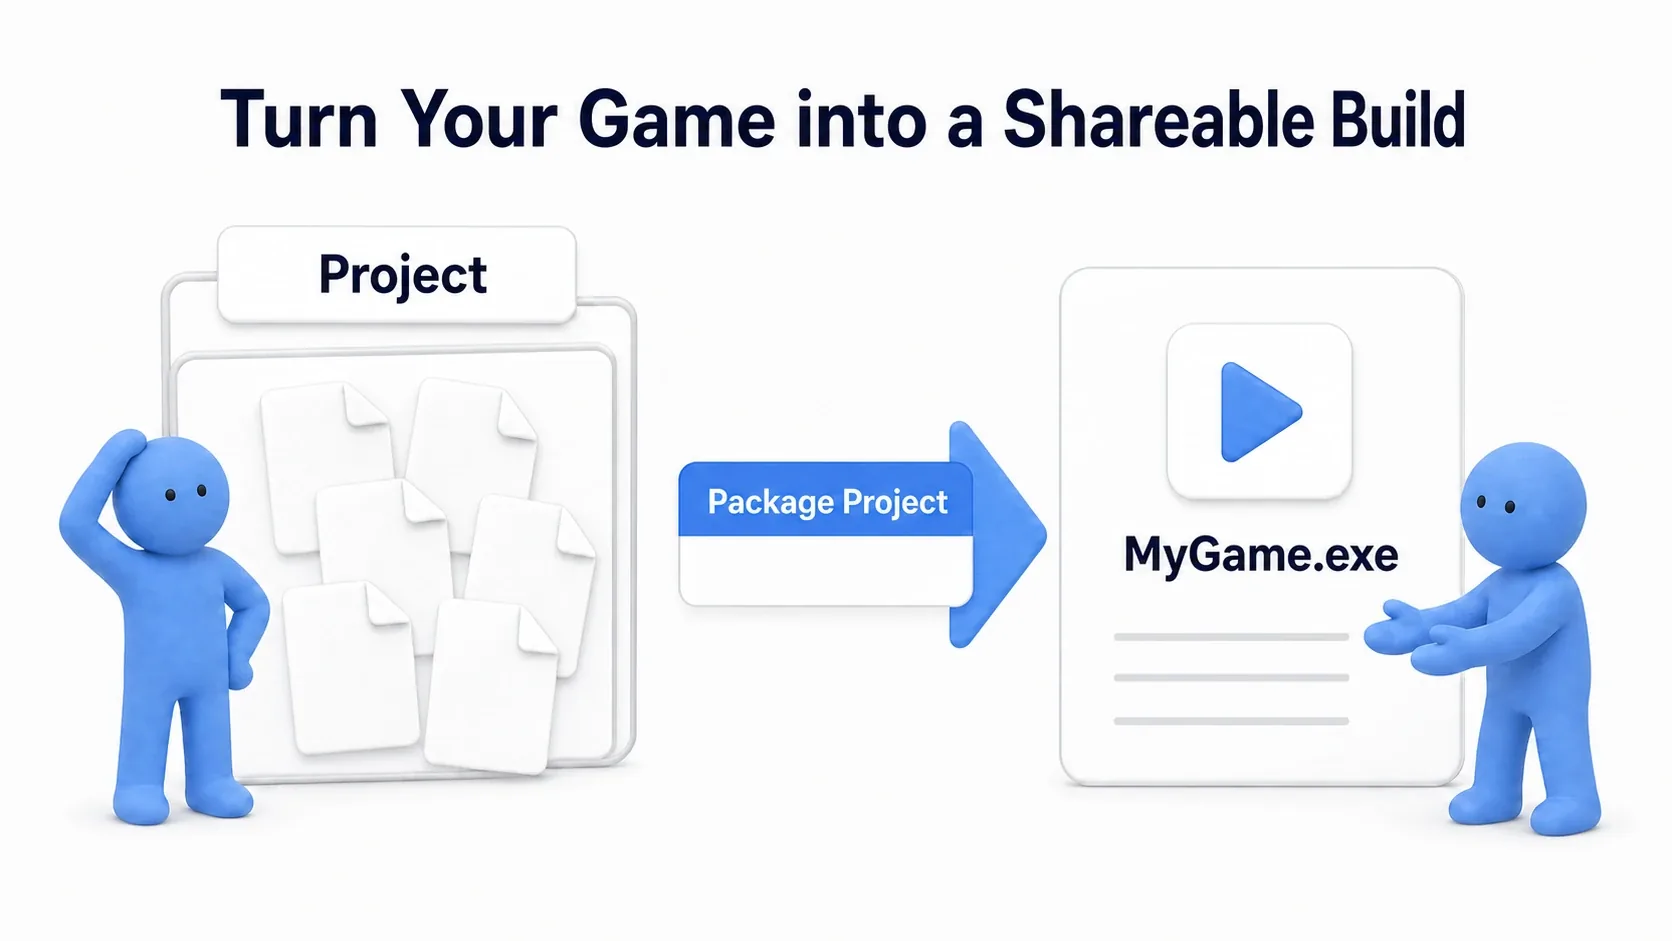
You've got a game that plays fine when you hit Play in the editor. You want to show a friend, so you zip up the project folder and send it over. They don't have Unreal Engine, so they can't open it.
Turning your project into something you can hand to another person is called packaging. UE5 has a dedicated menu for it, and one click produces an .exe. On the first attempt, though, you'll usually either get a black screen on launch or a build that stops partway through. This article walks through the packaging process and how to fix the three pitfalls almost every beginner hits.
What You'll Learn
- What packaging actually does (Cook and Package)
- Why the black screen on launch is a missing Game Default Map
- The difference between Development and Shipping, and which order to use them
- What's inside the output folder, and what you actually send to people
- The rule that unreferenced assets don't get included, and how to work around it
- Hands-on: taking a template all the way to a launchable .exe
What Packaging Actually Does
Between clicking the menu item and getting an .exe, UE does two broad jobs.
| Stage | Name | What it does |
|---|---|---|
| 1 | Cook | Converts .uasset files into a format the target platform can read directly |
| 2 | Package | Gathers the converted data and the executable into a single folder |
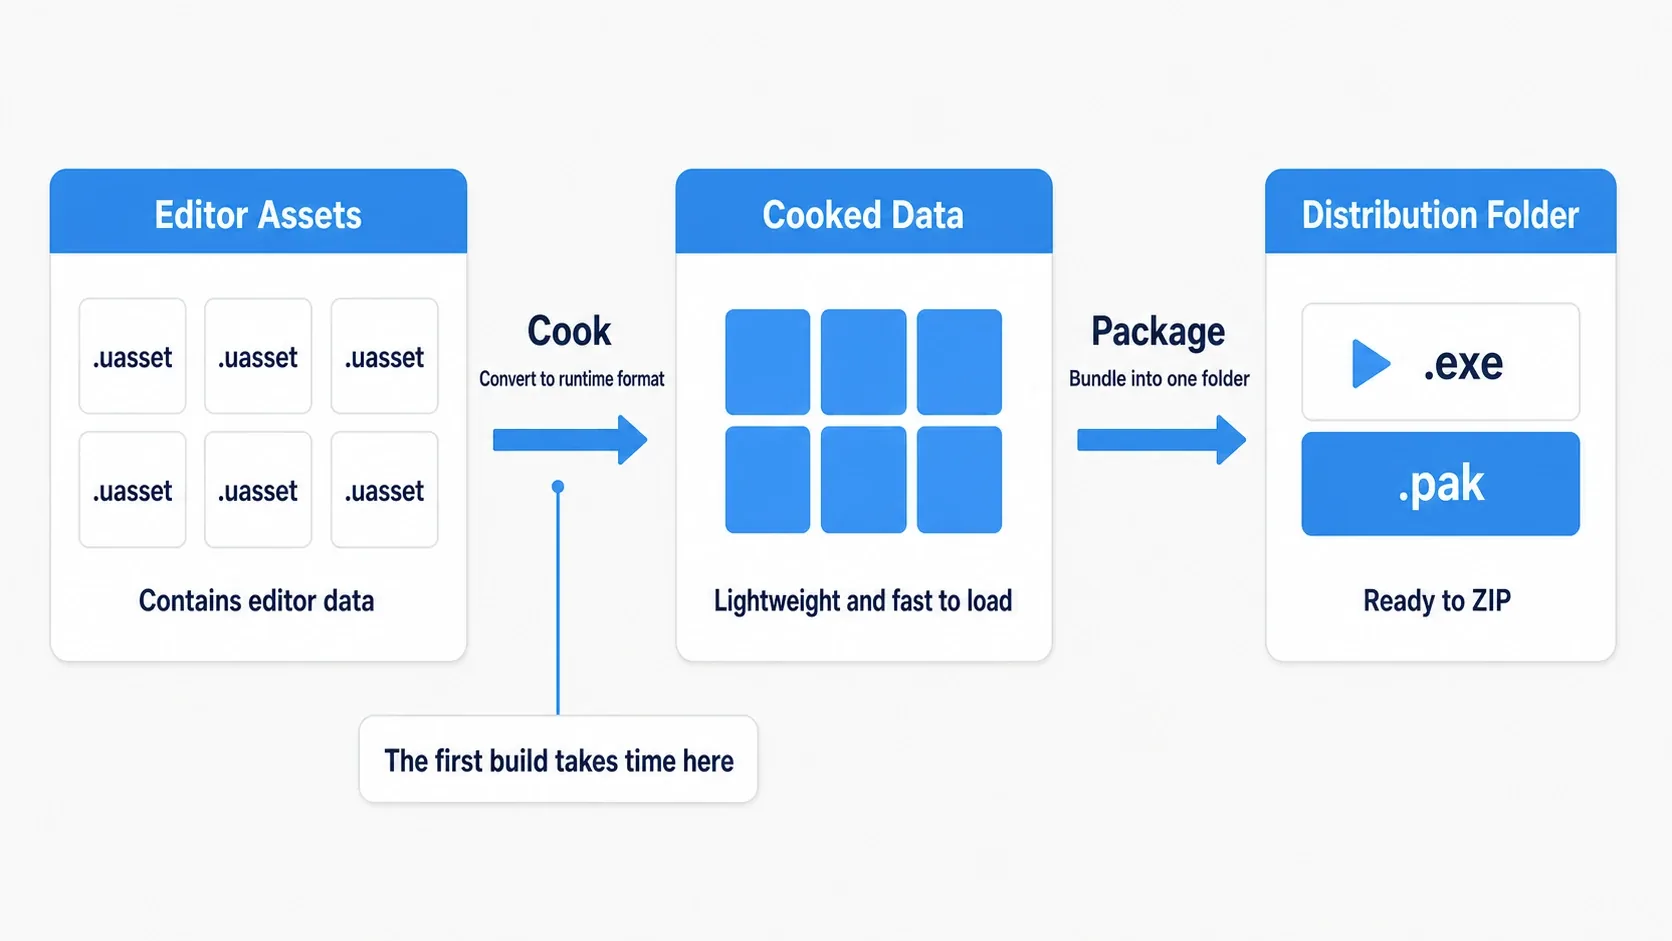
The .uasset files you work with in the editor carry a huge amount of editing-related information. That's too heavy at runtime, so cooking re-bakes them into the form the game needs. The reason your first package takes tens of minutes is almost entirely the cook. Later runs reuse the already-converted data and finish much faster.
The important detail here is that cooking only covers assets it can reach by following references from your startup level. An asset that merely sits in a folder is, as a rule, not included in the package. This rule leads directly to the pitfall described below.
Three Settings to Handle First
There are three settings you should always check before hitting the package button.
1. Game Default Map (the biggest pitfall)
Open Edit > Project Settings > Project > Maps & Modes.
| Setting | Meaning |
|---|---|
| Editor Startup Map | The level loaded when you open the editor |
| Game Default Map | The level your packaged game opens on startup |
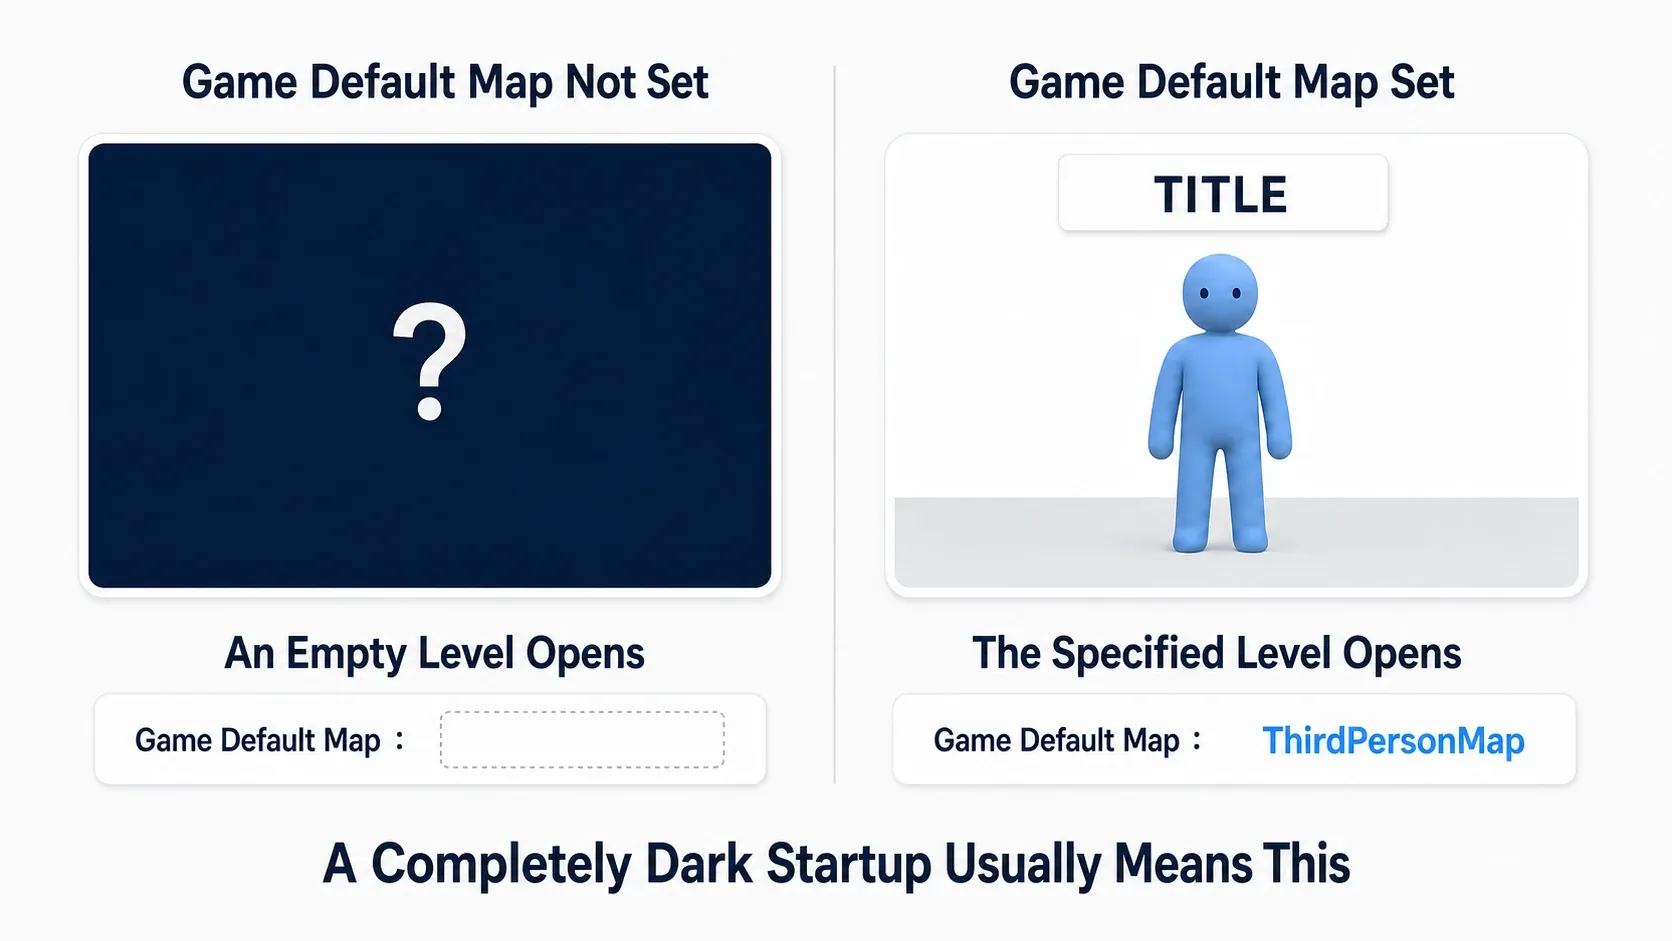
In the editor you're always opening levels yourself, so you never have a reason to touch this setting. Ship it as-is and your .exe opens the default empty level. With no floor, no lights, and no player, the screen goes black.
Point this at your title screen or first stage. A black screen after launching the exe is almost always this.
2. Build Tools (Visual Studio)
If your project contains C++ code or uses a plugin that contains C++, packaging requires a compiler. On Windows, install Visual Studio and select the following in the installer:
- The Game development with C++ workload
- The Windows 10/11 SDK
Without these, packaging halts partway through with Missing required SDK or a compilation error. Blueprint-only projects can sometimes skip it, but adding a single plugin can make it necessary, so installing it up front usually saves time overall.
3. Take a Look at the Packaging Settings
Project Settings > Project > Packaging holds the options that determine what gets output. Here are the ones worth knowing first.
| Setting | Default | Meaning |
|---|---|---|
| Use Pak File | On | Bundles assets into a single .pak. Turn it off and you get a mountain of individual files |
| Full Rebuild | Off | When on, rebuilds everything each time. Slower, but clears out stale leftovers |
| Cook everything in the project content directory | Off | When on, includes even unreferenced assets |
| Additional Asset Directories to Cook | Empty | Specify folders you want to force-include |
The third option is the direct fix for the "unreachable assets don't get included" problem mentioned earlier. But including everything inflates both size and build time, so it's healthier to add just the specific folders you know are affected to Additional Asset Directories to Cook.
Note: The assets most likely to disappear are ones referenced by name or by variable from Blueprints, for example via
Spawn Actor from Class. If something works in the editor but shows up as nothing in the packaged build, suspect this first. For how to inspect asset references, see the asset management article.
Development vs. Shipping
The Build Configuration you pick when packaging decides what kind of executable the same game becomes. For solo development, only two of them really matter.
| Configuration | Speed / size | Logs | Console (~ key) | Use case |
|---|---|---|---|---|
| Development | Slower, larger | Yes | Yes | Testing, test builds |
| Shipping | Fastest, smallest | No | No | Release, final distribution |
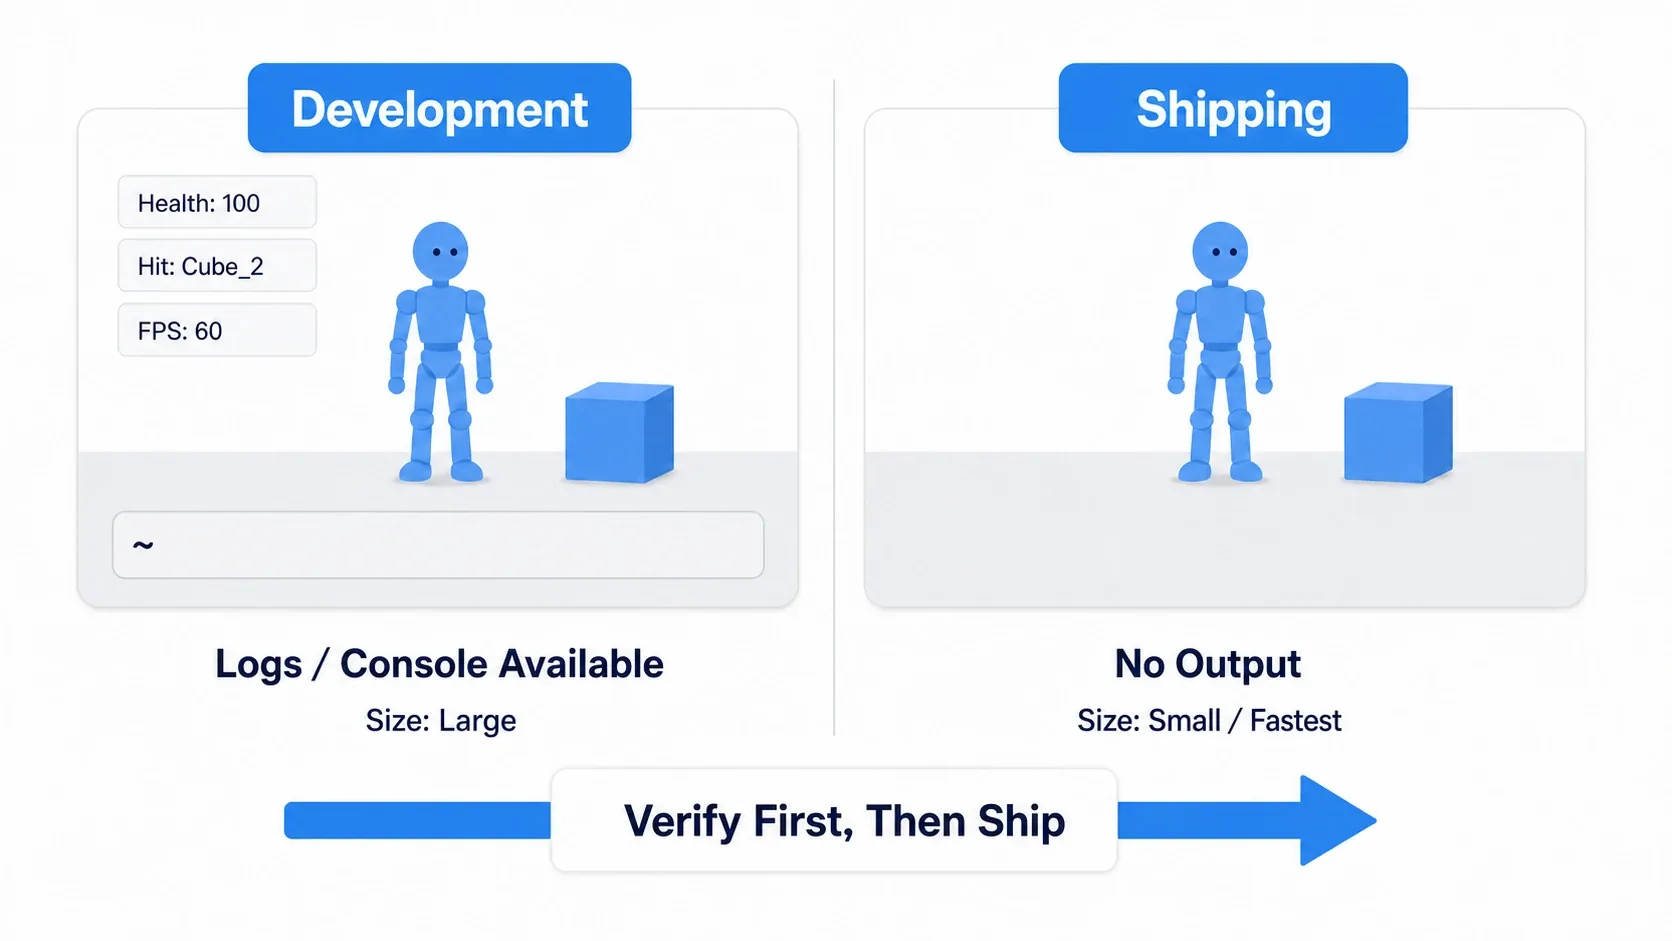
Shipping strips debug machinery out at compile time. Print String output disappears, and so do the lines drawn by Draw Debug Type on a Line Trace. In exchange for being faster and smaller, it leaves you with no clues when something goes wrong.
That fixes the order of operations. Package with Development first and confirm the game launches, then rebuild with Shipping once the problems are gone. Go straight to Shipping and you'll be staring at a black screen with nothing to go on.
You choose this in the same place as the packaging menu: Platforms > Windows > Build Configuration. Whatever you select there applies to the next Package Project run.
What's Inside the Output Folder
When packaging finishes, a Windows folder appears in the output location you picked. Here's what's in it.
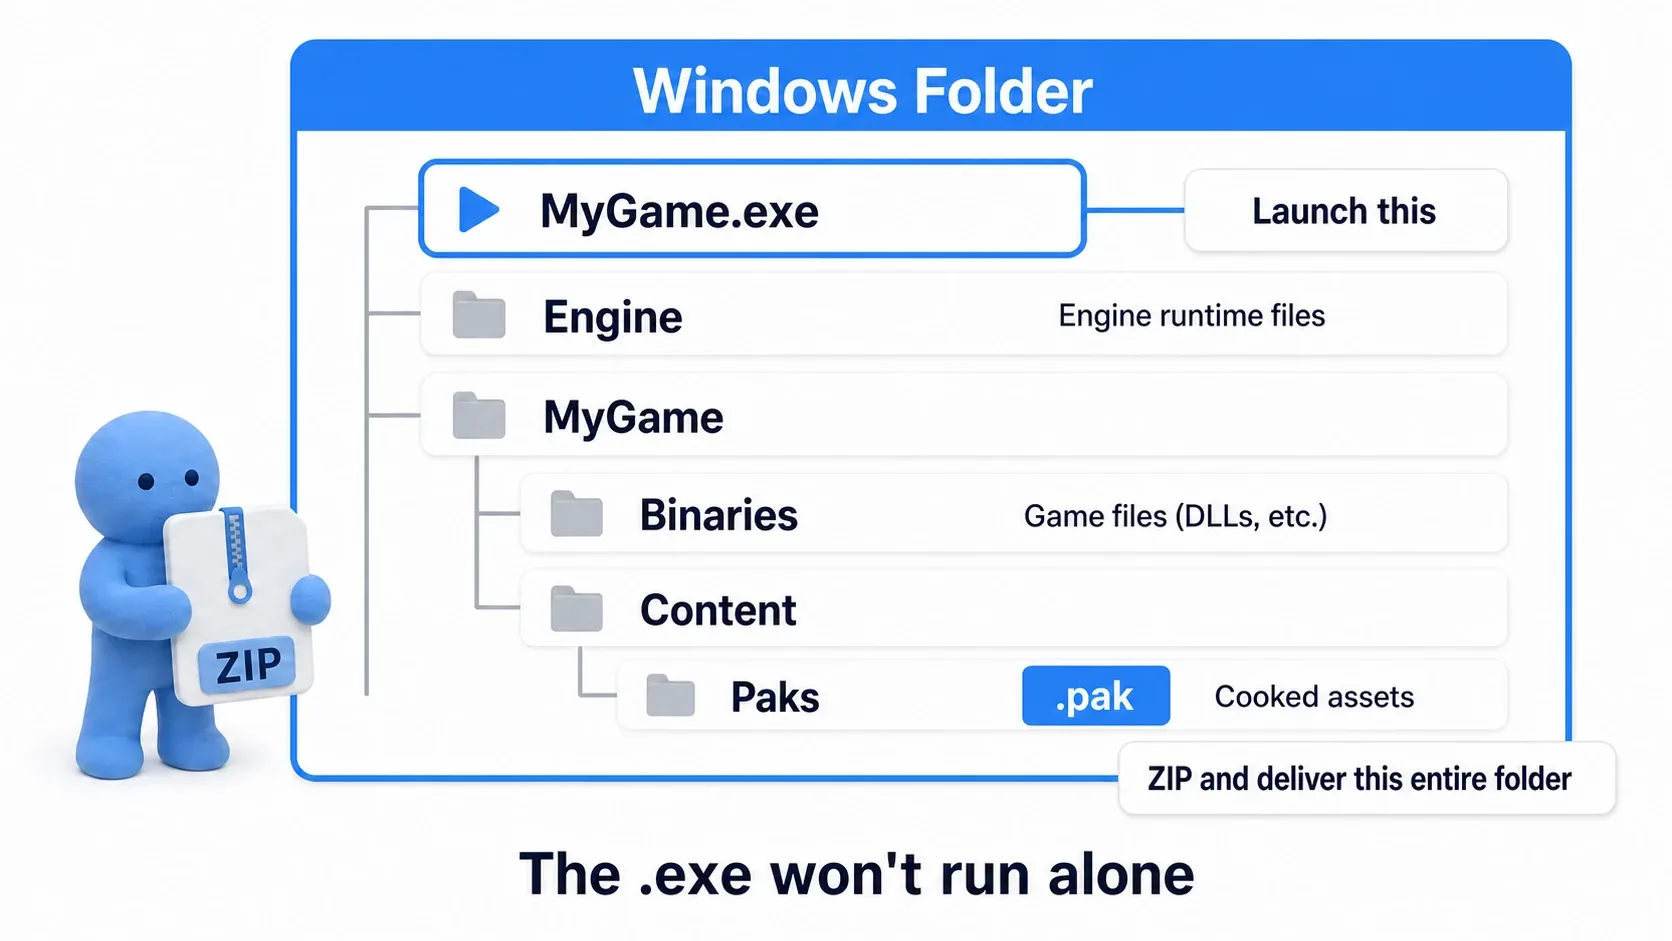
Windows/
├─ MyGame.exe          ← this is what you launch
├─ Engine/             ← engine-side runtime files
└─ MyGame/
   ├─ Binaries/        ← the actual game binaries (DLLs, etc.)
   └─ Content/
      └─ Paks/         ← the .pak containing the cooked assets
MyGame.exe is essentially a launcher. Pull it out on its own and it won't run. It only starts when the Engine folder and the MyGame folder sit alongside it.
So when you share your game, zip the entire Windows folder. The other person extracts it and double-clicks the .exe inside. "I sent them the exe and they said it wouldn't start" happens to everyone once before they learn this structure.
Hands-On: Turning a Template into a Shareable .exe
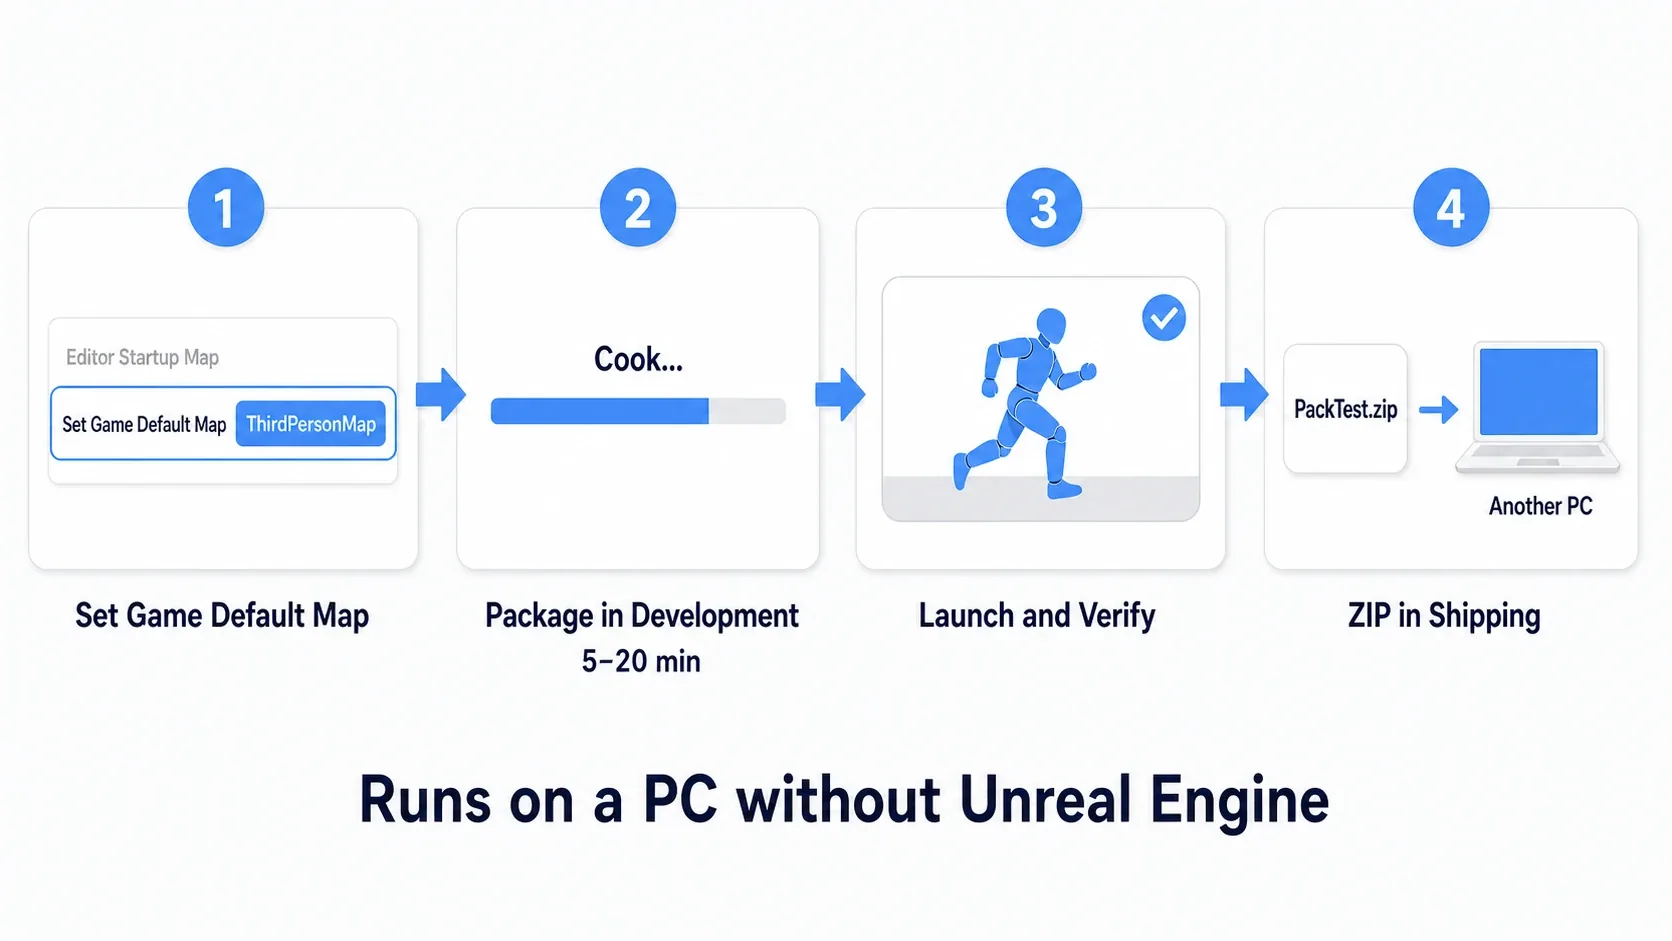
Action game, puzzle game, horror game: every one of them goes through this right before release. Using the Third Person template, we'll go end to end from a project that runs in the editor to a ZIP that launches on someone else's PC.
The End Result
Extract the ZIP, double-click the .exe, and you can control the character even on a PC without Unreal Engine installed.
Setup
Create a new project with these settings.
| Setting | Value |
|---|---|
| Template | Third Person |
| Project Type | Blueprint |
| Target Platform | Desktop |
| Starter Content | Not included (to keep size down) |
| Project name | PackTest |
Save it to a path with no spaces or non-ASCII characters (for example D:\UE\PackTest). Non-ASCII characters in the path can cause the cook to fail partway through.
Step 1: Set the Game Default Map
Open Edit > Project Settings > Project > Maps & Modes and set these two.
| Setting | Value |
|---|---|
| Editor Startup Map | ThirdPersonMap |
| Game Default Map | ThirdPersonMap |
The Third Person template usually fills these in already, but confirm with your own eyes that they aren't blank. Skip this and you'll meet the black screen in step 3.
Step 2: Package with Development
- Click Platforms in the toolbar
- Choose Windows > Build Configuration > Development
- Open Platforms again and click Windows > Package Project
- Pick an output folder (for example
D:\UE\Build)
Progress appears in the bottom right of the editor. The first run takes roughly 5 to 20 minutes, depending on your PC and project size. When it finishes, a green notification appears in the corner.
If it fails, open Show Output Log from the notification for details. Scan from the top for lines containing error.
Step 3: Launch and Check
Open the Windows folder in your output location and double-click PackTest.exe.
Success looks like this: the Third Person level opens fullscreen, WASD moves the character, and Space jumps. Quit with Alt + F4.
- Black screen, nothing appears → Game Default Map isn't set (go back to step 1)
- A window flashes and closes instantly → Check the log in
%LOCALAPPDATA%\PackTest\Saved\Logs\ - Packaging never completes → Check the error lines in the Output Log. If it's SDK-related, revisit your Visual Studio setup
- Audio or a few objects are missing → Unreferenced assets got dropped (add them to
Additional Asset Directories to Cook)
It's worth deliberately clearing Game Default Map and packaging again here. Watching the same project become apparently unlaunchable from one setting makes the lesson stick.
Step 4: Rebuild with Shipping and Zip It
Once Development runs clean, switch to Platforms > Windows > Build Configuration > Shipping and run Package Project again. Use a different output folder.
Right-click the resulting Windows folder and compress it to a ZIP. That's your distributable. Compared to the Development build, it should be tens of megabytes smaller.
Two things to take away.
- Test with Development, distribute with Shipping: get everything working on the build that produces logs, then make the final version. Do it in reverse and you have no way to investigate the problems you run into
- Send the whole folder: the
.exedoesn't run on its own. Zip it with theEnginefolder still sitting beside it
The real prevention for missing assets is keeping your references tidy. That continues in the asset management article.
Bugs That Only Appear After Packaging
"It works in the editor but not in the exe" is common, because the editor and the packaged build are different environments.
| Symptom | Common cause |
|---|---|
| One specific asset doesn't show up | It wasn't reachable by reference, so it wasn't cooked |
| Crashes right after launch | Game Default Map is broken or points at a level that doesn't exist |
| Runs noticeably slow | Different settings than editor Play. Measure with the Stat commands first |
| Debug output missing | Normal behavior in Shipping. Check with Development |
| Text renders as garbage or not at all | The font asset doesn't contain those characters |
Your entry point for investigating is the log. A packaged build writes logs not to the project folder but here:
%LOCALAPPDATA%\<ProjectName>\Saved\Logs\<ProjectName>.log
Type %LOCALAPPDATA% into the Explorer address bar to get there. If you packaged with Development, Print String and UE_LOG output lands here too. Reading logs is covered in the Print String article.
Bonus: Good to Know for Later
- The game name and icon are set in different places: the window title comes from
Project Displayed Titleunder Project Settings > Project > Description, and the icon fromGame Iconunder Platforms > Windows, where you supply a.ico. Leave the project name as-is and your working title ships to the public - Output outside the project folder: outputting inside the project causes the next cook to try to include that output, inflating everything
- Later runs are fast: only the first run cooks everything. You don't need to brace yourself for 20 minutes every time
- Run your tests before shipping: if you have automated tests, running them once before packaging cuts down on "discovered it after release" (→ Automated Testing in UE)
- Re-package after an engine upgrade: right after moving versions, some problems only surface in a packaged build even though the editor is fine. The upgrade procedure itself is in Upgrading Your Project
- Full Rebuild is your escape hatch: when stale leftovers are causing failures, turning on
Full Rebuildsometimes gets you through. It does put the build time back to first-run levels - Distribution platforms add requirements: itch.io and BOOTH accept a plain ZIP, but Steam needs its own plugin and app ID configuration. Starting with ZIP distribution is the safe path. If you also want Steam's online features, the groundwork is covered in Online multiplayer and sessions
Summary
- Packaging is Cook (convert) + Package (bundle). The first run is long because of the cook
- A missing Game Default Map is the number one cause of "black screen on launch"
- If you use C++ or C++ plugins, you need Visual Studio's "Game development with C++" workload
- Test with Development, distribute with Shipping. Shipping has no logs and no console
- Share the whole
Windowsfolder as a ZIP. The.exewon't run alone - Assets that can't be reached by reference don't get packaged. When something vanishes, suspect
Additional Asset Directories to Cook
What does Game Default Map point to in the project you're working on right now? Open the editor and check. That's a good place to start.